Everything about iOS DFU and Recovery Modes
October 29th, 2018 by Oleg AfoninCategory: «General»
If you are involved with iOS forensics, you have probably used at least one of these modes. Both DFU and Recovery modes are intended for recovering iPhone and iPad devices from issues if the device becomes unusable, does not boot or has a problem installing an update.
iOS Recovery Mode
In iOS, Recovery mode is a failsafe method allowing users to recover their devices if they become unresponsive. The Recovery mode, also known as “second-stage loader”, boots the device in iBoot (bootloader) mode. iBoot can be used to flash the device with a new OS. iBoot responds to a limited number of commands, and can return some limited information about the device. As iBoot does not load iOS, it also does not carry many iOS restrictions. In particular, iBoot/Recovery mode allows connecting the device to the computer even if USB Restricted Mode was engaged on the device.
Apple recommends using Recovery mode if one of the following situations occurs:
- iTunes doesn’t recognize your device or says it’s in recovery mode.
- If your screen is stuck on the Apple logo for several minutes with no progress bar.
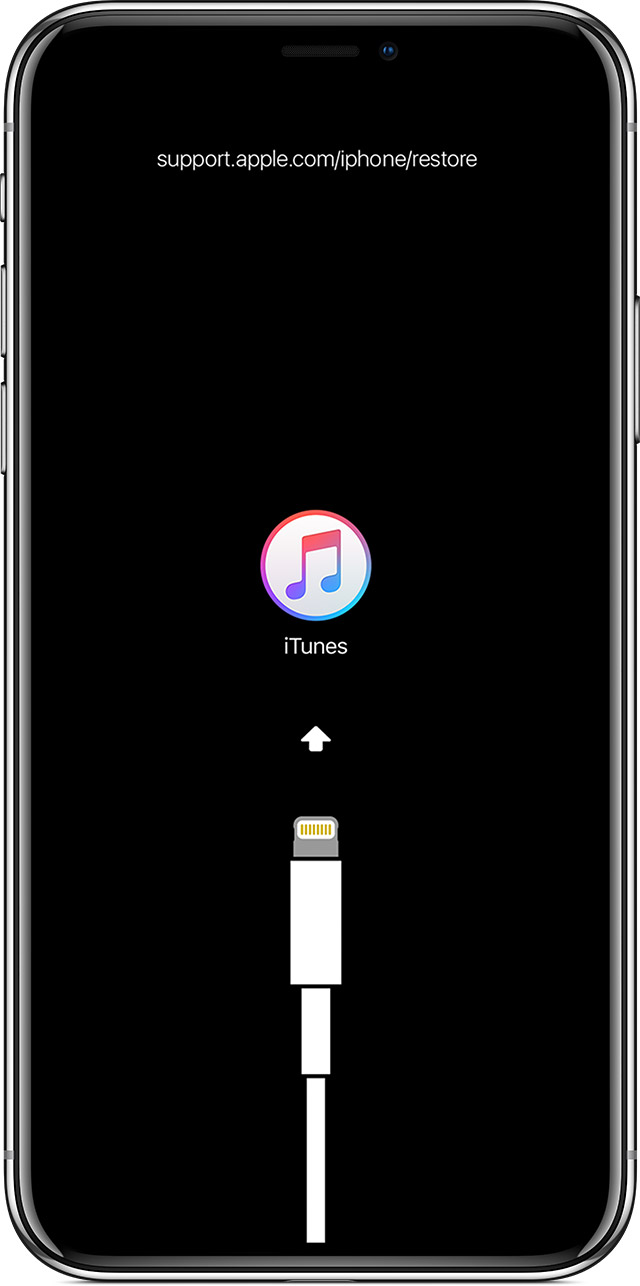
- You see the connect to iTunes screen.
(source: https://support.apple.com/en-us/HT201263)
In addition to those, the Recovery mode can be useful in the following situations:
- The device is locked; the passcode is unknown, and you want to reset the device (data will be lost).
- The device has entered USB Restricted Mode, and you do not know the passcode.
- The device is locked because you exceeded the maximum number of attempts to enter device passcode, and “Connect to iTunes” message is displayed.
- The device has a problem installing an update (e.g. the device was previously jailbroken).
- You are recovering the device after a jailbreak, and want to have the OS in a clean state.
Since iBoot is a software-based bootloader, it can be upgraded with iOS updates (unlike DFU mode, which is embedded into hardware).
Entering iOS Recovery Mode
Steps for entering the Recovery mode are different between iOS devices. Devices with a physical Home button, capacitive Home button and without the Home button employ different steps to enter Recovery mode.
For devices with physical Home buttons, follow these steps:
- Turn off the device.
- Press and hold the home button.
- Connect the device to computer with iTunes.
- Wait until you see the iTunes logo and the cable on the iPhone.
Apple recommends the following steps for entering Recovery mode:
- If iTunes is already open, close it. Connect your device to your computer and open iTunes.
- While your device is connected, force restart it with these steps, but don’t release the buttons when you see the Apple logo, wait until the connect to iTunes screen appears:
- On iPhone 8 and later: Press and quickly release the Volume Up button. Press and quickly release the Volume Down button. Then, press and hold the Side button until you see the connect to iTunes screen.
- On an iPhone 7 or iPhone 7 Plus: Press and hold the Side and Volume Down buttons at the same time. Keep holding them until you see connect to iTunes screen.
- On an iPhone 6s and earlier, iPad, or iPod touch: Press and hold both the Home and the Top (or Side) buttons at the same time. Keep holding them until you see the connect to iTunes screen.
Using iOS Recovery Mode
As already mentioned, iOS Recovery mode can be used to update or restore the device with a new (or current) version of iOS.
Update: the OS will be loaded onto the device; user data will be preserved. In Recovery mode, you can only update to the currently signed version of iOS (no downgrades possible when going through iBoot). Note that updating your device will not allow you disabling or bypassing USB Restricted Mode. Passcode will be preserved. Some users reported that updating devices without a passcode to iOS 12 resulted in an unknown passcode added. If this is the case, try “1234” or “0000” (or their 6-figit equivalents). If that does not help, use Restore.
Restore: the OS will be loaded onto the device with full factory reset. User data is erased. Passcode will be removed. USB restrictions will be lifted, but user data will be already erased by that time.
Information Available in Recovery Mode
Only a very limited set of information will be available. While the iPhone is in the Recovery mode, you may obtain the following information about the device:
Device Model: iPhone8,1
Model: n71map
ECID: XXXXXXXXXXXXXXXX
Serial Number: XXXXXXXXXXX
IMEI: XXXXXXXXXXXXXXX
MODE: Recovery
The Recovery mode may return the following information:
- Device model: two representations of the device model, e.g. iPhone7,2 (n61ap), iPhone10,6 (d221ap) etc.
- ECID (UCID): XXXXXXXXXXXXXXXX. The ECID (Exclusive Chip Identification) or Unique Chip ID is an identifier unique to every unit, or more accurately, to every SoC.
- Serial number: XXXXXXXXXXX (or N/A)
- IMEI: XXXXXXXXXXXXXXX (or N/A). Note that we have not seen IMEI information on any of our test devices, with or without a SIM card.
- Mode: Recovery
To obtain this information, we used an internal build of iOS Forensic Toolkit. The Recovery Mode support will be added to the Toolkit with the next update.
Exiting Recovery Mode
iPhone 6s and earlier, iPads: hold the Home button and the Lock button until the device reboots.
iPhone 7 and iPhone 7 Plus: hold down the Side button and Volume Down button until the device reboots.
iPhone 8 and iPhone 8 Plus, iPhone X: click the Volume Up button, then click the Volume Down button, then hold down the Side button until the device reboots.
Entering DFU Mode
If Apple designed the Recovery mode for the general consumer, the DFU mode was never intended for general use. This mode lacks proper documentation in Apple Knowledge Base, and requires precise timing when following each step (otherwise the device will simply reboot). As a result, entering DFU mode can be difficult even for experts.
As with the Recovery mode, steps for entering DFU mode differ between devices. For each device generation there could be several distinctly different ways to enter the DFU modes. Some methods can be easier than others, the end result being the same.
Note that the device screen will be completely black while in DFU mode. The iPhone Wiki explains steps required to enter the DFU mode in a dedicated article. According to the article, this is how you enter DFU mode on the different device models.
iPad, iPad Pro, iPhone 6s and below, iPhone SE and iPod touch
- Connect the device to a computer using a USB cable.
- Hold down both the Home button and Lock button.
- After 8 seconds, release the Lock button while continuing to hold down the Home button.
- If the Apple logo appears, the Lock button was held down for too long.
- Nothing will be displayed on the screen when the device is in DFU mode. If open, iTunes will alert you that a device was detected in recovery mode.
- If your device shows a screen telling you to connect the device to iTunes, retry these steps.
Alternative method 1:
- Hold the Lock Button for 3 seconds
- Continue holding the Lock button and also hold the Home button (15 seconds)
- Release the Lock button while continuing to hold the Home button (10 seconds)
- Your device should enter DFU mode
Alternative method 2:
- Connect the device to your computer and launch iTunes. Turn the device off.
- Hold down the Lock button and Home button together for exactly 10 seconds, then release the Lock button.
- Continue holding the Home button until iTunes on your computer displays a message that a device in recovery mode has been detected. The device screen will remain completely black.
iPhone 7 and iPhone 7 Plus
- Connect the device to a computer using a USB cable.
- Hold down both the Side button and Volume Down button.
- After 8 seconds, release the Side button while continuing to hold down the Volume Down button.
- If the Apple logo appears, the Side button was held down for too long.
- Nothing will be displayed on the screen when the device is in DFU mode. If open, iTunes will alert you that a device was detected in recovery mode.
- If your device shows a screen telling you to connect the device to iTunes, retry these steps.
iPhone 8, iPhone 8 Plus, iPhone X (may also work for iPhone Xs, Xs Max, iPhone Xr)
- Connect the device to a computer using a USB cable.
- Quick-press the Volume Up button
- Quick-press the Volume Down button
- Hold down the Side button until the screen goes black, then hold down both the Side button and Volume Down button.
- After 5 seconds, release the Side button while continuing to hold down the Volume Down button.
- If the Apple logo appears, the Side button was held down for too long.
- Nothing will be displayed on the screen when the device is in DFU mode. If open, iTunes will alert you that a device was detected in recovery mode.
- If your device shows a screen telling you to connect the device to iTunes, retry these steps.
Information Available in DFU Mode
The DFU mode returns even less information compared to the Recovery mode.
Device Model: iPhone8,1
Model: n71map
ECID: XXXXXXXXXXXXXXXX
Serial Number: N/A
IMEI: N/A
MODE: DFU
To obtain this information, we used an internal build of iOS Forensic Toolkit. The DFU Mode support will be added to the Toolkit with the next update.
- Device model: two representations of the device model, e.g. iPhone7,2 (n61ap), iPhone10,6 (d221ap) etc.
- ECID/Unique Chip ID: XXXXXXXXXXXXXXXX
- Serial number: not available in DFU mode
- IMEI: not available in DFU mode
- Mode: DFU
Exiting DFU Mode
The process of exiting DFU mode is also different across devices.
For devices with a physical Home button (up to and including iPhone 6s and iPhone SE): hold the Home button and the Lock button until the device reboots.
For iPhone 7 and iPhone 7 Plus: hold down the Side button and Volume Down button until the device reboots.
For iPhone 8 and iPhone 8 Plus, iPhone X: click the Volume Up button, then click the Volume Down button, then hold down the Side button until the device reboots.
Differences between DFU and Recovery Modes
While both DFU and recovery are designed to fulfil essentially the same goal of recovering a non-bootable device by flashing known working firmware, they are very different in the way they work.
The Recovery mode boots into the bootloader (iBoot), and works by issuing commands through the bootloader. The bootloader is part of the operating system, and can be flashed, updated or patched if there are any vulnerabilities discovered. The Recovery mode will only accept signed firmware images, so going back to firmware that is no longer signed by Apple is not possible. While the device is in Recovery mode, the user gets a clear visible indication on the device:
DFU or Device Firmware Upgrade, on the other hand, allows restoring devices from any state, including devices with corrupted bootloader. DFU does not operate through a software-upgradeable bootloader. Instead, DFU is burned into the hardware as part SecureROM. DFU cannot be updated, patched or disabled. DFU will also accept only signed firmware packages. As long as a package is still signed by Apple, the user can upgrade and downgrade firmware at will since there is no downgrade protection in DFU. There is no indication on the device that the device is in DFU mode. During DFU interfacing, the device screen remains black.
The Recovery mode was designed for end users and Apple facilities, while the DFU mode was never meant for the end user at all. Entering the Recovery mode is easy; any reasonably experienced user can follow the instructions. Entering the DFU mode is not only significantly trickier, but requires precise timings. Hold a button one second too long, and the device simply reboots instead of entering DFU.
Downgrading iOS
Booting the device in Recovery mode invokes the iBoot process; all subsequent commands are checked and processed by iBoot. One thing the bootloader does is enforcing downgrade protection. The user can only install a signed firmware package that is of equal or greater version than the one on the device (except for special cases of going back to an official iOS release from a beta version).
The DFU mode works directly through hardware and does not invoke the iBoot process. Due to the fact that iBoot is not involved in the process, the user can use iBoot to reflash, upgrade or downgrade the OS as long as the version of iOS being installed is still signed by Apple.
Information Available through Recovery and DFU
There is not much information about the device available through either mode. The Recovery model returns Device Model, Unique Chip ID, Serial Number and IMEI. The DFU mode only returns Device Model and Unique Chip ID.
Conclusion
Apple put in place a truly robust implementation for emergency flashing that does not require bootloader unlock or installing third-party software. If the phone has entered USB Restricted Mode, forensic experts can use the Recovery mode to access basic information about the device such as device model, chip ID and serial number (and, with some luck, the IMEI). The next update of iOS Forensic Toolkit will include support for DFU and Recovery modes.


- Elcomsoft Phone Breaker 11.03: universal binary for Macs, SMS two-factor authentication restored16 July, 2026
- iOS Forensic Toolkit 10.10 adds pairing-free sideloading of the extraction agent24 June, 2026
- Elcomsoft Phone Breaker 11.2: downloads iOS 26 iCloud backups18 June, 2026
- Elcomsoft Phone Breaker 11.1: reliable iCloud backup extraction26 May, 2026
- ElcomSoft Phone Breaker 11: full overhaul of iCloud extraction30 April, 2026