Understanding BitLocker TPM Protection
January 5th, 2021 by Andrey MalyshevCategory: «General», «Tips & Tricks»
Investigating a BitLocker-encrypted hard drive can be challenging, especially if the encryption keys are protected by the computer’s hardware protection, the TPM. In this article, we’ll talk about the protection that TPM chips provide to BitLocker volumes, and discuss vulnerabilities found in today’s TPM modules.
What is TPM
Trusted Platform Module (TPM) is a standard for a secure cryptoprocessor, a dedicated microcontroller designed to secure hardware through integrated cryptographic keys. On a physical level, the TPM might be implemented as a built-in chip, an additional module one can install into a slot on the desktop motherboard, or as a virtual emulator (the Intel PTT technology).
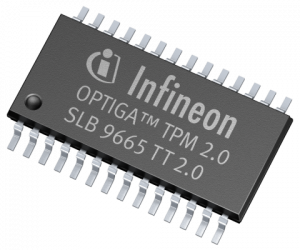
Infineon Optiga TPM chips:

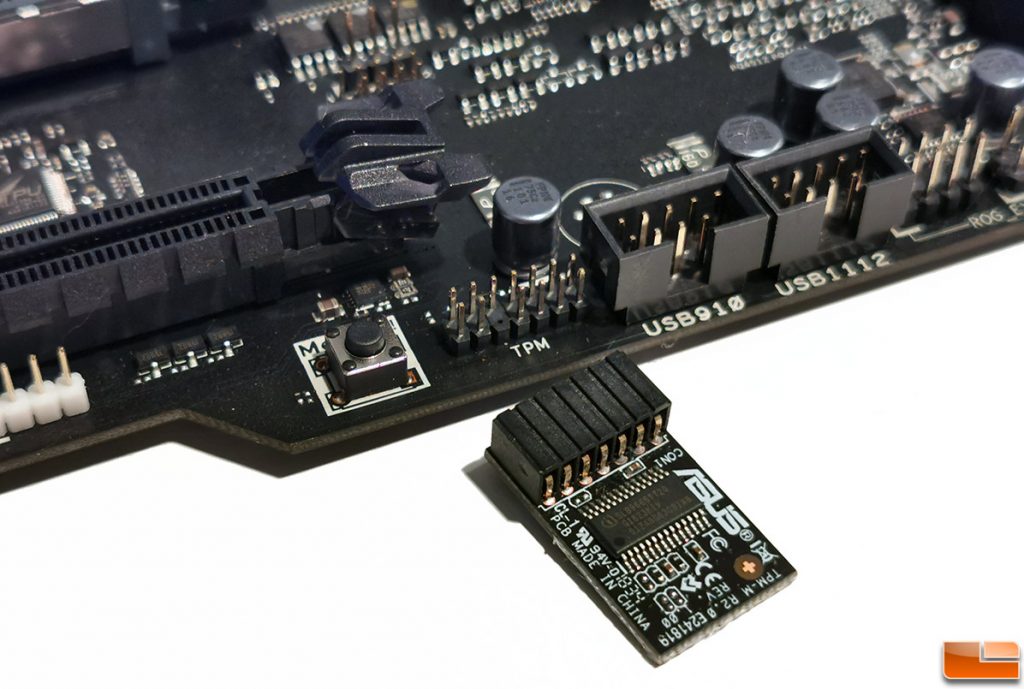
Standalone TPM module for Asus motherboards:
The platform consists of a secure cryptoprocessor and a small amount of built-in memory. The main functions of TPM are the generation, storage and secure management of cryptographic keys; in particular, the BitLocker keys. The operating system must provide APIs for developers for accessing the TPM, and uses TPM to manage encryption keys.
In this article, I will talk about the role of TPM in BitLocker encryption.
When Windows developers were designing the disk encryption scheme, they attempted to counter the following threats:
- Signing in to the user’s account without valid authentication credentials
- Moving the hard drive to a different system for analysis
- Altering the computer’s configuration for gaining access to the data
- Running an alternate OS for gaining access to the data
The top priority, however, was that the protection was as transparent and as unobtrusive to the user as possible. Ideally, the user would never notice the encryption; this goal has been achieved. For those who need extra protection against additional threats, the developers allowed specifying a pre-boot PIN code or adding other types of protectors (e.g. a physical smartcard or USB drive).
How BitLocker works
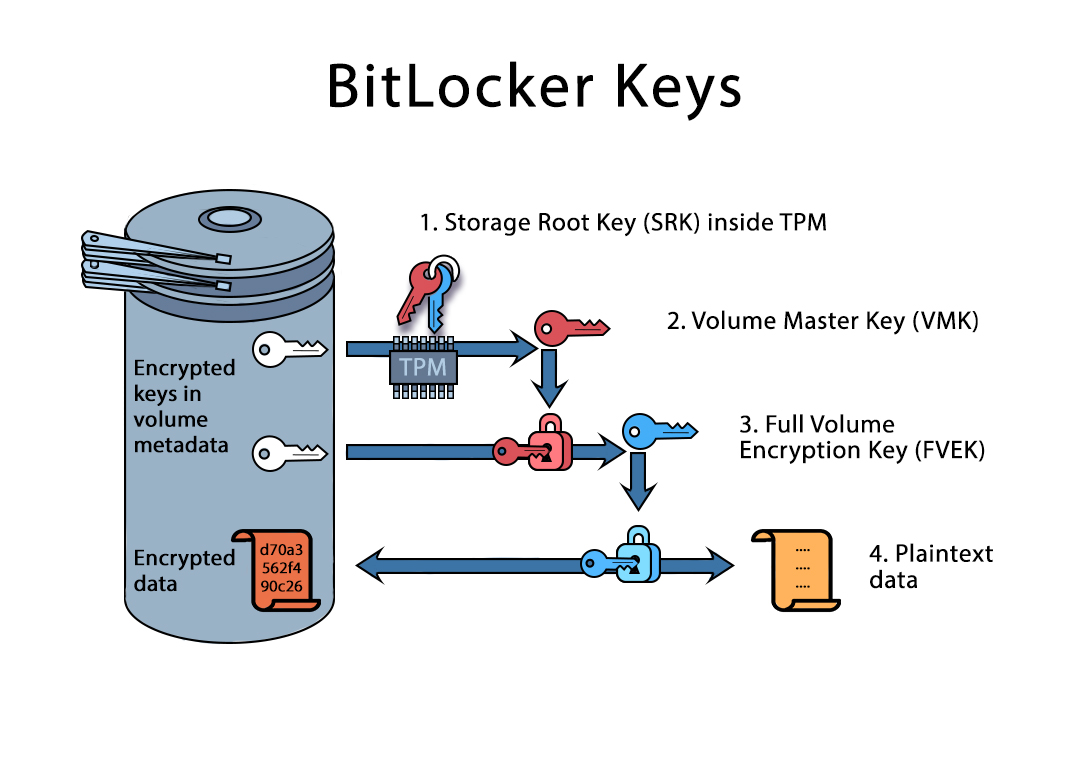
BitLocker makes use of symmetric encryption. By default, AES-128 is used to encrypt data in either XTS (new) or CBC (legacy) mode. The data is encrypted with VMK (Volume Master Key), which in turn can be obtained in one of the following ways:
- Decrypted with the user’s encryption password, if this protector is enabled for a given volume.
- Decrypted with a Recovery Key. The Recovery Key is generated automatically once the encryption is enabled for the first time. The key is then either stored to a file, uploaded to the user’s Microsoft Account of saved in Active Directory.
- (You are here) Extracted from the TPM module when certain conditions are met.
This is how Bitlocker communicates with TPM:
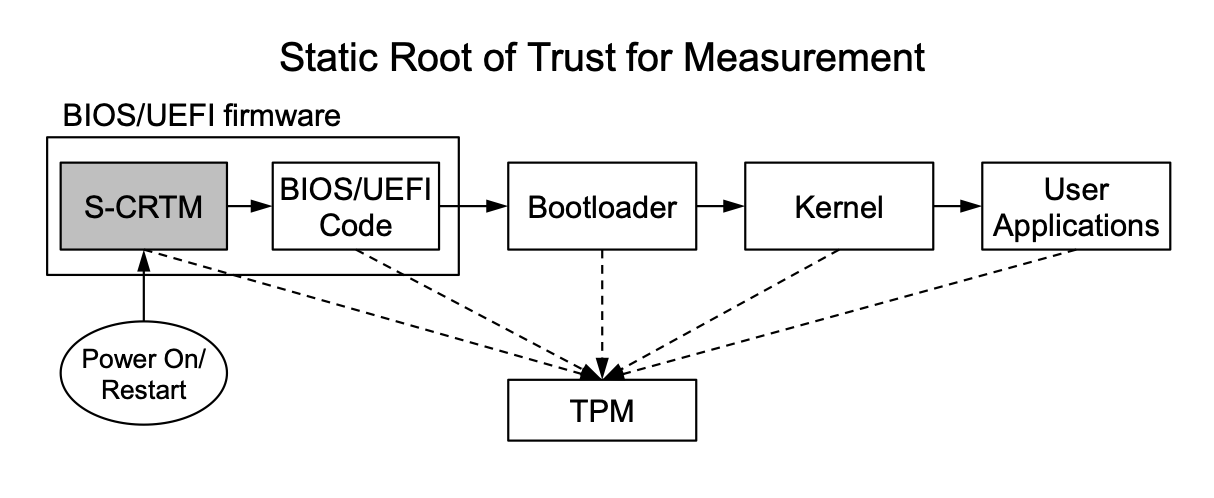
The basic principle of TPM is very similar to blockchain. During the boot, the system builds chain of trust, which is stored in PCR (Platform Configuration Register) registers.
This is what happens when the computer boots:
- Power on. SRTM (Static root of trust for measures) is the first trusted module is loaded. This module is stored in the computer’s ROM, and cannot be altered. A vulnerability in this module breaks the entire protection scheme, which was clearly demonstrated by the developers of the checkm8 exploit for iOS devices. SRTM inserts the first record into the chain of trust by calculating the hash value of the computer’s BIOS. The hash is stored in a PCR register.
- UEFI BIOS loads. The BIOS analyzes the computer’s configuration including the hard drive partitioning, the MBR (Master Boot Record), bootloader and many other parameters including firmware checksums of certain components (e.g. fingerprint readers or smartcard readers). Notably, the value of the previous PCR register is used to calculate new hash values, which means that any modification of a single PCR register breaks the entire chain.
- After filling out several PCR registers, BIOS loads the bootloader from the MBR. The bootloader inserts a few more records.
- Finally, the OS kernel starts. The kernel keeps adding to the chain of trust.
As you can see, once the OS is finally loaded, the PCR registers contain the entire chain of trust. Note that the TPM module does not allow modifying PCR registers; one cannot alter existing records, only add new ones.
This is how it all looks:
BitLocker encryption
Once the user enables BitLocker on a disk volume, Windows generates a random volume master key (VMK) as well as a recovery key. The master key is then stored in the TPM module; it is also encrypted with the recovery key. The encrypted VMK is then saved in the disk header. Once the computer is rebooted, the following happens:
- All PCR registers are zeroed out.
- The system follows steps 1 through 4 described earlier.
- The OS kernel attempts unlocking the encrypted volume and requests the VMK from the TPM module. The TPM module in turn analyzes the chain of trust by checking PCR registers. If the chain of trust is corrupted, the VMK is not released; the OS kernel than displays a message requesting the user to unlock the volume with a Recovery Key.
As you can see, if the computer is powered off, the only way to obtain the VMK is by launching the original OS in its original configuration. Altering a single component will trigger the prompt for Recovery Key.
Bypassing TPM
Most often than not, you are analyzing a ‘cold’ system. If this is the case, make sure to capture the disk image before everything else. You can use Elcomsoft System Recovery to do that. Before taking the image, you’ll be able to see the list of disk partitions along with their encryption settings. If the tool reports that the disk is encrypted with BitLocker but the password hash cannot be extracted, you’ll have to either use the Recovery Key or attempt to extract the VMK from TPM.
Extracting Volume Master Key from RAM
If you are able to sign in to the computer, you may attempt capturing its memory image. By analyzing the RAM image with Elcomsoft Forensic Disk Decryptor you may be able to discover the master key and decrypt the volume without any other attacks. This, however, will not be possible if the user specified a pre-boot protector such as an extra PIN code (TPM+PIN). If you attempt to brute-force the PIN, the TPM will panic and lock access to the encryption key either permanently or for a period of time.
While you may prefer live system analysis to capturing the encryption key and decrypting the disk image, offline analysis is significantly more forensically sound even if labor-intensive.
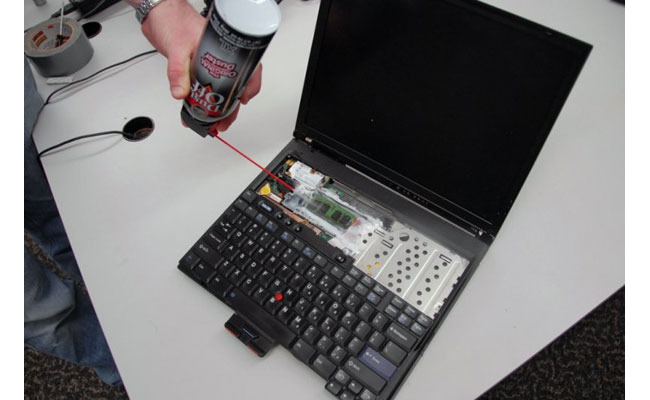
Cold boot and FireWire/Thunderbolt attacks
The fact that TPM releases the VMK at an early stage allows for a quite unique attack often called the ‘cold boot attack. This attack is based on the fact that the computer’s memory chips retain their content for several seconds after being powered off. However, if cooled to sub-zero temperatures, the modules will retain data for much longer. During the cold boot attack, you would start the computer and wait while the system boots up. By the time the computer presents the login prompt, the BitLocker volume would be already mounted, and the VMK decrypted and stored in the computer’s RAM. You would then cool the RAM modules with a commercially available refrigerant spray, immediately remove the modules, install them into the test computer and boot it into a Linux image with LiME kernel extension. You can then dump the memory image and scan it with Elcomsoft Forensic Disk Decryptor for BitLocker encryption keys.
A similar attack is available for older systems running Windows 7 and Windows 8 if they are equipped with a FireWire or Thunderbolt port or a PC Card slot. If this is the case, you can attempt capturing the memory dump with the infamous Inception tool (yes, it’s “that Python tool”). A memory dump made with Inception can be loaded into Elcomsoft Forensic Disk Decryptor and scanned for the master key. The VMK be then used to either completely decrypt the disk image or mount it for faster analysis.
Unfortunately, this method is only available on older systems running Windows 7 or Windows 8. Windows 8.1 already fixes the vulnerability by disabling DMA via Thunderbolt when the computer is sleeping or locked.
The Sleep Mode attack
In 2018, researchers Seunghun Han, Wook Shin, Jun-Hyeok Park, and HyoungChun Kim from National Security Research Institute published a paper named A Bad Dream: Subverting Trusted Platform
Module While You Are Sleeping (PDF). When the computer enters the energy-saving sleep state, the TPM saves its PCR registers in NVRAM, and restores them when the computer wakes up. The researchers discovered that, at this brief moment, the PCR registers can be manipulated, thus reading the chain of trust or modifying its content. The researchers notified major motherboard manufacturers such as Intel, Lenovo, Gigabyte, Dell, and hp, who in turn patched the vulnerability in BIOS updates. However, since few users install BIOS updates, there are many computers still vulnerable to this exploit.
Seunghun Han released two tools: Napper for TPM and Bitleaker. The first tool can be used to test the computer’s TPM chip for the “Bad Dream” vulnerability, while the second tool is the actual exploit one can run if the TPM module has the unpatched vulnerability.
The second tool requires manually creating a Live CD with Ubuntu, compiling and installing Bitleaker according to the manual. You will need to disable Secure Boot to run the tool. The alternative way would be signing the modified bootloader and kernel with your signature and adding the public key to BIOS; this, however, defies the purpose as it alters the content of PCR registers.
Intercepting TPM signals
TPM modules are connected to the computer via the LPC (Low Pin Count) bus. This bus is used to carry data between “slow” devices, such as the serial ports. It operates at the frequency of 33 MHz. Denis Andzakovic claims that, by default, Microsoft BitLocker protected OS drives can be accessed by sniffing the LPC bus, retrieving the volume master key when it’s returned by the TPM, and using the retrieved VMK to decrypt the protected drive.
For TPM 1.2, he used the DSLogic Plus logic analyzer with USB interface. However, he found it to be far from perfect for sniffing TPM traffic as he had to solve synchronization problems and even patch the firmware. However, he was able to successfully extract the VMK from the TPM module.
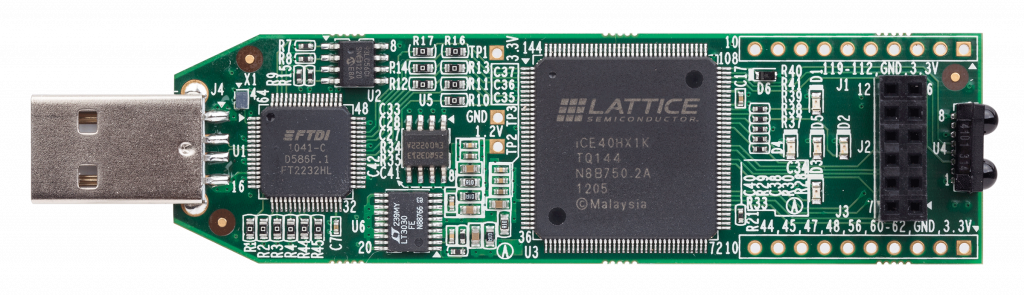
Sniffing TPM 2.0 was way easier with a cheap FPGA Lattice ICEStick and a specal firmware designed for sniffing TPM modules.
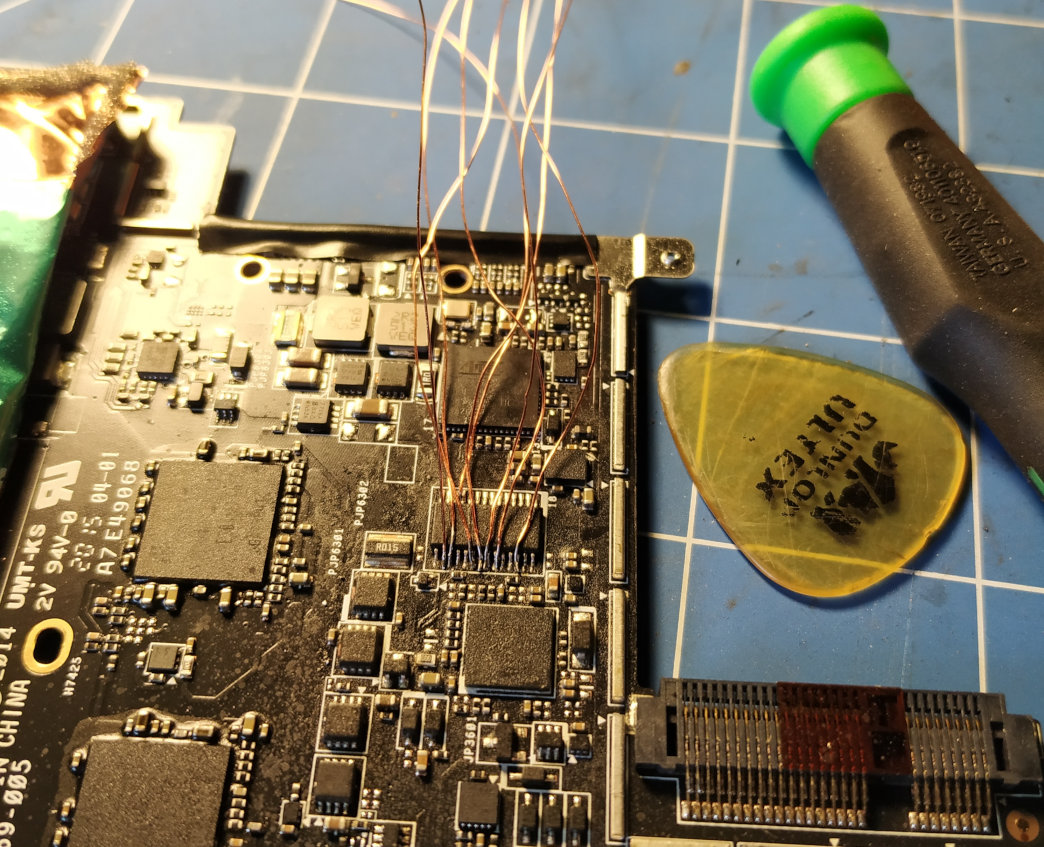
All he needed to do was soldering the pins, enabling the sniffer and obtaining the master key. More on that in Denis’ original article. Note that desktop motherboards with add-on TPM chips are even easier to sniff with no soldering required.
This method works in BitLocker’s default configuration. If the user enables pre-boot authentication with a PIN code, the PIN code will be required to make TPM release the VMK. This method will not work for Intel PTT as there is no physical access to the module’s interface.
FPGA Lattice iCEStick:
Connecting to the TPM chip:
Conclusion
Combined with TPM, BitLocker enables secure protection against unauthorized access. Despite the fact that the TPM chip itself does not do encryption, gaining access to the encryption key is not an easy task. I described a number of methods that can be used to extract the encryption keys from the TPM module. Even if you never use any of them, they are certainly worth being part of your arsenal.
REFERENCES:

Elcomsoft Forensic Disk Decryptor
Elcomsoft Forensic Disk Decryptor offers forensic specialists an easy way to obtain complete real-time access to information stored in popular crypto containers. Supporting desktop and portable versions of BitLocker, FileVault 2, PGP Disk, TrueCrypt and VeraCrypt protection, the tool can decrypt all files and folders stored in crypto containers or mount encrypted volumes as new drive letters for instant, real-time access.
Elcomsoft Forensic Disk Decryptor official web page & downloads »

Elcomsoft System Recovery
In order to preserve digital evidence, the chain of custody begins from the first point of data collection. Elcomsoft System Recovery employs a forensically sound workflow to ensure that digital evidence collected during the investigation remains court admissible. The workflow implements read-only, write-blocking access to the target computer, and saves collected evidence in the form of digitally signed, verifiable disk images, making Elcomsoft System Recovery a viable alternative to hardware-based write blocking disk imaging devices while offering real-time access to crucial evidence.


- iOS Forensic Toolkit 10.10 adds pairing-free sideloading of the extraction agent24 June, 2026
- Elcomsoft Phone Breaker 11.2: downloads iOS 26 iCloud backups18 June, 2026
- Elcomsoft Phone Breaker 11.1: reliable iCloud backup extraction26 May, 2026
- ElcomSoft Phone Breaker 11: full overhaul of iCloud extraction30 April, 2026
- iOS Forensic Toolkit 10.02 adds agent-based extraction for iOS 2629 April, 2026