Maximizing Disk Imaging Speeds
August 5th, 2024 by Oleg AfoninCategory: «Tips & Tricks»
In the field of digital forensics, properly handling the task of disk imaging is crucial for preserving data integrity. Using write blockers ensures that no data is altered during the imaging process, a key requirement for maintaining the chain of custody. While there are many factors influencing the efficiency and speed of this process, this article offers advanced tips and considerations that can help achieve optimal performance.
A Brief Overview of Write Blockers
To recap, write blockers are software or hardware tools designed to prevent accidental modifications to the original evidence stored on disks being imaged. In this article, we will focus solely on SATA-based hardware write blockers. This type of write blockers act as intermediaries between the forensic expert’s computer and the storage device being imaged. We’ll focus on the latest generation of write blockers features a modern 10 Gbps chip that supports USB 3.2 Gen2 connectivity, while maintaining backward compatibility with older USB versions down to USB 2.0. We will test disk imaging performance for SATA storage devices in 2.5″/3.5″ and m.2 form factors.
Does Imaging Speed Matter?
The speed of disk imaging is important, yet it is not a critical or factor. While imaging speeds for magnetic hard drives don’t vary significantly across different write blockers, the performance difference is much more pronounced with faster solid-state drives (SSDs). Using a modern write blocker equipped with a last-generation chipset can substantially reduce the time required to extract data.
How Fast is Fast?
A high imaging speed is one that approaches the maximum read speed of the specific storage device, considering overhead and port limitations. For SSDs operating over the SATA protocol, a good speed is close to the interface speed minus overhead costs. For SATA3 SSDs connected to a USB3.2 Gen2 port, a good imaging speed would be around 450 MB/s, while an excellent speed is approximately 500 MB/s. Magnetic hard drive speeds vary widely. Due to the hardware design, maximum read speeds are achieved on the outer tracks in the beginning of the imaging process, while dropping significantly towards the end of the disk. Note that these maximum speeds are unattainable via legacy USB coonnections such as USB3.0, USB3.1 Gen1, or USB3.2 Gen1 due to overhead crippling data transfer rates.
Performance Comparison of Imaging Tools with Write Blockers
In our testing process, we compared the performance of several imaging programs using the same disk and a 10 Gbps-capable hardware write blocker. Notably, enabling data compression may significantly affect the imaging speed, which will greatly depend on the compression type and the disk’s content.
Test Setup:
- Workstation: ASUS Vivobook S16 S5606MA, Intel Core Ultra 9 185H, 32GB RAM, Samsung 990 Pro 2TB SSD, USB/Thunderbolt 4 ports.
- Test Disk: SSD AMD Radeon R5 R5SL128G (128GB total capacity, 10GB free).
We tested the imaging performance using OSForensics, FTK Imager, and X-Ways Imager, selecting various compression levels. The results are summarized in the table below.

Observations
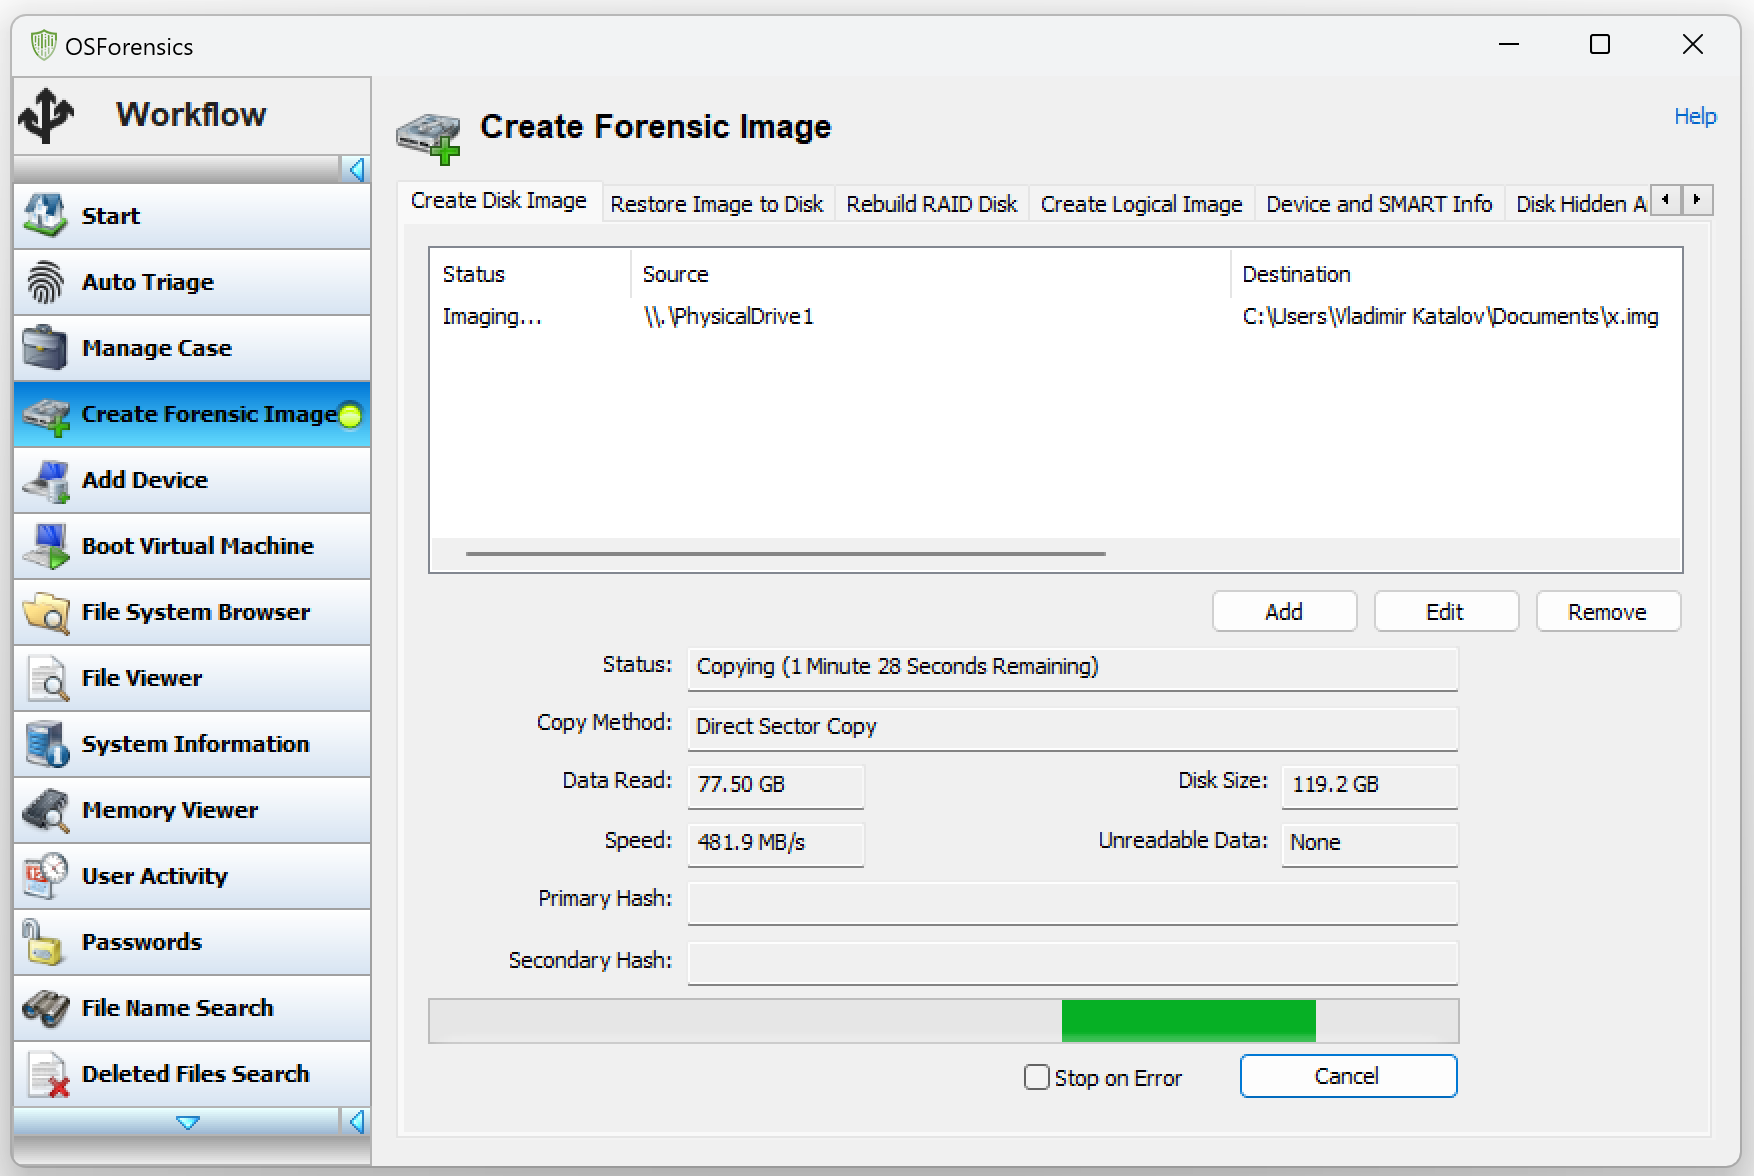
- OSForensics:
- Displays current speed during imaging, but the total time needs separate measurement.
- Best performance with RAW format (480 MB/s).
- Performance drops significantly with compression (87 MB/s and 79 MB/s for medium and maximum compression, respectively).
- FTK Imager:
- Does not display current speed but records total imaging time.
- Serious performance drop with compression enabled.
- In RAW format, it performs slower than OSForensics (360 MB/s).
- Slight speed drop when imaging to E01 with no compression (267 MB/s compared to OSForensics’ 360 MB/s).
- X-Ways Imager:
- Does not display current speed but records total time.
- Less compression-based performance drops compared to other tools.
- Does not reach peak speeds of OSForensics when imaging into a RAW file, but demonstrates solid results with compression.
When using compresion, X-Ways Imager generally outperformed other tools. However, when imaging into an uncompressed RAW, OSForensics demonstrated the best performance, reaching 480 MB/s. FTK Imager lagged behind slightly, particularly in uncompressed E01.
Summary of Performance
- RAW Format
- OSForensics: 480 MB/s
- FTK Imager: 360 MB/s
- X-Ways Imager: Consistently solid, though not as fast as OSForensics
- E01 Format (no compression)
- OSForensics: 360 MB/s
- FTK Imager: 267 MB/s
- Compressed Formats
- OSForensics: Significant slowdown (87 MB/s and 79 MB/s)
- FTK Imager: Solid but slower than RAW
- X-Ways Imager: Best with medium compression
Our tests demonstrated that the choice of imaging tool and compression settings can greatly affect the imaging speed. If you aim for the fastest performance, particularly with uncompressed RAW data, OSForensics is the best choice. However, for better performance with compressed formats, X-Ways Imager is ahead. FTK Imager, while competent, tends to lag behind slightly in speed compared to the other tools.
Maximizing Disk Imaging Performance
We ran multiple tests in both desktop and portable environments, across different generations of USB ports, and with various cables. Here are the key findings and tips for achieving maximum performance.
Key Tips for Maximum Performance
- Use a Powered Laptop
- If you are using a laptop, ensure that it is plugged into a power outlet. Many laptops reduce USB power delivery and bus speeds when running on battery. Always perform disk imaging with the laptop connected to mains power to avoid this power-saving mode.
- Connect to the Fastest Available USB Port
- Use the fastest available USB port, ideally USB 3.2 Gen 2 (10 Gbps) or faster. This ensures the highest data transfer speeds, saturating the SATA protocol’s 6 Gbps limit. Avoid using older USB 3.0 (5 Gbps) ports if possible.
- Use High-Quality Cables
- Not every USB 3 cable supports speeds over 5 Gbps. Use cables certified for USB 3.1 Gen 2, USB 3.2 Gen 2, or higher, preferably with marked speed. Be cautious with fast-charge USB-C cables, many of which only supporting USB 2.0 speeds. Opt for certified USB/Thunderbolt 4 cables marked with their maximum speed, and pick shorter cables for better performance.
- Use a NVMe SSD as a Target
- Use an NVMe SSD for the target drive, either seated in the M.2 slot or connected via a 10 Gbps or faster USB port. NVMe SSDs offer significantly higher write speeds compared to traditional hard drives and SATA SSDs, preventing the target drive from becoming a bottleneck.
- Ensure Ample Free Space on the Target Drive
- Before imaging, ensure the target drive has ample free space. For SSDs, having sufficient free space is crucial as it allows for higher write speeds and avoids performance drops that occur when the drive is nearly full. Magnetic hard drives also benefit from more free space to avoid slowdown due to file system fragmentation.
- Allow Your Computer to Stabilize After Booting
- Wait up to 10 minutes after turning on the computer for all background processes to complete and the system to stabilize.
- Minimize Background Disk Activity
- Ensure there are no disk-intensive background tasks running, such as Windows updates, which can significantly reduce imaging speed.
- Pause Indexing and Antivirus Software
- Windows search indexing has minimal impact on performance, but antivirus software can greatly slow down the process. We found that temporarily pausing the built-in Windows Defender during disk imaging helps bump imaging speeds on some systems.
- Beware of TRIM Commands on Source SSDs
- Write blockers cannot prevent data loss resulting from the disks’s internal garbage collection and TRIM processing. While no new TRIM commands shall pass through a write blocker, background garbage collection is unavoidable. If an SSD was recently formatted or had lots of data deleted, avoid powering it up and instead use specialized access tools in factory mode to prevent further data loss.
Beyond the Basics
When it comes to using write blockers for imaging hard disks, there are a few additional considerations that can enhance performance, even if they aren’t strict requirements.
Size and Speed Considerations
Currently, the most common SSD sizes are 1TB or 2TB. Using a modern write blocker, copying 2TB of data can take just over an hour. With an older write blocker or without following the optimal conditions, this process could easily take 2 or 3 hours. For magnetic hard drives (HDDs), the read speed is much slower, so the difference in performance between different write blockers or software should be minimal.
Please note that smaller SSD drives will typically be slower than their higher-capacity counterparts due to decreased parallelism. In addition, SSDs with higher wear (greater write count) may demonstrate random slowdowns due to the overhead of the internal data correction algorithms. Finally, older SSD drives of equal capacity may be either faster or slower than their modern counterparts depending on the technology used (MLC, planar TLC, 3D TLC, or QLC NAND) and the number of NAND chips installed (which equals parallelism, which affects read and write speeds).
Image Formats
In forensic imaging, the most commonly used format is .e01 with default compression settings. Compression helps a lot when one needs to store multiple disk images. The dd/raw format is less commonly used due to its lack of compression and the resulting large size.
- RAW
- Use When You Need:
- Maximum compatibility and versatility are needed.
- Maximum data extraction speed is required.
- The source disk is almost full.
- Compression is not required.
- Avoid When:
- Using E01 us mandatory.
- Metadata in the file header is important.
- Compression required.
- Use When You Need:
- E01
- Use When:
- The source disk has plenty of free space or files compress well.
- Using E01 is mandatory.
- Metadata in the file header is crucial.
- Avoid When:
- The source disk is nearly full, making compression ineffective and complicating image creation.
- Compression is not required.
- Use When:
- AFF4
- Use When:
- You’re after a modern solution.
- More flexible metadata handling and improved performance are required.
- Avoid When:
- Using E01 us mandatory.
- Your forensic analysis tool does not support AFF4.
- Use When:
- EWF Format:
- Avoid When:
- This format is not widely supported and thus may limit usability.
- Avoid When:
Conclusion
Achieving maximum imaging speed requires adhering to several conditions and using proper equipment and software. Implementing these recommendations can significantly reduce the time you’ll need to spend for disk imaging.


- iOS Forensic Toolkit 9.0: full unlocking and perfect acquisition support for iPhone 6/6 Plus and other Apple A8/A8X devices11 February, 2026
- Elcomsoft Quick Triage30 December, 2025
- Introducing free forensic tools12 December, 2025
- Elcomsoft System Recovery 8.36 adds Windows Server 2025 support, BitLocker key exporting, and enhanced SRUM analysis14 November, 2025
- iOS Forensic Toolkit 8.81 adds iOS 17 and 18 support for checkm8 extractions 6 November, 2025