Two-factor authentication is great when it comes to securing access to someone’s account. It’s not so great when it gets in the way of accessing your account. However, in emergency situations things can turn completely ugly. In this article we’ll discuss steps you can do to minimize the negative consequences of using two-factor authentication if you lose access to your trusted device and your trusted phone number. In order to keep the size of this text reasonable we’ll only talk about Apple’s implementation, namely Two-Step Verification and Two-Factor Authentication. You can read more about those in our previous blog post.
Two-Factor Authentication in Emergencies
What’s an emergency? For the purpose of this article, we’ll look at a common scenario of a traveler going abroad with an iPhone. The iPhone goes missing or gets stolen. (As opposed to the device being broken or getting water damage, in which case one may still be able to use the SIM card to receive single-time passwords).
Without two-factor authentication, activating a new iPhone and restoring pretty much everything from the old device is a matter of visiting a nearby Apple Store or another brick-and-mortar shop, picking up a new iPhone and setting it up with a new SIM card. Entering your Apple ID and password would give you an option of restoring your last cloud backup from your old, lost or stolen iPhone.
If, however, a traveler has two-factor authentication enabled on their Apple account, the phone will request a one-time password before it continues restoring backup data. In this scenario, the traveler loses both trusted authentication factors at the same time: the trusted device (iPhone) and the trusted phone number (SIM card). With no possibility to produce a secondary password, the traveler is effectively locked out of their Apple account, which means no access to contacts, apps, call history, or stored passwords.
Essentially, the problem can be broken into two separate issues:
- Remotely locking or deactivating the missing device
- Reinstating access to Apple ID and restoring from a cloud backup
Using Find My iPhone if Two-Factor Authentication Is Enabled
The first thing one should do when their phone goes missing is locking the device using Apple’s Find My iPhone service. In some cases, one may want to execute a remote data wipe, while for most users the Lost Mode would be more beneficial.
Note: You may also want to contact your mobile service provider to report the SIM card lost or stolen. This is separate from deactivating your iPhone. For deactivating your SIM card, use the call center of your mobile service provider. If you are located in your home country, you may be able to source an instant replacement for the stolen SIM card locally. If, however, you are traveling abroad, obtaining immediate replacement may not be possible.
While two-factor authentication is designed to protect your Apple account against unauthorized login attempts, there is one exception. You can still use Find My iPhone service https://www.icloud.com/#find to locate or erase your iPhone or put it to Lost Mode without using a single-time password. In other words, you can still log in to this service by using your Apple ID and password, and nothing else.
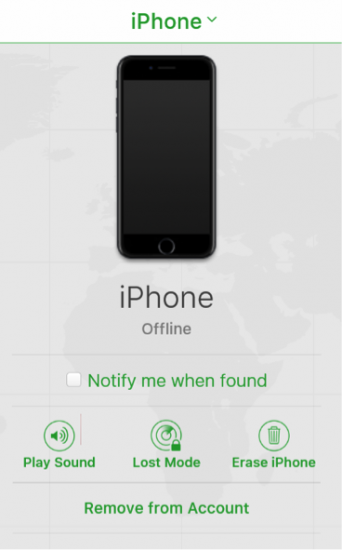
Does it represent a potential security vulnerability? Not necessarily, as all other services except Find My iPhone are locked out and unavailable:
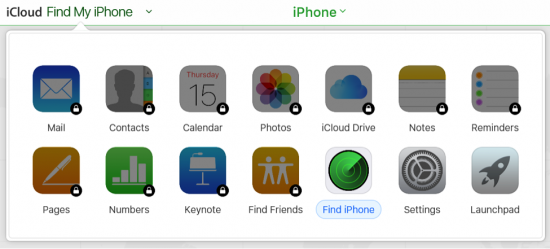
If you attempt using any service other than Find iPhone, you will be prompted for a single-time password.
Setting Up a New iPhone
In order to set up a new iPhone with your Apple account, get access to your iCloud backups, contacts, call logs, apps and app data, you will need to either supply a one-time password or go through the process of reinstating access to your Apple account.
The process of reinstating access is done via Apple iForgot service through https://iforgot.apple.com/password/verify/appleid
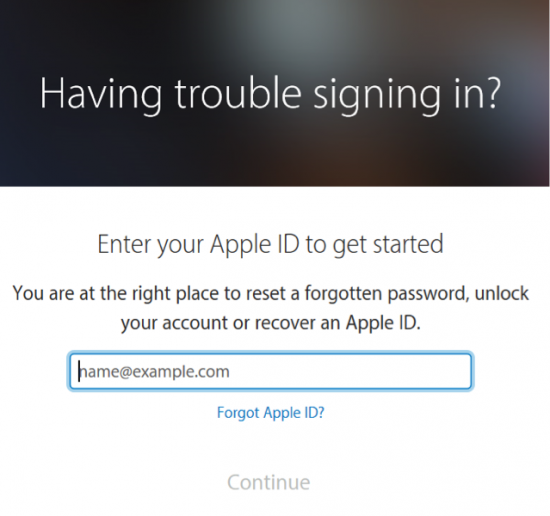
However, the process differs significantly for cases where your account is protected with Two-Step Verification or Two-Factor Authentication. (You can read more about the differences between these authentication methods in our previous blog post).
In order to recover your account, fill in your Apple ID first. On the next step, you will be asked to provide your trusted phone number. No text messages will be sent to that number at this time. Just enter it and proceed to the next step.
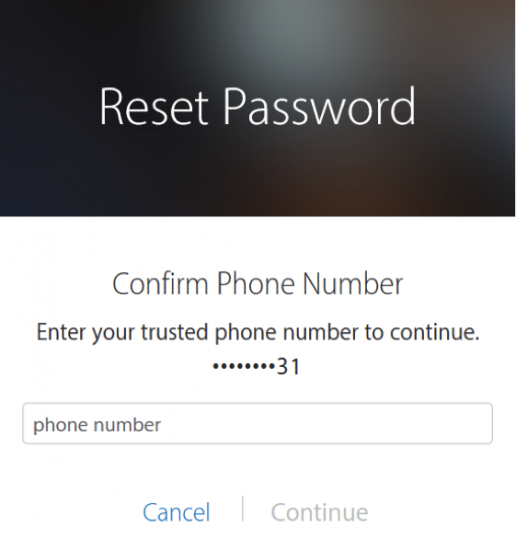
Assuming that you do remember your password and don’t have access to a trusted device or a trusted phone number, use the link that says “Do not have access to your trusted devices or phone numbers?”
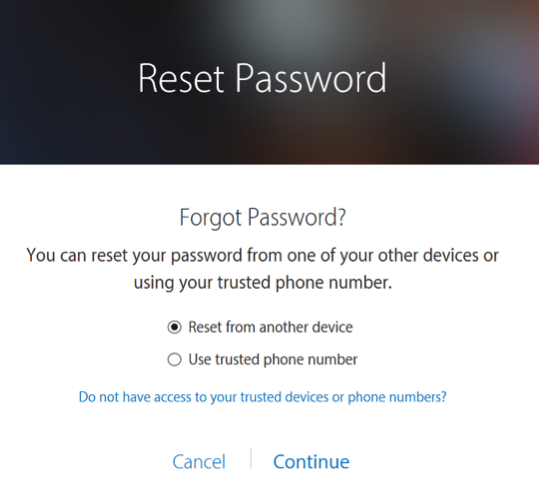
This will start account recovery.
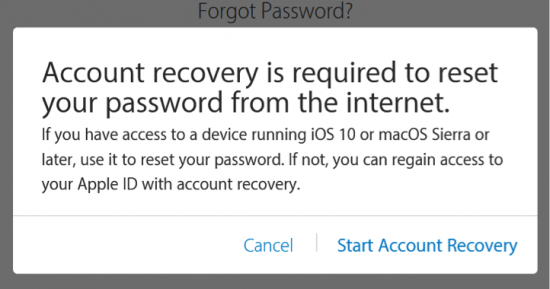
Click Start Account Recovery to continue.
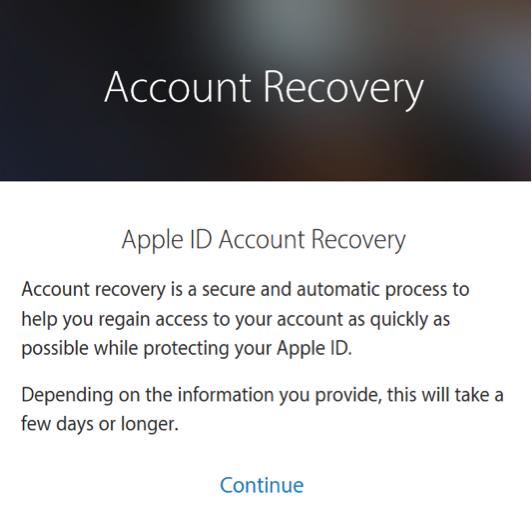
From now on, the process is different between Two-Step Verification and Two-Factor Authentication.
Reinstating Access to Apple ID: Apple Two-Step Verification
If you enabled two-step verification, you were given the option to create and print Account Recovery Key. This key is designed to help you exactly in situations such as this, where you don’t have access to your trusted devices and phone numbers.
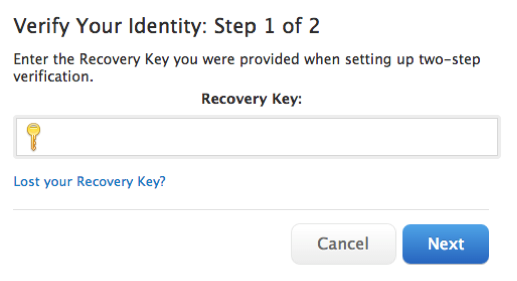
If you have your Recovery Key handy, just enter it there, and you’ll automatically get access to your account. If, however, you don’t have a Recovery Key, you will be directed to the fallback recovery process which is similar to that of Two-Factor Authentication.
Important: Once you reinstated access to your account, make sure to verify a new device as soon as possible. Otherwise, you’ll have to use your Recovery Key every time when you log in. Alternatively, you may temporarily disable Two-Step Verification (not recommended) or disable Two-Step Verification and set up Two-Factor Authentication.
Apple recommends printing more than one copy of the Recovery Key. According to Apple, with two-step verification you are responsible for:
- Remembering your password
- Keeping your trusted devices physically secure
- Keeping your Recovery Key in a safe place
If you lose access to two of these three items at the same time, you could be locked out of your Apple ID permanently.
Note: If you lose your Recovery Key, you can create a new one (https://support.apple.com/kb/HT5577). This will invalidate your previous Recovery Key.
More information:
Reinstating Access to Apple ID: Apple Two-Factor Authentication
In this newer authentication scheme, Apple removed the possibility for creating a Recovery Key, relying on a step-by-step recovery process instead. During this process, you’ll be asked to provide details about your account that only you may know. This includes your trusted phone numbers, any credit cards on file, and possibly other information.
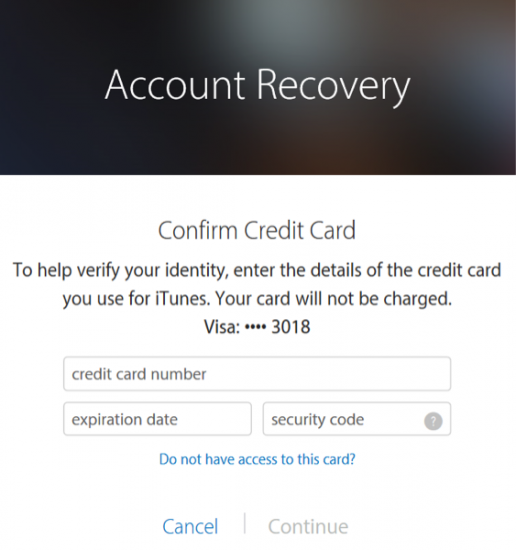
Depending on how much information you have on file with Apple, and how much of that you can correctly confirm during the recovery process, you may or may not be granted access to your account. In some cases, Apple will record your request and pass it on to a live person who will manually review your case. This is a lengthy process with no guaranteed outcome.
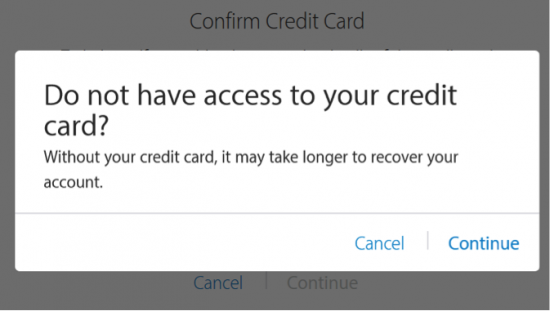
Worst case scenario, you can still use your replacement SIM card to receive the code once you get back home.
Preparing for Emergencies
You can make your life significantly easier in case of emergencies if you do a few steps ahead of time.
Two-Step Verification: Log in to your Apple account and print out the Recovery Code. Cut it out and put in your wallet. Make sure you have this code with you when traveling. Store separately from your iPhone. Alternatively, you may store this Recovery Code at home, asking a member of your household to spell this number when you need it.
Two-Factor Authentication: There is no Recovery Code for accounts with Two-Factor Authentication. Reinstating access to your account depends on how much information you have on file with Apple, and how much of that information you can correctly confirm during the recovery process. Make sure to have at least one credit card on file. Bring this card with you while traveling. It may be a good idea to write down the card number and keep it home with your family members. If your wallet goes missing, you will be able to confirm the card number with Apple (and it will be easier to block the stolen card with your bank as well). Verify additional phone numbers (such as your spouse’s); at very least, you’ll be able to receive a verification code to that number in case of emergencies.
Apple’s official recommendation include:
- Remember your Apple ID password.
- Use a device passcode on all your devices.
- Keep your trusted phone number(s) up to date.
- Keep your trusted devices physically secure.
Note that you can verify more than one phone number for the purpose of two-factor authentication. While this generally weakens security, a verified phone number may become invaluable in emergencies.
One more thing. Make sure you know the phone numbers of your family members by heart as opposed to bringing them up from your phone book every time you call!


