Open-Sourcing Raspberry Pi Software for Firewall Functionality: Secure Sideloading of Extraction Agent
June 19th, 2023 by Elcomsoft R&DCategory: «Mobile», «Tips & Tricks»
We are excited to announce the release of an open-source software for Raspberry Pi 4 designed to provide firewall functionality for sideloading, signing, and verifying the extraction agent that delivers robust file system imaging and keychain decryption on a wide range of Apple devices. This development aims to address the growing security challenge faced by forensic experts when sideloading the extraction agent using regular and developer Apple accounts.
Important: older developer accounts created before June 6, 2021, are exempt from the verification process. If you are using one of these accounts, you will not need a firewall to run the extraction agent.
TL&DR
To perform a low-level extraction of iOS and iPadOS devices, the extraction agent, an essential app, needs to be sideloaded onto the device under investigation. Each sideloaded app, including the extraction agent, must be signed with a unique digital signature specific to the device. When launching a newly sideloaded app on an iPhone or iPad, users are prompted to verify the digital signature, requiring the device to establish contact with an Apple server. However, it is crucial to be aware that connecting the device to the internet poses the risk of remote blocking or erasing its content, especially if it is part of an evidence base.
Previously, we recommended a solution that involved enrolling the Apple ID used for signing the sideloaded app into the Apple Developer program, which in turn allowed for the validation of the digital signature without the need for the device to contact an online server. Unfortunately, due to recent updates on Apple’s side, even digital signatures associated with new developer accounts must now undergo verification with an Apple server. Consequently, this reintroduces the potential risks that were previously exclusive to non-developer accounts. Considering these changes, we have developed a solution based on a Raspberry Pi 4 with open-source software that minimizes risks by limiting the device’s connection solely to the server required for certificate verification.
The importance of extraction agent and the decline of checkm8
The extraction agent is a small app for iOS that we developed in-house to enable low-level file system extraction and keychain decryption on Apple devices being investigated. Once installed onto a device, the extraction agent attempts to escalate its privilege level to break out of sandbox and gain full access to the file system and relevant encryption keys to access and decrypt keychain records.
The significance of the extraction agent cannot be understated, especially as the relevancy of checkm8 diminishes over time. With fewer checkm8-compatible devices and an increasing need to reset passcodes to access information, essential evidence is at risk of being lost. The compatibility gap between checkm8 and iOS 16 has reached critical levels, and iOS 17 can be installed on even fewer devices that are vulnerable to checkm8. While checm8 remains a remarkable extraction method, it is clear that a new approach is necessary.
Agent-based low-level extraction through extraction agent is gaining traction as a viable alternative. Hardware-wise, the extraction agent supports all iPhone and iPad models, including the latest iterations. However, it is important to note that the support for various iOS versions is never complete and requires significant catching up when it comes to supporting the newest builds.
Installing the extraction agent is a challenge
One of the most daunting challenges for forensic experts lies not in the usage but in the installation process of the extraction agent. Since the extraction agent will never be accepted into the App Store, experts must resort to sideloading to install the agent onto a device. The sideloading requires the use of a set of Apple ID credentials to sign the .ipa file being installed. Ideally, an Apple Developer Account, preferably an older one, is required for that purpose. However, even using a developer account is not without its complications.
First, this Device registration update states that, as per Apple’s guidelines, only the first ten devices are added immediately into the Developer program, while subsequent additions face delays of up to three days. This means that the extraction agent cannot be signed and deployed instantaneously. Moreover, online verification of provisioning profiles has also changed for developer accounts created after June 6, 2021 as detailed in the Provisioning profile update.
Contrary to previous practices, the verification now requires connecting to an online server to verify the digital signature:
New Apple Developer Program memberships created after June 6, 2021, require development- and ad-hoc-signed apps for iOS, iPadOS, and tvOS to check in with the PPQ service when the app is first launched. Your device must be connected to the internet to verify the certificate used to sign your app. If you’re behind a firewall, make sure that it’s configured to allow connections to https://ppq.apple.com. If the device can’t successfully make a connection, the app may not launch. If your app is running in a highly restrictive network environment or you need to temporarily build offline, alternative workflows are available.
Contrary to what is stated in the update, the verification takes place on humb.apple.com (and not on ppq.apple.com, which is used for a similar purpose for non-developer accounts), which has a dynamic IP that changes every five minutes. It is crucial to note that this verification occurs at the first launch of the agent or any other signed and uploaded application.
After these updates, the overall utility of developer accounts for the purpose of sideloading the extraction agent has significantly diminished, with standard accounts once again becoming increasingly attractive. While standard accounts limit the number of devices to three per week, creating a new Apple ID can circumvent this limitation if necessary. On the other hand, developer accounts face delays beyond the initial ten devices and are now subject to online verification during agent launch. Consequently, finding a solution for firewall functionality becomes essential for both types of accounts.
Advantages of developer accounts
Despite the challenges faced by developer accounts, they still offer certain advantages over regular, non-developer Apple ID’s. First and most importantly, Windows users can only utilize developer accounts to sideload the extraction agent. The sideloading process we developed for installing the extraction agent with regular, non-developer Apple IDs requires a Mac. Finally, older developer accounts created before June 6, 2021, are exempt from the verification process. For these accounts, you will not need a firewall solution.
Possible alternatives
If you don’t have a Raspberry Pi, you may be able to set up a firewall in an alternative way. We have already published a method that effectively turns your Mac into a firewall. While this method does not require additional hardware, it is more complex and less reliable compared to the Raspberry Pi based solution.
Another method involves setting up a firewall on your router, on which you can try to configure a whitelist. This, however, may not be simple. Even if you know all the addresses that ppq.apple.com resolves to (there are only a few of them), humb.apple.com can resolve to a much wider range of addresses. Only a very small number of routers with standard firmware allow whitelist functionality, especially based on the domain name rather than IP. Alternatively, you may try an alternative firmware such as OpenWRT, which is outside the scope of this article.
Finally, yet another alternative may appear for users in some jurisdictions in iOS 17. According to 9to5mac, a report last year revealed that Apple was working on allowing sideloading with iOS 17, but so far it didn’t happen in the first beta. We are waiting eagerly for the outcome of the new EU regulation.
Using the Raspberry Pi 4 as a firewall
Our Mac-based solution has been available for quite some time, but its usage can be complex and prone to errors (let alone the fact that it is not available to Windows users). It is important to be aware about the risks associated with devices being investigated connecting to the internet, with remote locking or remote wipe on the extreme end of the spectrum, and unwanted data synchronization on the other, which can lead to significant changes and jeopardize admissibility of evidence obtained from such devices.
To solve these issues, we are introducing a new open-source software that transforms the Raspberry Pi 4 into a firewall. With one end of the Pi box connected to the router and the other to the phone, this solution provides enhanced security during the signing and verification process. The software can be found in the public repository on GitHub. It is worth noting that Elcomsoft has an extensive presence on GitHub, with currently 19 projects and more to come. Instructions for using the software will be provided separately in a subsequent article, and rest assured, it is remarkably simple to set up (with a few nuances to consider).
Finally, our solution should work for any other sideloaded applications signed with either regular or developer accounts, which includes alternative agents.
To reduce the risks of exposing the iPhone device being remotely tampered with, we’ll need to restrict it’s online connectivity. Ideally, the iPhone should be only able to connect to a single certificate validation server – with all other communications being terminated. For this we developed an open-source software for the Raspberry Pi 4. This article contains step by step instructions for setting up a Raspberry Pi 4 as a firewall for sideloading the extraction agent.
Pre-requisites
You will need the following hardware:
- Raspberry Pi 4 or newer (e.g. Raspberry Pi 4 Model B)
- microSD card
- Lightning to Ethernet adapter
- USB to Ethernet adapter
Instructions for setting up a Raspberry Pi as a functional firewall
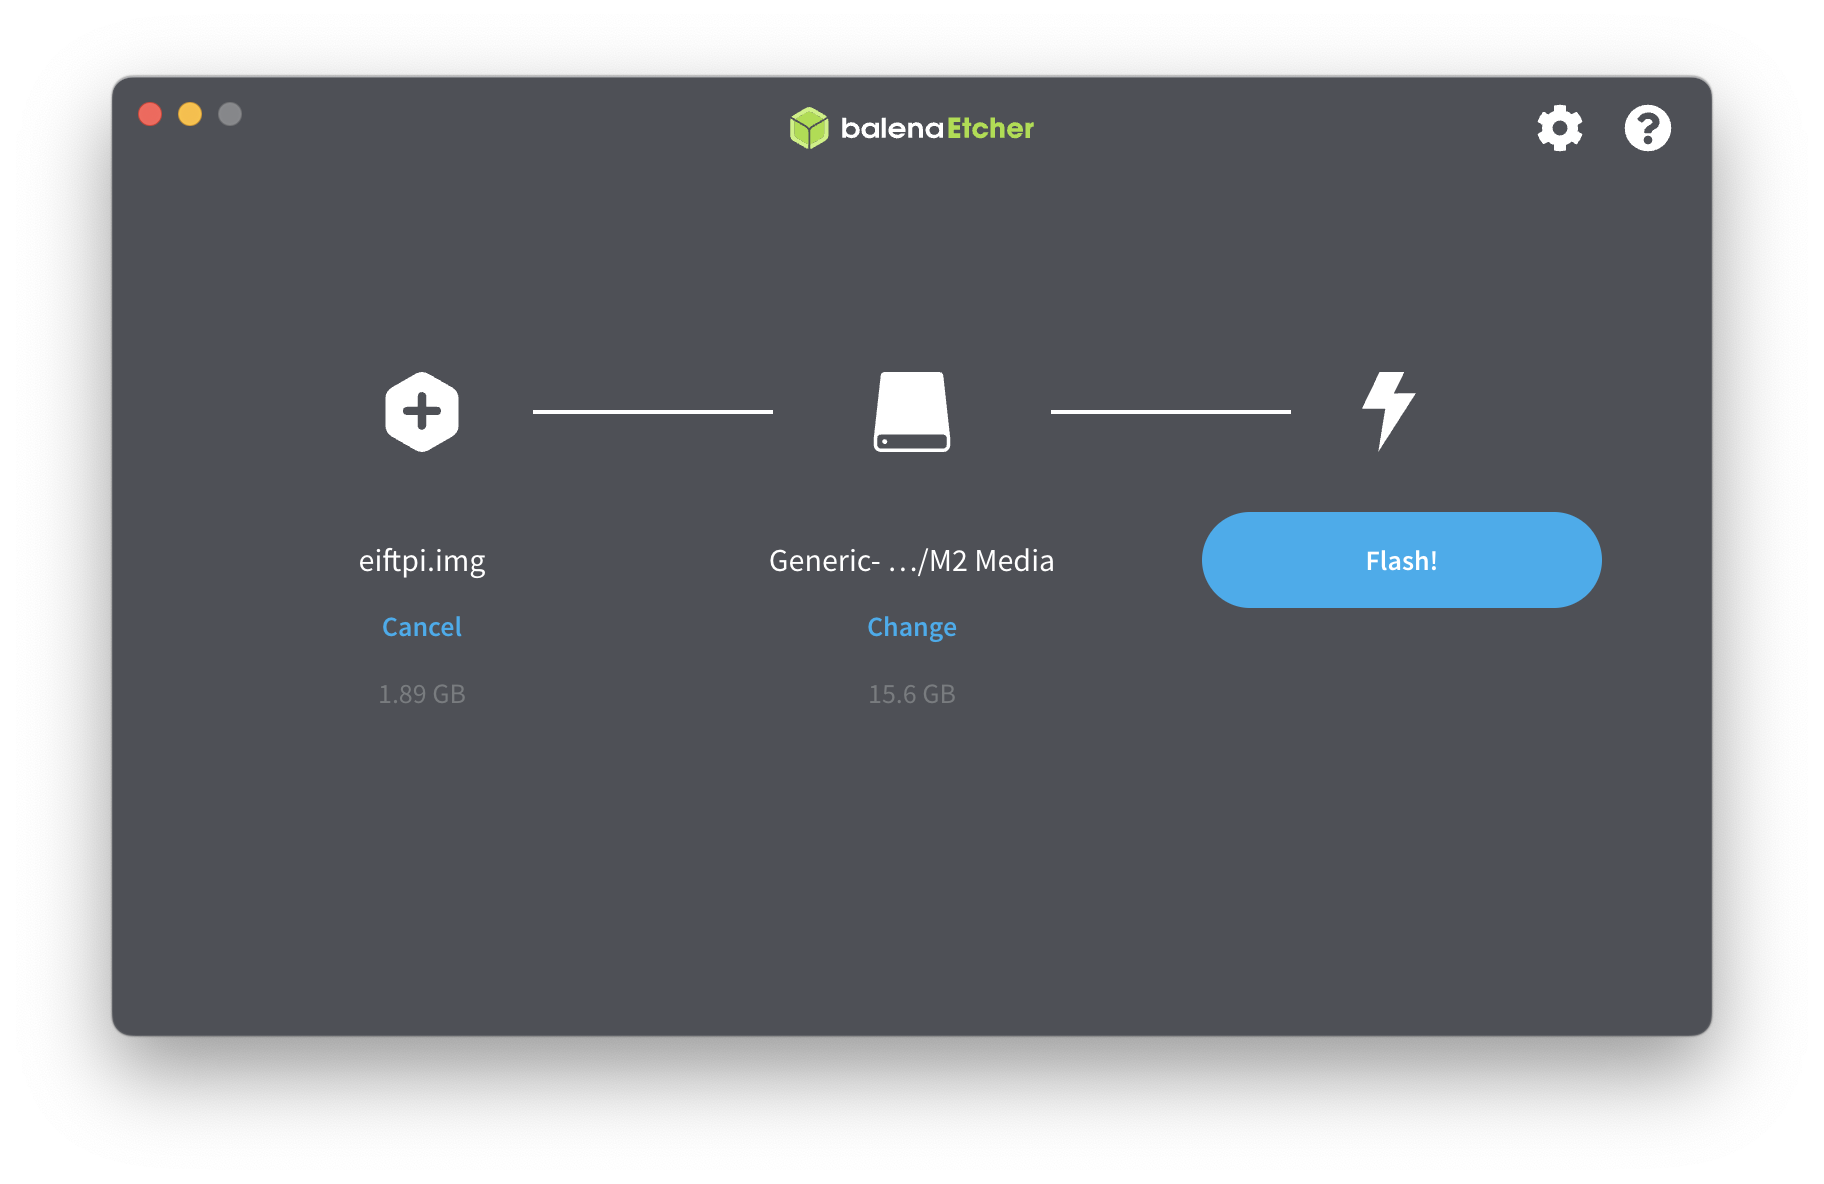
First, download the firmware image from GitHub – Elcomsoft/eiftpi and flash it to an SD card using software like balenaEtcher. You can download balenaEtcher from the following link: https://etcher.balena.io/. Then follow these steps:
- Insert the SD card into your computer
- Launch balenaEtcher and select the downloaded/compiled firmware image (eiftpi.img)
- Choose the SD card as the target drive
- Click on the “Flash!” button to write the firmware image to the SD card
- Once the process is complete, remove the SD card from your computer
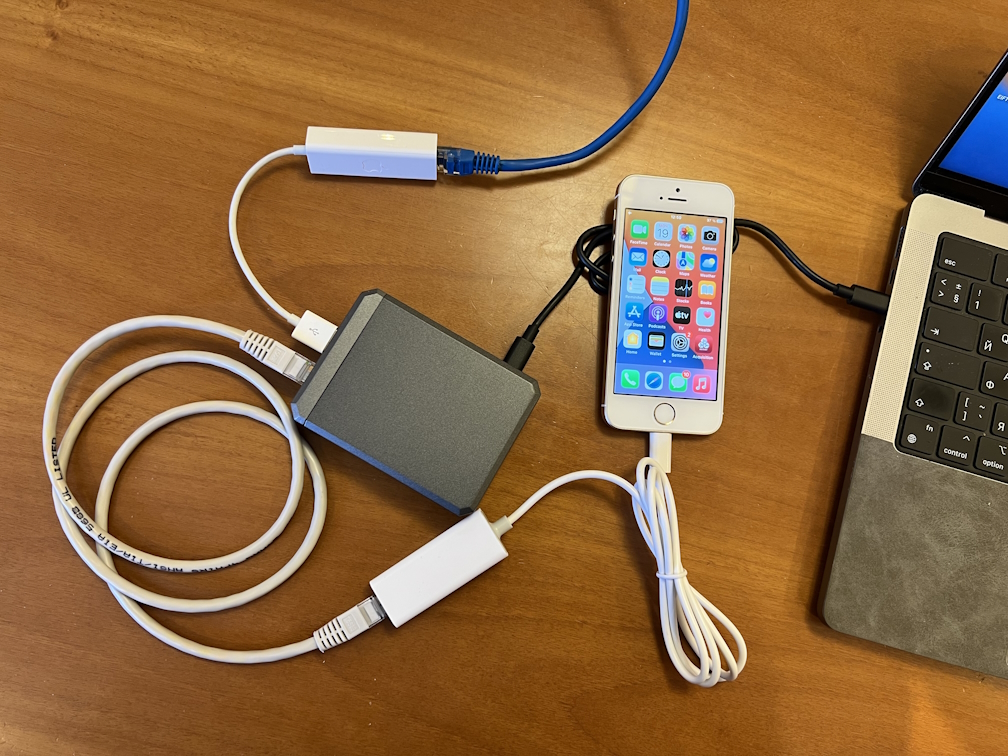
You will need two network interfaces on the Raspberry Pi. One interface will be connected to the internet, and the other will be used to connect the iPhone. To connect the iPhone, you will need a Lightning to Ethernet adapter.
- We recommend to use a USB-A to Ethernet adapter to connect the Raspberry Pi to the internet.
- Alternatively, you can connect the Raspberry Pi to the internet via Wi-Fi.
Important: the iPhone must be connected to the built-in Ethernet port.
Note: We purposely use a wired connection and do not recommend enabling WiFi on the iPhone as it may cause the device to accidentally to connect to a different known network, which would expose the risk of remote wipe.
For a simple and more reliable setup, use two wired connections. This is why you need the USB to Ethernet adapter.
If you prefer to connect the Raspberry Pi to Wi-Fi, follow these steps:
- Connect the Raspberry Pi to your Mac using Ethernet. (Note: If your MacBook does not have an Ethernet port, you will need a USB-C to Ethernet or USB-A to Ethernet adapter.)
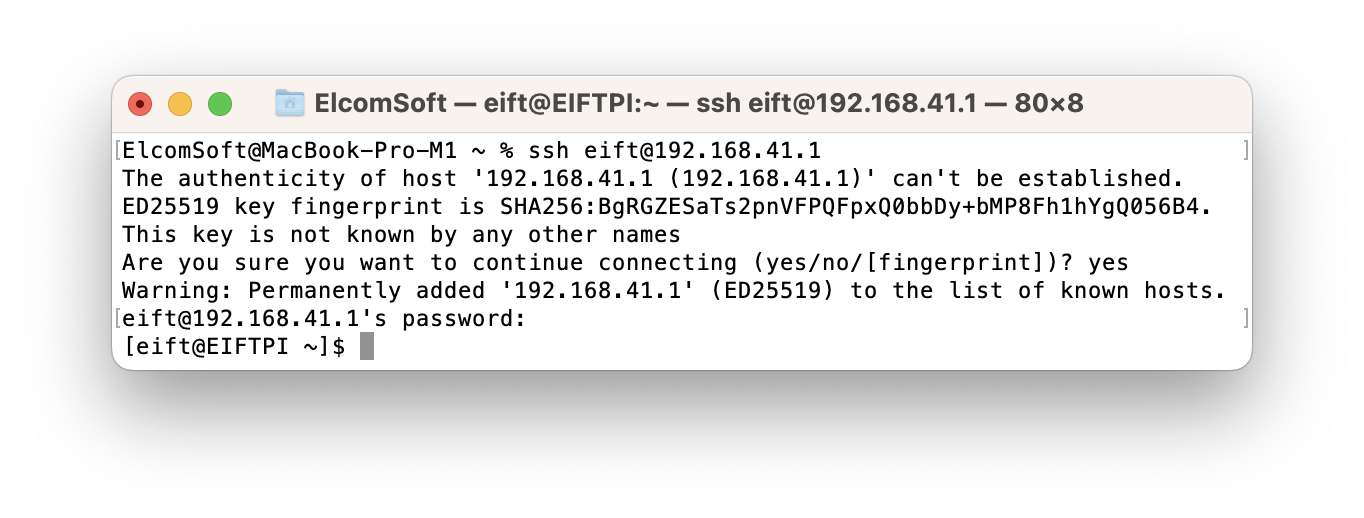
- Open a terminal on your Mac and enter the following command:
ssh eift@192.168.41.1- The password is “Elcomsoft” (without quotes).
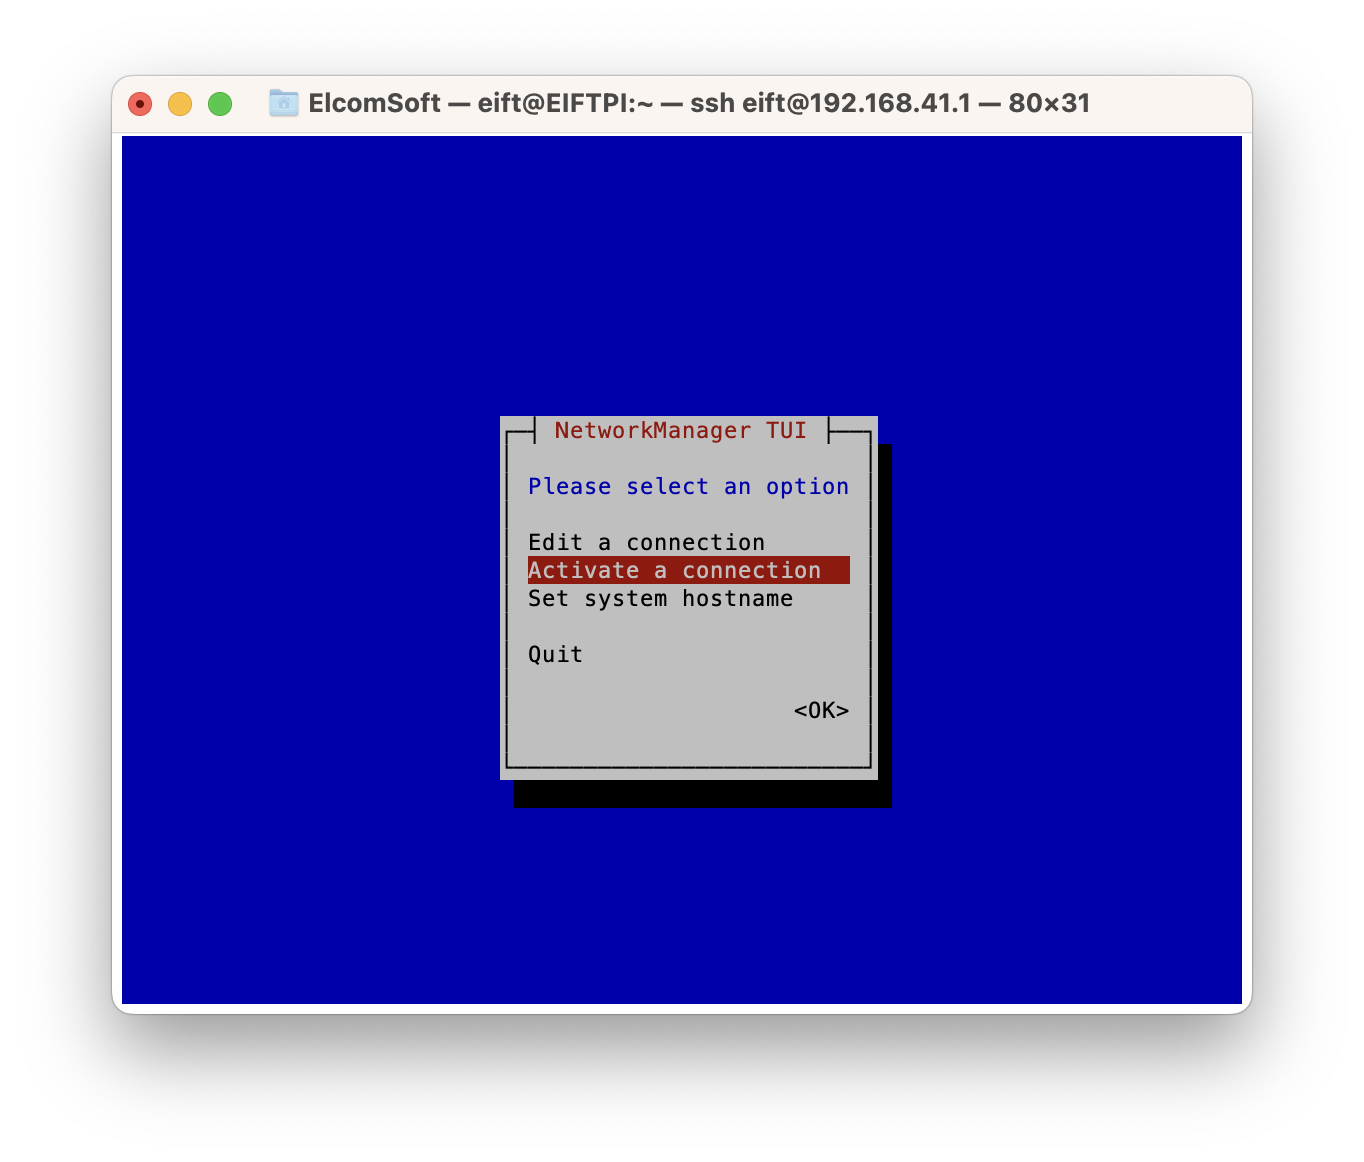
- Once you are logged in, run the following command to configure Wi-Fi:
sudo nmtui
- The nmtui interface will allow you to easily connect to the Wi-Fi network.
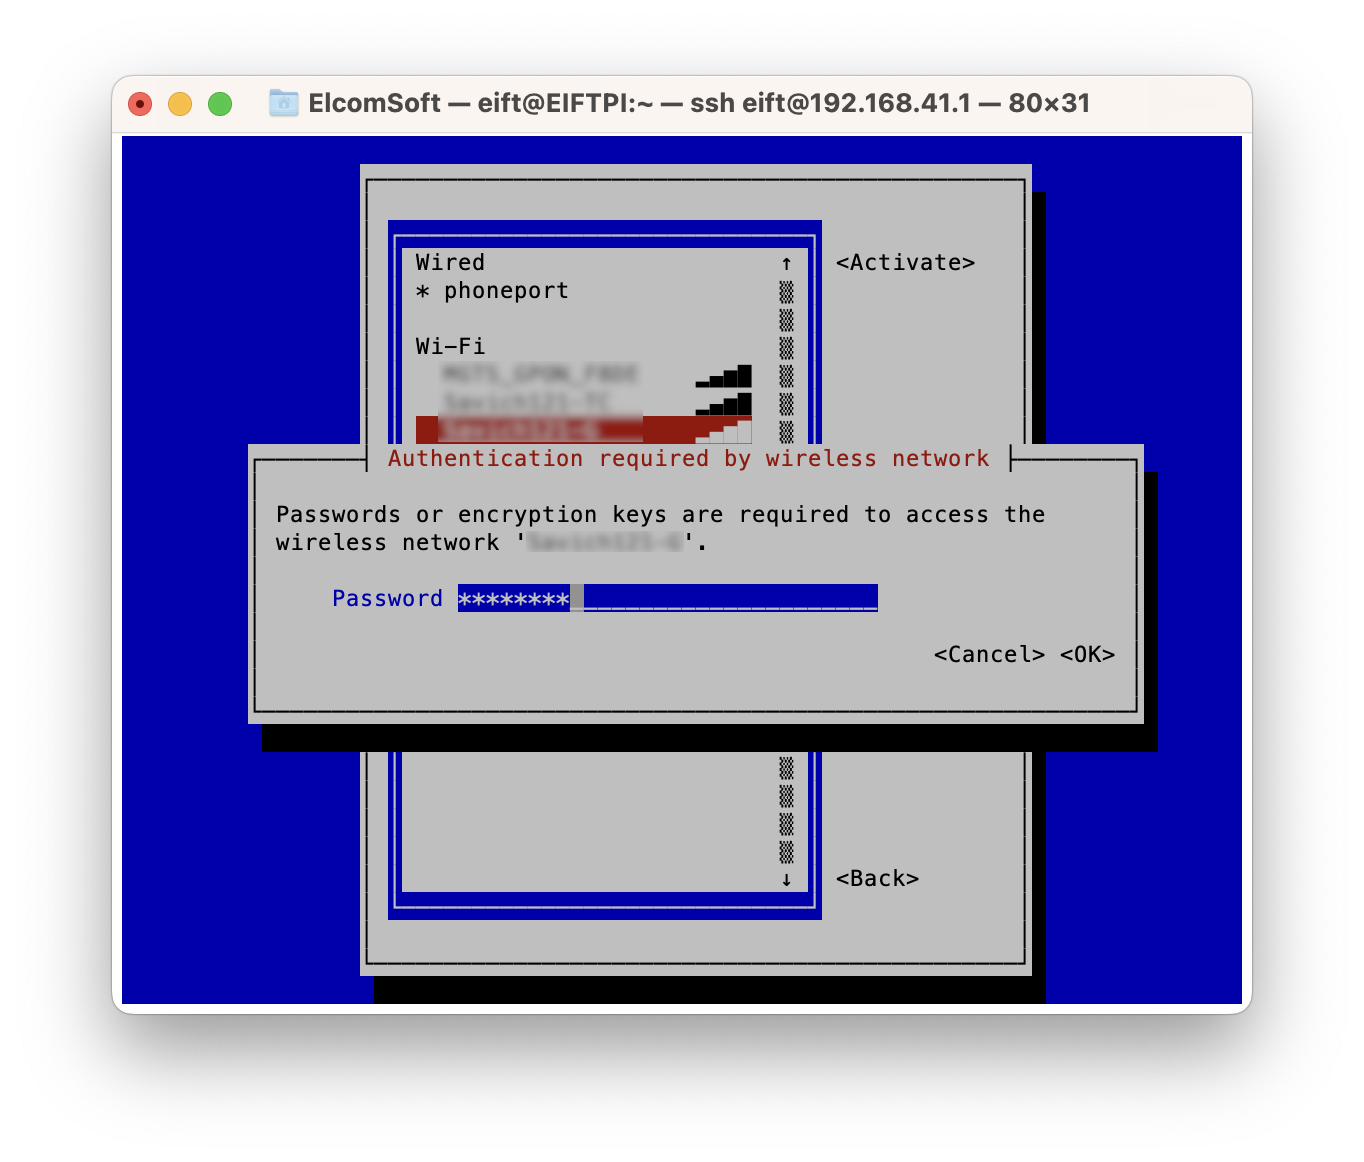
That’s it! You have now set up the Raspberry Pi with the firmware. Connect the Pi to the network (either via Ethernet or Wi-Fi) and connect your iPhone to the Pi using a cable. Note: we recommend to first use a test iPhone to ensure that internet access is restricted, while only ppq.apple.com, humb.apple.com and elcomsoft.com should be accessible.
Conclusion
As we have shared our open-source software for Raspberry Pi 4 with firewall functionality, we aim to secure the sideloading of the extraction agent in the iOS ecosystem. The limitations of checkm8 and the complex nature of developer accounts have necessitated new approaches to ensure data security. By embracing open-source solutions and providing alternatives, we strive to empower forensic experts and enhance the effectiveness of the extraction agent in safeguarding valuable information.
REFERENCES:

Elcomsoft iOS Forensic Toolkit
Extract critical evidence from Apple iOS devices in real time. Gain access to phone secrets including passwords and encryption keys, and decrypt the file system image with or without the original passcode. Physical and logical acquisition options for all 64-bit devices running all versions of iOS.
Elcomsoft iOS Forensic Toolkit official web page & downloads »

- Elcomsoft Phone Breaker 11.03: universal binary for Macs, SMS two-factor authentication restored16 July, 2026
- iOS Forensic Toolkit 10.10 adds pairing-free sideloading of the extraction agent24 June, 2026
- Elcomsoft Phone Breaker 11.2: downloads iOS 26 iCloud backups18 June, 2026
- Elcomsoft Phone Breaker 11.1: reliable iCloud backup extraction26 May, 2026
- ElcomSoft Phone Breaker 11: full overhaul of iCloud extraction30 April, 2026