Using DC Dimming to Stop PWM Flickering in iPhone 11 Pro and Pro Max, Google Pixel 4 and 4 XL
November 6th, 2019 by Oleg AfoninCategory: «Tips & Tricks»
Just like the previous generation of OLED-equipped iPhones, the iPhone 11 Pro and Pro Max both employ OLED panels that are prone to flickering that is particularly visible to those with sensitive eyes. The flickering is caused by PWM (Pulse Width Modulation), a technology used by OLED manufacturers to control display brightness. While both panels feature higher peak brightness compared to the OLED panel Apple used in the previous generations of iPhones, they are still prone to the same flickering at brightness levels lower than 50%. The screen flickering is particularly visible in low ambient brightness conditions, and may cause eyestrain with sensitive users.
Google has equipped its new-generation Pixel 4 and Pixel 4 XL devices with innovative OLED panels offering smooth 90 Hz refresh rates. While these OLED panels look great on paper, they have two major issues. First, the 90 Hz refresh rate is only enabled by Google at brightness levels of 75% or higher. Second, the displays flicker at brightness levels below 75%.
In this article, we’ll describe methods to get rid of OLED flickering on the last generations of Apple and Google smartphones without rooting or jailbreaking.
PWM and DC Dimming
Last year, we published a comprehensive write-up on PWM flickering: iPhone Xs PWM Demystified. If you haven’t read it before, check out the “OLED Technology: PWM Brightness Control” and “What Apple Does About PWM Flickering” chapters to figure out what’s it all about. In 2019, manufacturers started realizing that PWM brightness control has a number of users who either can see the flickering or are suffering with headaches and sore eyes. To mitigate the issue, a number of Chinese manufacturers (Oppo, OnePlus, Xiaomi and Huawei) implemented DC Dimming, a feature that rids of the flickering by controlling brightness directly.
Today, the DC Dimming feature remains more of a gimmick. While displays without flickering look great and don’t cause any ill effects, the current implementation is purely software-based. The display controllers are still hard-wired to change brightness levels with pulses; any changes to that are implemented in form of semi-transparent overlays in software. This is clearly visible on devices featuring under-display fingerprint scanners. Such devices clearly show flickering on their respective lock screens (where fingerprint scanners are supposed to do their work). It is only after the user has logged in the DC Dimming takes place.
DC Dimming in Apple iPhone 11 Pro and 11 Pro Max
In order to reduce PWM flickering on the iPhone 11 and iPhone 11 Max, we will use iOS Display Accommodations > Reduce White Point. This feature dims the maximum brightness by applying a dark filter over the display. Once you enable Reduce White Point, the brightness of whites and bright colors will be dimmed.
If you were using an iPhone or iPad equipped with an IPS display, the physical level of backlight would remain stable, but visible brightness would be reduced. On the IPS display, using Reduce White Point would cause higher power consumption, reduce visible contrast and produce dull colors. There are no ill effects on OLED-equipped devices since there is no backlight. OLED panels have infinite contrast and wide color gamut, so reducing white point does not have much effect on the contrast or colors. If physical brightness of your iPhone 11 or 11 Max display remains at 50% setting or higher, there will be no PWM flickering either; the Reduce White Point filter will, however, dim the display to acceptably low levels. In other words, activating Reduce White Point provides a much more pleasant visual experience in low ambient light.
Step 1: Using iOS Display Accommodations to Enable DC Dimming
Activating Reduce White Point requires the following steps:
Launch Settings from your Home screen
Tap Accessibility
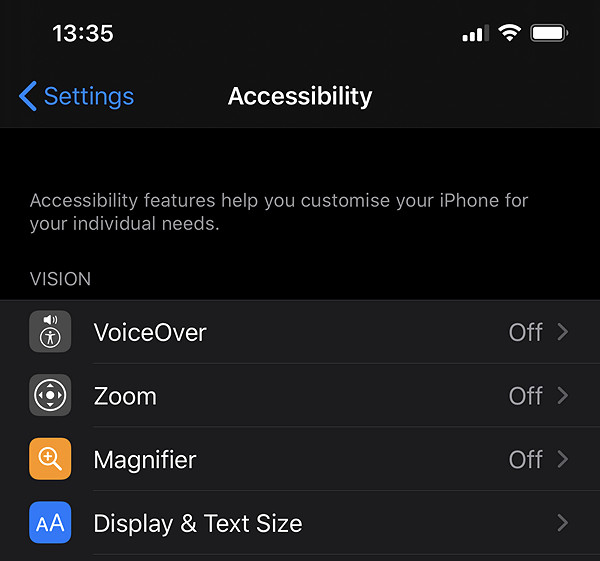
Tap Display & Text Size
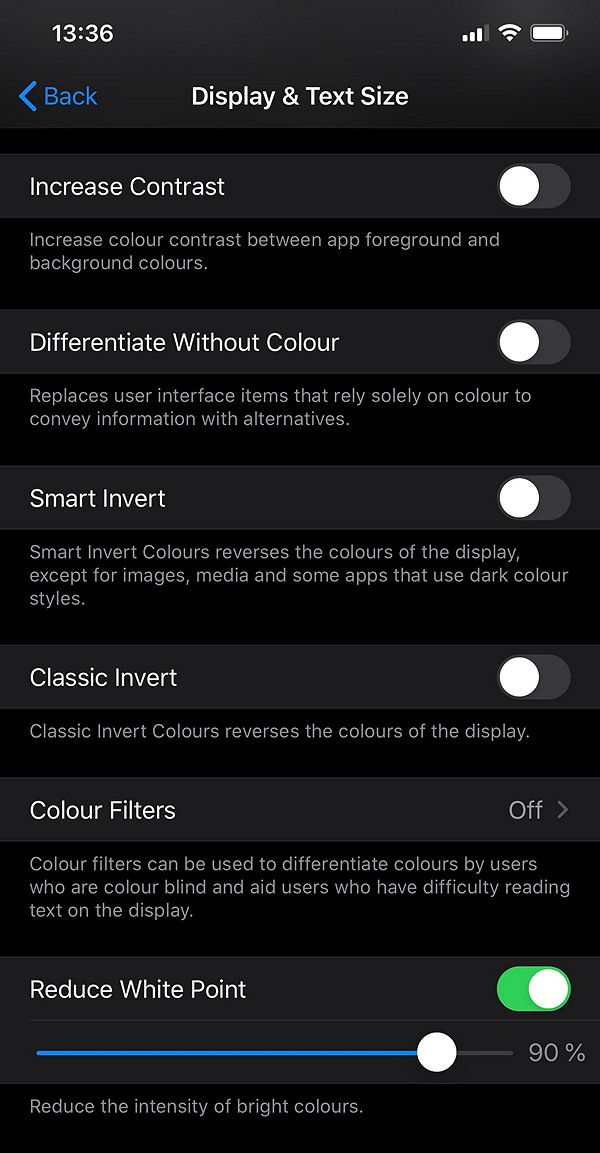
Tap the switch next to Reduce White Point and drag the slider to your preferred setting. A good starting point for the iPhone 11 and iPhone 11 Max is 95%. For stronger dimming effect (to be used in extreme darkness) use 100%.
Finally, pull down the Control Panel of the iPhone and set the Brightness slider to the 50% setting or above. This ensures that there is no visible flickering.
If you have to drag the Brightness slider to a setting lower than 50%, you will start seeing some flickering. If this is the case, go back to Display Accommodations and increase the value of Reduce White Point. In extreme darkness, set the filter of Reduce White Point to 100%.
Step 2: Use Shortcuts to Quickly Enable and Disable DC Dimming
After successfully completing the first step, you have reduced the white point of your display significantly. This in turn means that while your display looks great (and is flicker-free) in low ambient light, it will look very dim outdoors. At this point, you’ll want a way to quickly disable Reduce White Point without going through the Settings app.
In order to quickly control PWM, you will need to create an Accessibility Shortcut.
First, search through the Settings app for “Accessibility Shortcut”, or go directly to Settings > General > Accessibility and scroll all the way down.
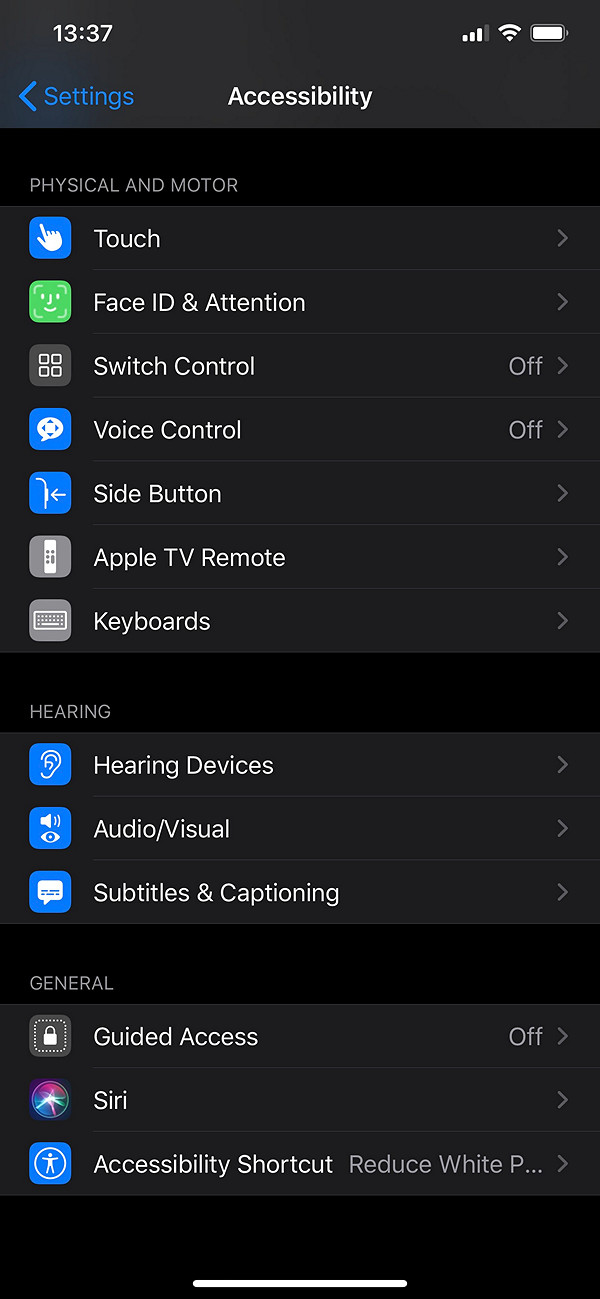
Tap Accessibility Shortcut, then select Reduce White Point as shown below.
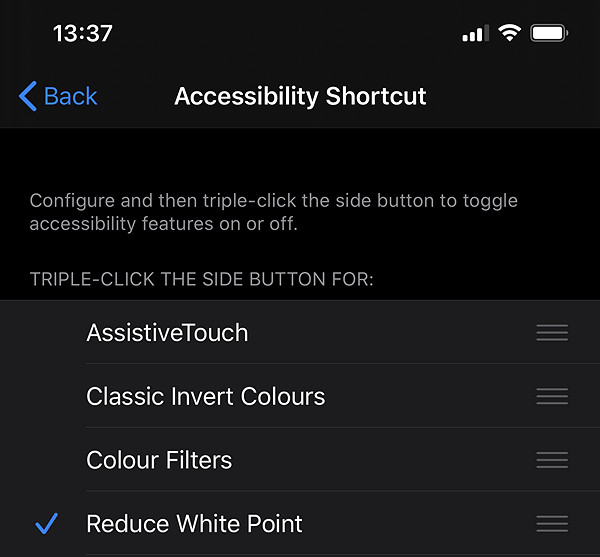
This toggles the Reduce White Point with a triple-click of the side button (the Sleep/Wake button), dimming your screen to make your iPhone Xs or Xs Max effectively PWM-free. Another triple-click of the side button, and your display is back to its normal brightness.
Step 3: Use Control Center to Control DC Dimming
iOS 13 has an additional way of turning DC Dimming on or off through the Control Center via Accessibility shortcuts. You can use this method to add an icon to your iPhone 11 or 11 Max Control Panel in addition to the power button trick.
To add the Accessibility shortcut to your Control Center, you will need to customize Control Center by following these steps.
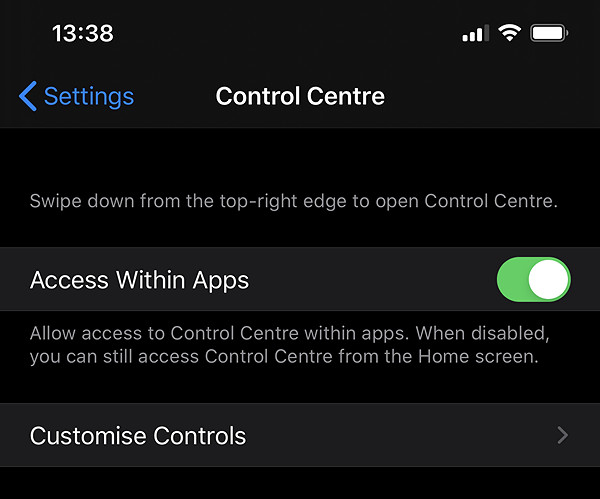
Open the Settings app and locate Control Center (just under General).
Tap Control Center > Customize Controls.
The Accessibility Shortcuts icon should be available under More Controls. Tap next to Accessibility Shortcuts.
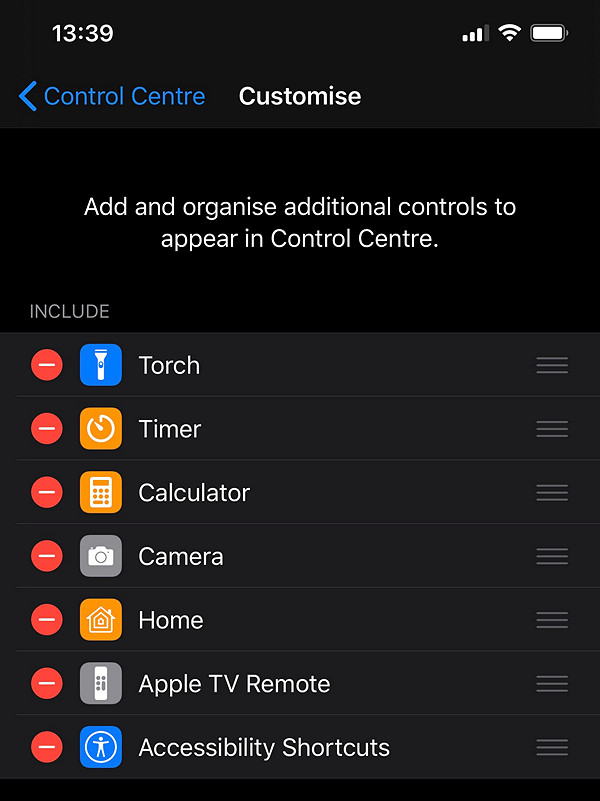
The Accessibility Shortcuts icon will be added to the list of controls. Pull down the Control Center to verify that the shortcut has been added. You may adjust the position of the Accessibility Shortcuts icon in your Control Center by dragging it up and down in the Control Center Settings.
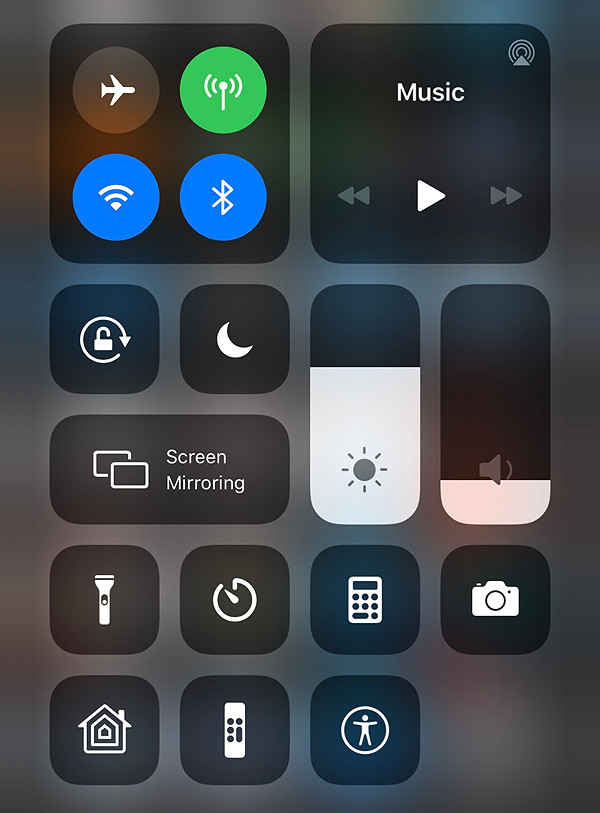
To activate the accessibility feature from the Control Center, pull down the Control Center, then tap the Accessibility Shortcuts icon.

Congratulations! You can now quickly enable and disable DC Dimming of the iPhone 11 or 11 Max display via Control Center.
DC Dimming in Google Pixel 4 and 4 XL and the 90 Hz Refresh Rate
The Pixel 4 and Pixel 4 XL have innovative OLED panels with higher refresh rates of 90 Hz vs the usual 60. While these OLED panels look great on paper, they have two issues. First, the 90 Hz refresh rate was only enabled by Google at brightness levels of 75% or higher in the original firmware. The November Android update seemingly fixed the issue. Second, the displays flicker at brightness levels below 75%, and this issue has not been fixed (and it’s very unlikely it’ll be ever addressed by Google).
Following the update, the displays on the two devices will stick to the 90Hz refresh rate under more circumstances. However, the two devices will exhibit different behavior. The Pixel 4 will switch to 90Hz whenever the display brightness is above 42% and the ambient brightness level will have no effect on the refresh rate. On the other hand, the Pixel 4 XL will stick to 90Hz irrespective of the display or ambient brightness.
Source: XDA
What was the reason behind Google’s original decision to limit the availability of the 90 Hz refresh? While the official reasoning has to do with battery life issues, there’s more to Smooth Display than meets the eye. According to XDA, “It’s worth noting that these changes have led to another issue with the Pixel 4 XL. Since the device will now run at 90Hz in more situations, the display gamma bug is now more noticeable on it. Due to this, when you turn off and on the display, it applies the wrong gamma table and the display looks very contrasty and shifted towards a magenta hue.”
There are issues with gamma, and there are also issues with the 90 Hz refresh rate not being in proper sync with the 240 Hz OLED flicker at low brightness levels. Let me elaborate.
Most OLED displays use PWM to control brightness at lower levels. PWM-enabled displays flicker at a frequency of 240 Hz. This frequency matches evenly with a screen refresh rate of 60 Hz; there are exactly 4 PWM cycles per one display refresh. So what if the display flickers at 240 Hz and the refresh rate is 90 Hz? There would be 2.666 PWM cycles per one display cycle, which could produce unwanted motion artefacts on the display, thus negating the “smooth” effect. It appears that Google engineers were concerned with this potential issue, effectively making Smooth Display work only at those brightness levels where there brightness was still controlled by DC and not PWM.
Why the November update then? It might have happened that further tests revealed that there were no discernable artefacts when enabling Smooth Display along with PWM flickering. Or the battery tax was not quite as severe as originally expected (at least on the XL model). Or both.
What you can do is simply disable PWM flickering altogether on the Pixel 4/4 XL or any other Android smartphone.
Enabling DC Dimming in Any Android Device
The idea is similar to what we used for enabling DC dimming on the iPhone 11 Pro. We’ll limit the device’s ability to lower display brightness beyond the level where PWM kicks in. The brightness will be controlled in stages. Between 100 and 75% (the latter number depends on your device; on most Samsung phones, the range would be 100-100), we’ll use the phone’s standard brightness controls. Lowering brightness beyond that point will use a variable density screen overlay. While this sounds complex and not very usable in real life, there are apps that make the process completely transparent for the user, taking care of all adjustments.
Before Android 8, you could use any of the many screen overlay apps such as Darker to dim the screen. Android 8, 9 and 10 implement an extra security measure disallowing screen overlays over the system clock and notifications panel. To overcome this restriction, you’ll either need root or an app that uses an overlay via Accessibility (thus requiring the Accessibility permission). At this time, there are only three apps like that.
The first app is available in Google Play: Lower Brightness Pro.
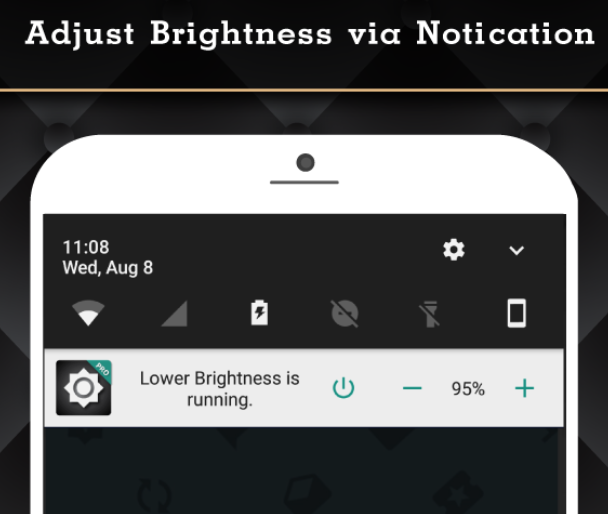
This app does automate OLED brightness control; however, it has two major drawbacks. First, auto brightness becomes awkward, so you’ll probably end up disabling the feature. Second, the filter opacity is controlled with the + and – buttons, which again is not very convenient.
The free PWMFree app available from XDA Developers offers better controls and one-tap activation from the quick toggles panel. The app is not available in Google Play.
The app I finally settled for is OLED Saver. This app ticks all the boxes:
- Dims the entire screen including the notifications area
- User-adjustable PWM threshold
- Quick toggle for enabling/disabling the service
- Brightness controlled with a slider and/or buttons
- Brings its own implementation of auto brightness control that can be adjusted to user’s liking
- While the app requires Accessibility permissions, it’s available in GooglePlay
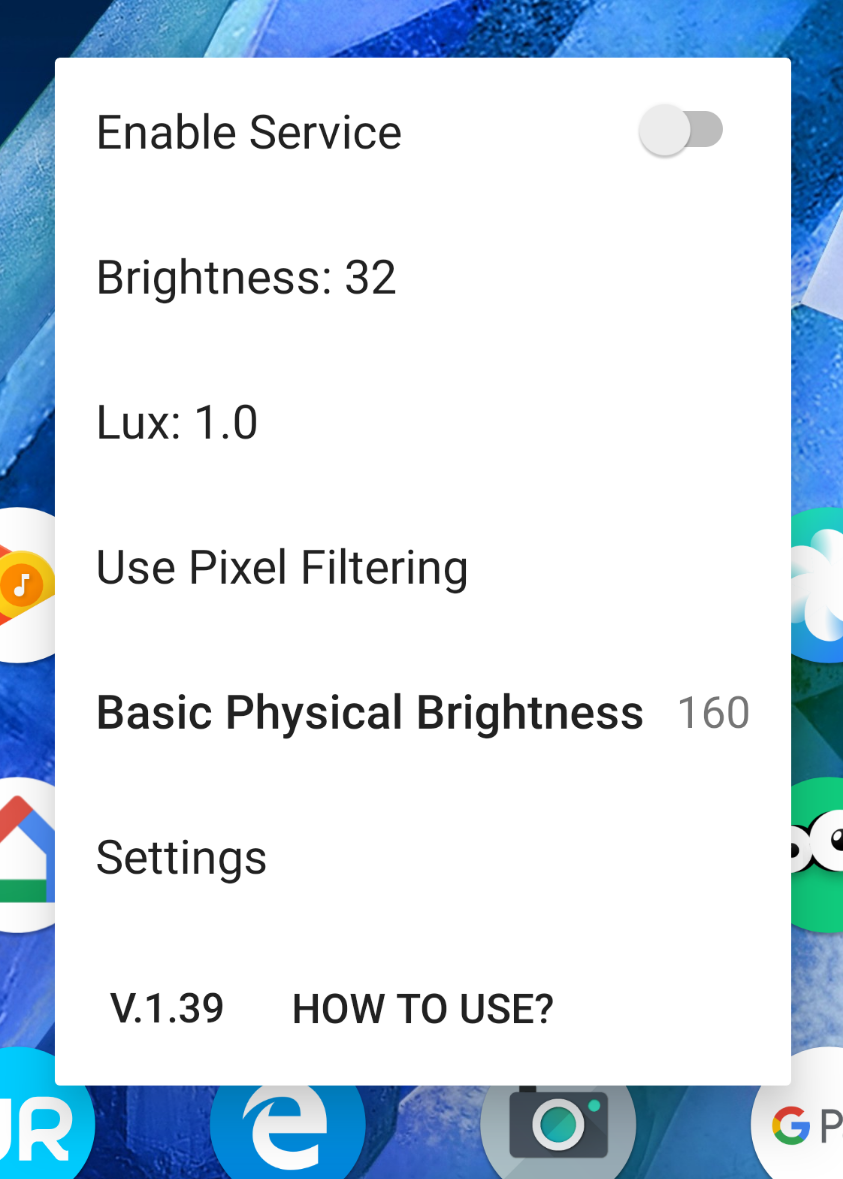
Note: the “Pixel filtering” feature dims pixels in checkerboard pattern, which may improve display gamma but reduce effective resolution.
After enabling the service, you can set up the PWM threshold and brightness compensation. You can use the + and – keys to adjust auto brightness features to your liking. This would be your new PWM-free DC Dimming brightness control:
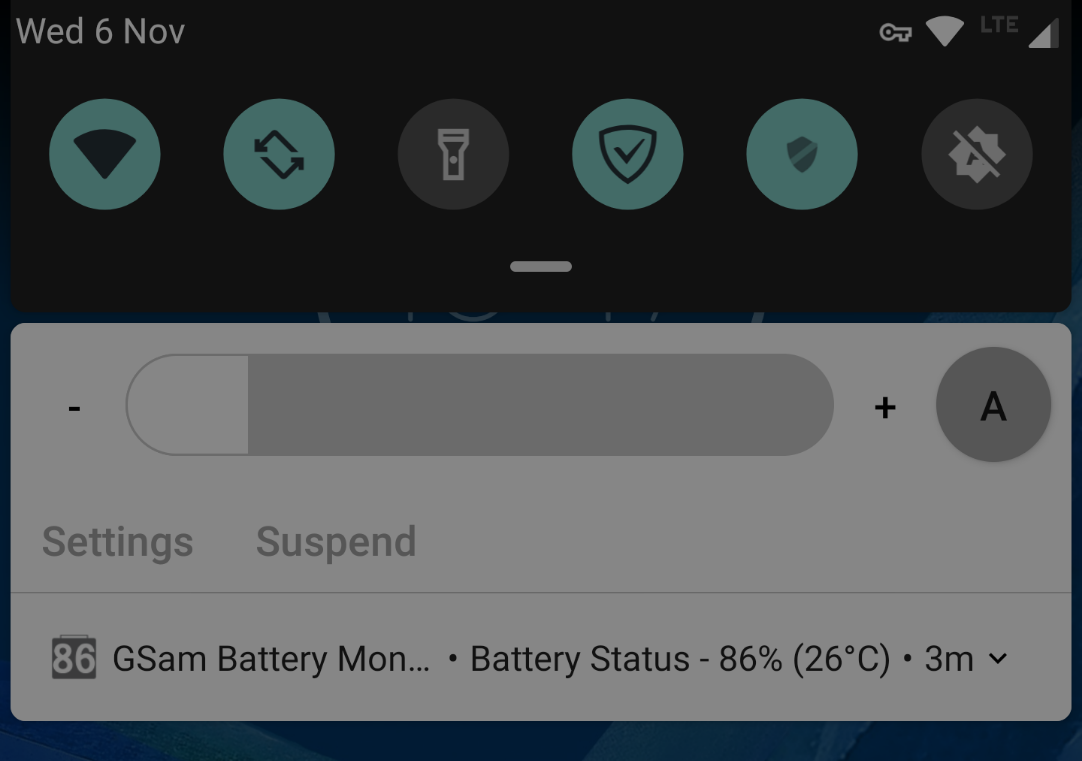
You can see OLED Saver in action: the screen shot is decidedly dim. This is dark screen overlay at work.
Additional Information
- What is DC Dimming & Why it’s Important for AMOLED Smartphones? (link)
- The Pixel 4’s 90Hz display only works at high brightness levels (link)
- Google has a blacklist of apps that won’t run at 90Hz on the Pixel 4 (link)
- How to configure the Pixel 4’s 90Hz Smooth Display: Enable, Disable & Force On (link)
- Google’s own code explains why the Pixel 4’s Smooth Display isn’t always as smooth as you’d like (link)
- Google promises another Pixel 4 software update, this time for the screen’s refresh rate (link)
- Xiaomi and OnePlus add DC-dimming as an alternative to OLED PWM in their smartphone OS (link)
- Xiaomi Mi 9 получил функцию DC dimming, берегущую глаза (link)
- [APP] AMOLED PWMfree (link)
- OLED’s Cause a Shift in Display Driving to DC Dimming to Improve Low Luminance Images (link)
- iPhone 11 Pro (Max) PWM eye strain(link)


- Elcomsoft Phone Breaker 11.03: universal binary for Macs, SMS two-factor authentication restored16 July, 2026
- iOS Forensic Toolkit 10.10 adds pairing-free sideloading of the extraction agent24 June, 2026
- Elcomsoft Phone Breaker 11.2: downloads iOS 26 iCloud backups18 June, 2026
- Elcomsoft Phone Breaker 11.1: reliable iCloud backup extraction26 May, 2026
- ElcomSoft Phone Breaker 11: full overhaul of iCloud extraction30 April, 2026