iOS Acquisition on Windows: Tips&Tricks
September 6th, 2019 by Vladimir KatalovCategory: «Did you know that...?», «Elcomsoft News», «Tips & Tricks»
When you perform Apple iCloud acquisition, it almost does not matter what platform to use, Windows or macOS (I say almost, because some differences still apply, as macOS has better/native iCloud support). Logical acquisition can be done on any platform as well. But when doing full file system acquisition of jailbroken devices using Elcomsoft iOS Forensic Toolkit, we strongly recommend using macOS. If you are strongly tied to Windows, however, there are some things you should know.
Starting the toolkit
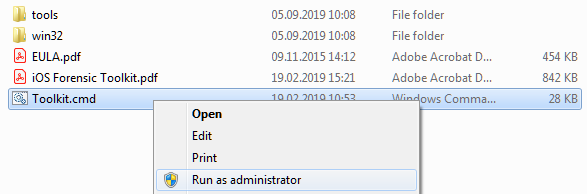
First of all, you have to start the toolkit with Administrator privileges – even if you are logged to the system as Admin. This is quite simple: simply locate the main program script (Toolkit.cmd) in Explorer, right-click on it and select Run as administrator.
The USB dongle supplied with your toolkit dongle should be already inserted. New (console) window is opened, and here is what you get there:
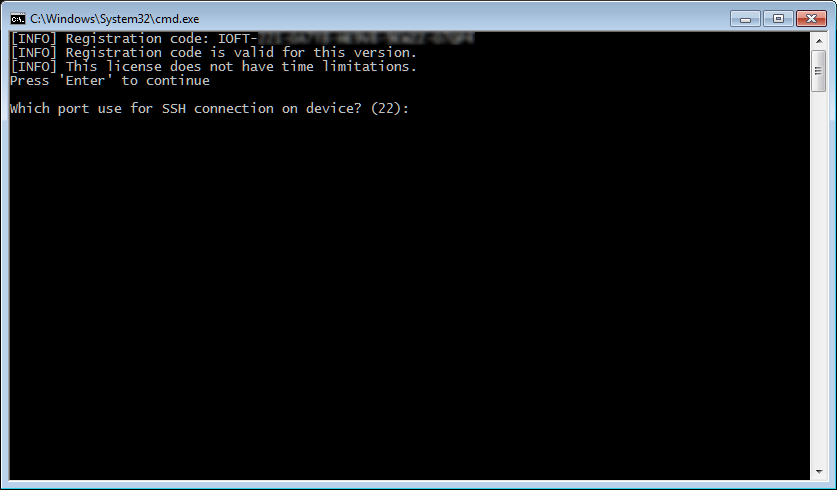
Your license code (IOFT-…) is the first thing printed there; you may need it when contacting our technical support or for license renewal.
Once you press ENTER on this screen, toolkit prompts for SSH port number for connection. Just press ENTER if you are going to use (advanced) logical acquisition only. If your device is 64-bit, running iOS 10 and have Meridian jailbreak installed – enter 2222 (and ENTER). For all other iOS versions and jailbreaks (btw, we recommend using doubleH3lix for iOS 10), then also use default 22.
Tunneling
To acquire data from jailbroken devices, we establish the connection first. Right after you confirmed the port number, another window should open:
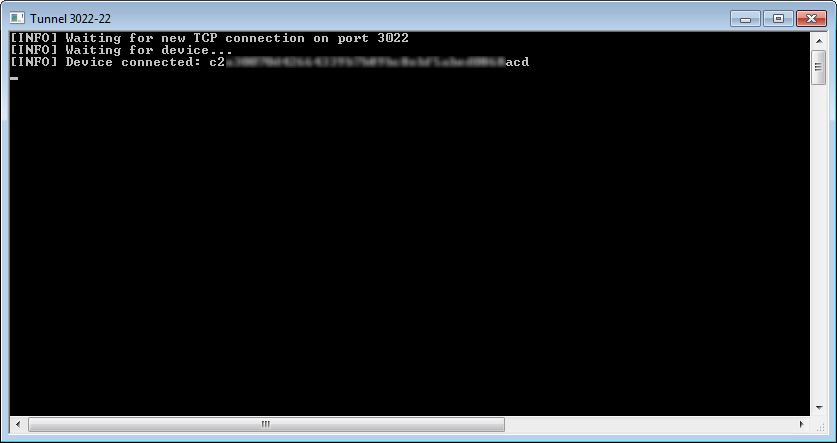
If it does not, something is wrong. We do our best to detect why connection cannot be established (and in this case, toolkit prints an error message and quits); still, there is an easy way to verify. Open command prompt, go to win32 folder of the toolkit and run the following command:
itunnel_mux.exe --iport N --lport 3022
(where N is the port number: 2222 for Meridian or 22 for all other jailbreaks, or if you do not work with jailbroken devices at all)
One possible error that may appear is:
[ERROR] Error 0x36B1 (14001): 'Unknown error'
[FATAL] Could not load .\iTunesMobileDevice.dll: ABORTING
In this case, simply install Microsoft Visual C++ 2005 Service Pack 1 Redistributable Package MFC Security Update.
Another important thing about this (tunnel) window is: you should NOT close it while toolkit is working. At the same time, when you exit from toolkit (by pressing ‘X’ in its menu, or by closing its main window, or by pressing Ctrl-C), this window remains open. At that time, you should close it manually before working with any other device.
Working with file system copy
I will not cover all the details about file system acquisition here – please follow the product manual and our other blog articles. However, there is a couple other things are specific to Windows.
So well, you get the full file system image, now what?
For 32-bit devices (now they are supported by older version of toolkit only), we were able to perform real physical acquisition by creating the bit-by-bit image. Such kind of image (DMG) was easier to work with, as you can simply mount it to the system (natively on macOS, or using 3rd party software on Windows).
For 64-bit devices, we can only get full system copy, including the files that you cannot get with logical acquisition, i.e. iTunes backup). So the data is in fact the same as with real physical acquisition (you may think of unallocated space, but forget it: for iOS, it is not technically possible to recover anything at all from it). The main difference is: file system is acquired as a .tar (tarball) archive. There are many reasons to use .tar instead of more popular .zip, but are now going to concentrate on what you can do with that archive.
The first and most obvious way is: simply open it in forensic tool or your choice. We recommend using our own Elcomsoft Phone Viewer for that – it is lightning fast, process the most critical data (evidence?), present it in a very convenient way (instead of huge complex tables like in most other packages), and of course can export it into Excel for further processing. But several other programs exist (and most of them support .tar archives).
However, you may need to analyse the data manually – there is no program on the market that work with ALL kinds of files (there are typically tens or hundreds thousand files on iOS devices).
First of all, always keep the original .tar archive even after unpacking it. When working with unpacked data, you may accidentally delete something, change the file properties, or modify some SQLite database and lose some important (deleted?) data by just opening it, as accompanying WAL (write-ahead log) will be merged.
As for unpacking itself, there is also a couple extremely important point (working on Windows, I think you remember).
First, run the .tar unpacking software (whether it is command-line tar itself or WinRAR) with Admin privileges, like you did that for toolkit itself. Otherwise, symbilic links (widely used on iOS) will not be restored; you are not going to lose any data, but with symlinks, the data is easier to navigate. Yes, Windows (even Windows 7) supports symlinks.
Second, it is better to unpack to the disk formatted with APFS – this is native Apple file system, used on most devices. You will have to install something like APFS for Windows by Paragon Software though. Otherwise (if you have NTFS drive only) some files simply will not be extracted because of using some special characters in their names.
Third (and probably the most important), Windows surprisingly has 260-character limit in file/path names by default, and so many files from .tar simply will not be extracted. Sounds crazy but true. Workaround? Enable using longer file names – it is possible starting with Windows 10 Anniversary Update. That can be done through Group Policy or by manual registry editing.
Conclusion
Again, we recommend using macOS for data acquisition – faster (yes, we compared), simpler (no dumb tunnel window and things like that), more reliable (‘thanks’ to Microsoft drivers) and all that. Still, Windows is still the main forensic platform for some reason, probably because most forensic companies do not have macOS versions of their software. But we do (and BlackBag is another good example – we love their software). Doing cloud forensics? Then macOS is preferred platform, too; our Elcomsoft Phone Breaker works better there.
REFERENCES:

Elcomsoft iOS Forensic Toolkit
Extract critical evidence from Apple iOS devices in real time. Gain access to phone secrets including passwords and encryption keys, and decrypt the file system image with or without the original passcode. Physical and logical acquisition options for all 64-bit devices running all versions of iOS.
Elcomsoft iOS Forensic Toolkit official web page & downloads »

- Elcomsoft Phone Breaker 11.2: downloads iOS 26 iCloud backups18 June, 2026
- Elcomsoft Phone Breaker 11.1: reliable iCloud backup extraction26 May, 2026
- ElcomSoft Phone Breaker 11: full overhaul of iCloud extraction30 April, 2026
- iOS Forensic Toolkit 10.02 adds agent-based extraction for iOS 2629 April, 2026
- Elcomsoft Quick Triage receives a major update28 April, 2026