Mac OS Forensics: Attacking FileVault 2
July 27th, 2016 by Oleg AfoninCategory: «Cryptography», «Elcomsoft News», «General», «Security»
In the world of Windows dominance, Apple’s Mac OS X enjoys a healthy market share of 9.5% among desktop operating systems. The adoption of Apple’s desktop OS (macOS seems to be the new name) is steadily growing. This is why we are targeting Mac OS with our tools.
This time, let’s talk about Mac OS X user account passwords. Not only will a user password allow accessing their Mac, but it will also allow decrypting FileVault 2 volumes that are otherwise securely encrypted with virtually unbreakable XTS-AES.
Attacking FileVault 2
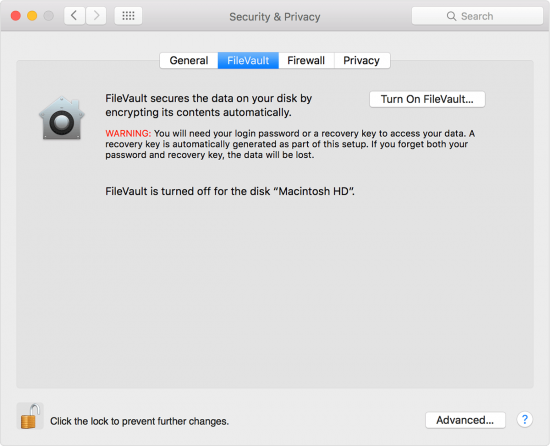
FileVault 2 is Apple’s take on whole-disk encryption. Protecting the entire startup partition, FileVault 2 volumes can be unlocked with either of the following:
- 256-bit XTS-AES key
- Recovery Key
- User password from any account with “unlock” privileges
There is also an additional unlock method available called Institutional Recovery Key. These recovery keys are created when system administrators enable FileVault 2 encryption with FileVaultMaster.keychain. This method requires additional steps to activate, and is typically used in organizations with centralized keychain management.
256-bit XTS-AES Key
Location: RAM (only while the encrypted volume is mounted)
The 256-bit XTS-AES key is the actual encryption key that is used by the system to encrypt and decrypt data. This is a binary key. Once the FileVault 2 volume is unlocked, the XTS-AES key is stored in the computer’s RAM.
In order to recover these keys, one would need to dump the content of the computer’s RAM into a file. Note that it is no longer possible to run a FireWire attack on locked or sleeping Macs due to Mac OS X security restrictions, so the RAM capturing tool must be executed on a running computer with FileVault 2 container unlocked and a user logged in.
Recovery Key
Location: printed notes, Apple cloud
Extraction: search, cloud acquisition (coming to Elcomsoft Phone Breaker 6.0), request from Apple
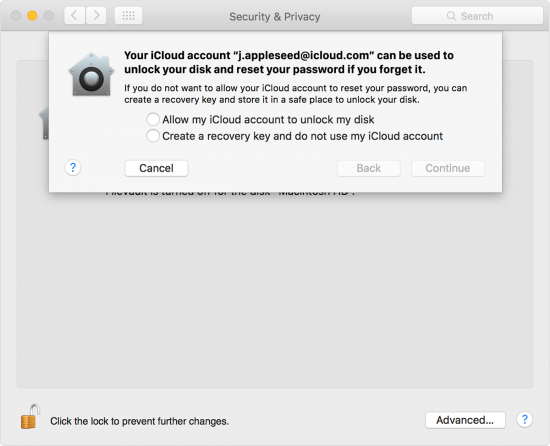
Similar to BitLocker, FileVault 2 employs Recovery Keys to enable users unlock their encrypted volumes if the disk is moved to a different device or if no user account with ‘unlock’ privileges is present in the system. Once FileVault 2 is enabled, the system creates and displays a recovery key. According to http://eprint.iacr.org/2012/374.pdf, the recovery key contains 120 bits (we didn’t check) that are encoded with all letters and numbers 1 through 9, and formatted to look like this:
XDFG-EE8G-KF89-S0FS-9F7Y-XFH8
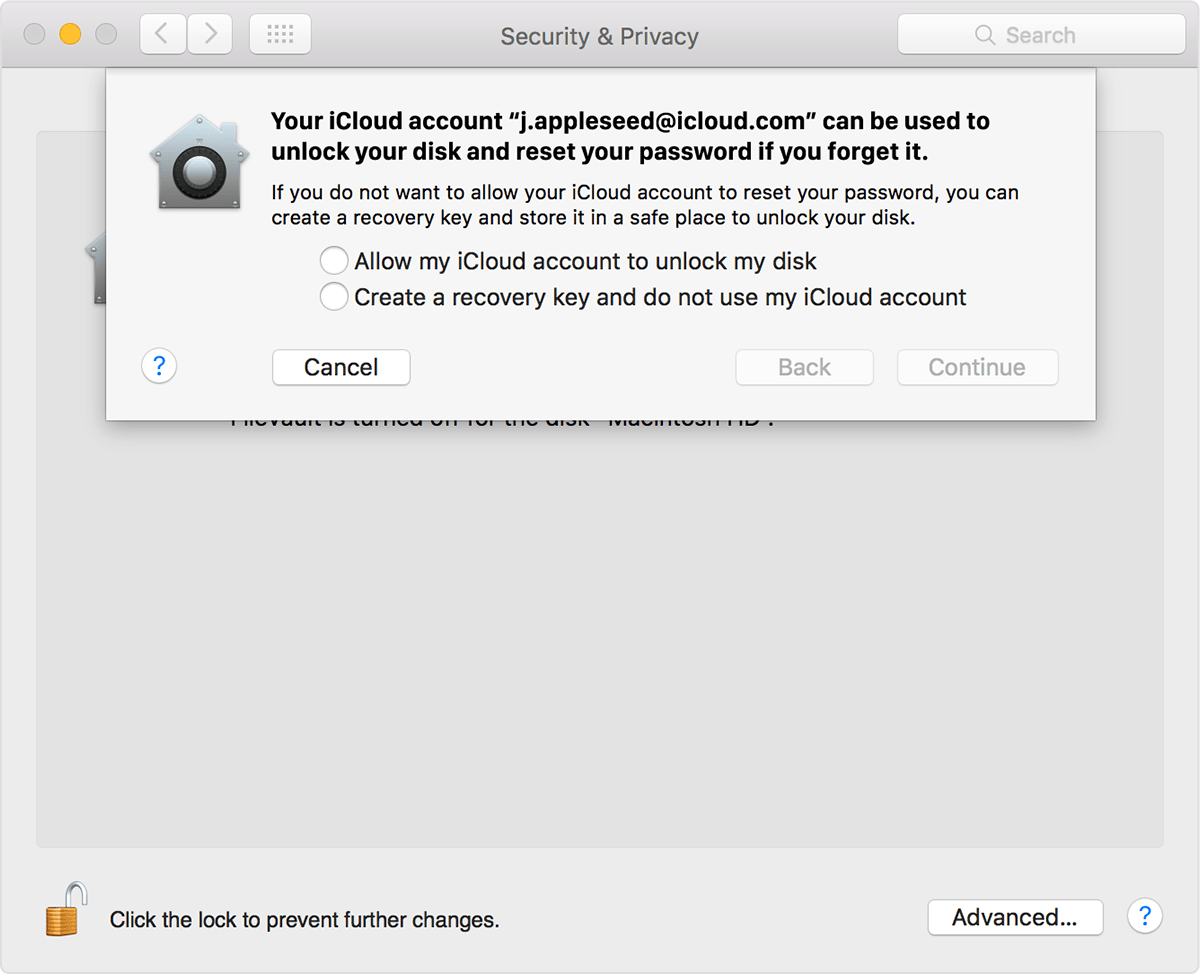
The user has an option to store the key with Apple. If the user agrees, the recovery key gets stored in the iCloud account associated with the user’s Apple ID (which is required to use the service).
While brute-forcing a 120-bit key seems easier than attempting to brute-force a 256-bit key, the security of a 120-bit key is still enough to make the attack unfeasible. This key is only useful if you can obtain it by searching the premises, downloading from the user’s iCloud account or requesting from Apple (if you have a warrant).
Extracting FileVault 2 Keys from iCloud
It is possible to extract a backup FileVault 2 key from the user’s iCloud account. The backup key can be extracted, processed and converted into a binary 256-bit XTS-AES key that can be used to decrypt the volume.
We are currently finalizing development of a tool for extracting and using FileVault 2 recovery keys to mount FileVault 2 volumes. In order to extract the key, you’ll be able to use Elcomsoft Phone Breaker 6.0 (scheduled for release next month). Once the tool is released, you’ll need to do perform the following steps:
- Launch Elcomsoft Phone Breaker and choose iCloud. Select “Decrypt FileVault image”.
- Specify path to the forensic image of the encrypted volume. Elcomsoft Phone Breaker accepts raw disk images (.dd), EnCase image files (.e01), and Apple Disk Images (.dmg).
- In a case the image contains several encrypted partitions, choose the one which you would like to mount (you may see more than one FileVault 2 volumes if several OS X installations are present).
- Elcomsoft Phone Breaker displays Apple ID that has the Recovery Key stored in its iCloud account.
- Provide authentication credentials (Apple ID password or authentication token extracted from the user’s computer).
- Elcomsoft Phone Breaker obtains the recovery key and decrypts the encrypted partition.
As a result, you will get an image of the decrypted partition in a raw (.dd) format.
Then you can use the “hdiutil” tool (OS X) or FTK Imager (Windows) to mount the partition and explore the data.
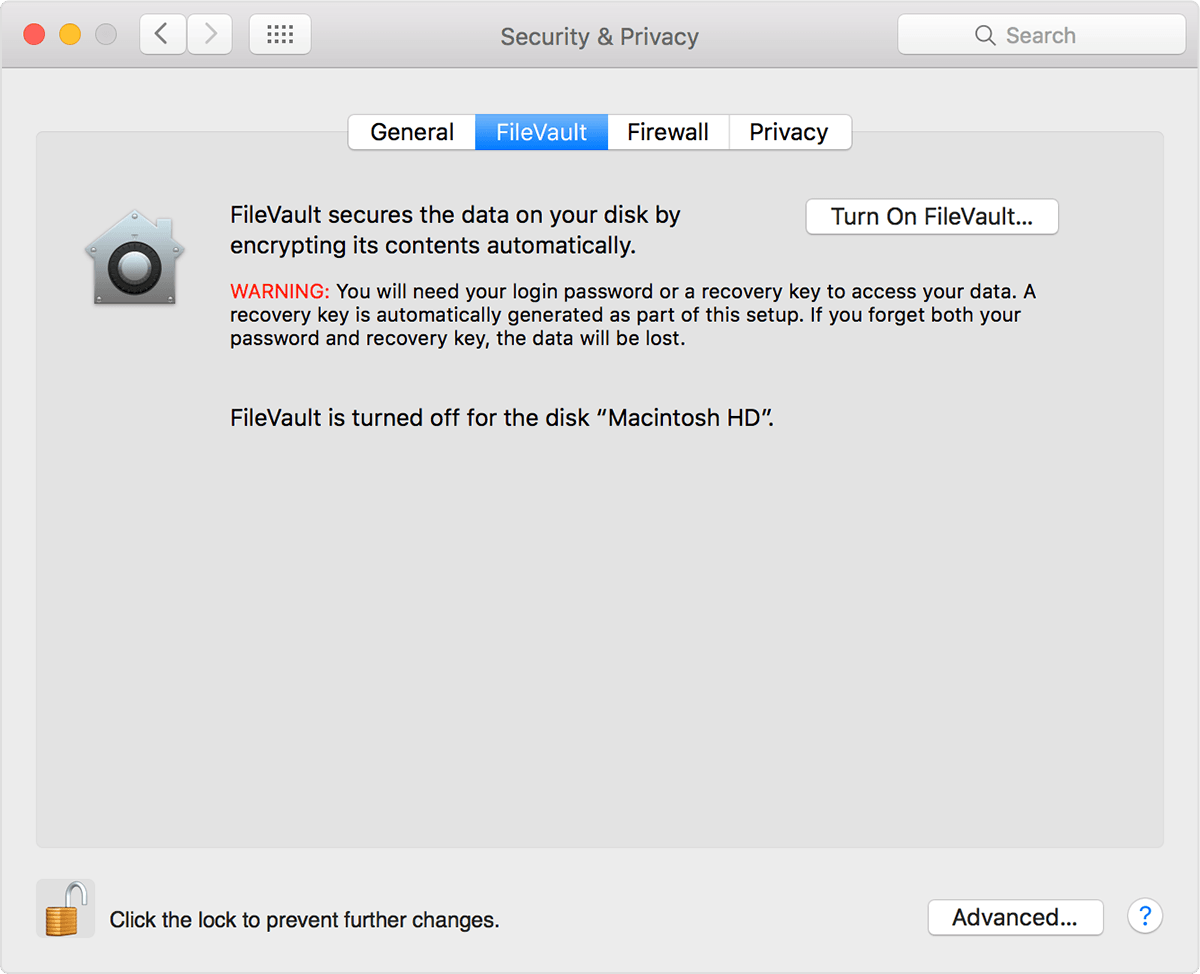
FileVault 2 Passwords
Location: hashed, /var/db/shadow/hash/<GUID>
Extraction (hash): cat /var/db/shadow/hash/<GUID> | cut -c169-216
Recovery (original password): Elcomsoft Distributed Password Recovery
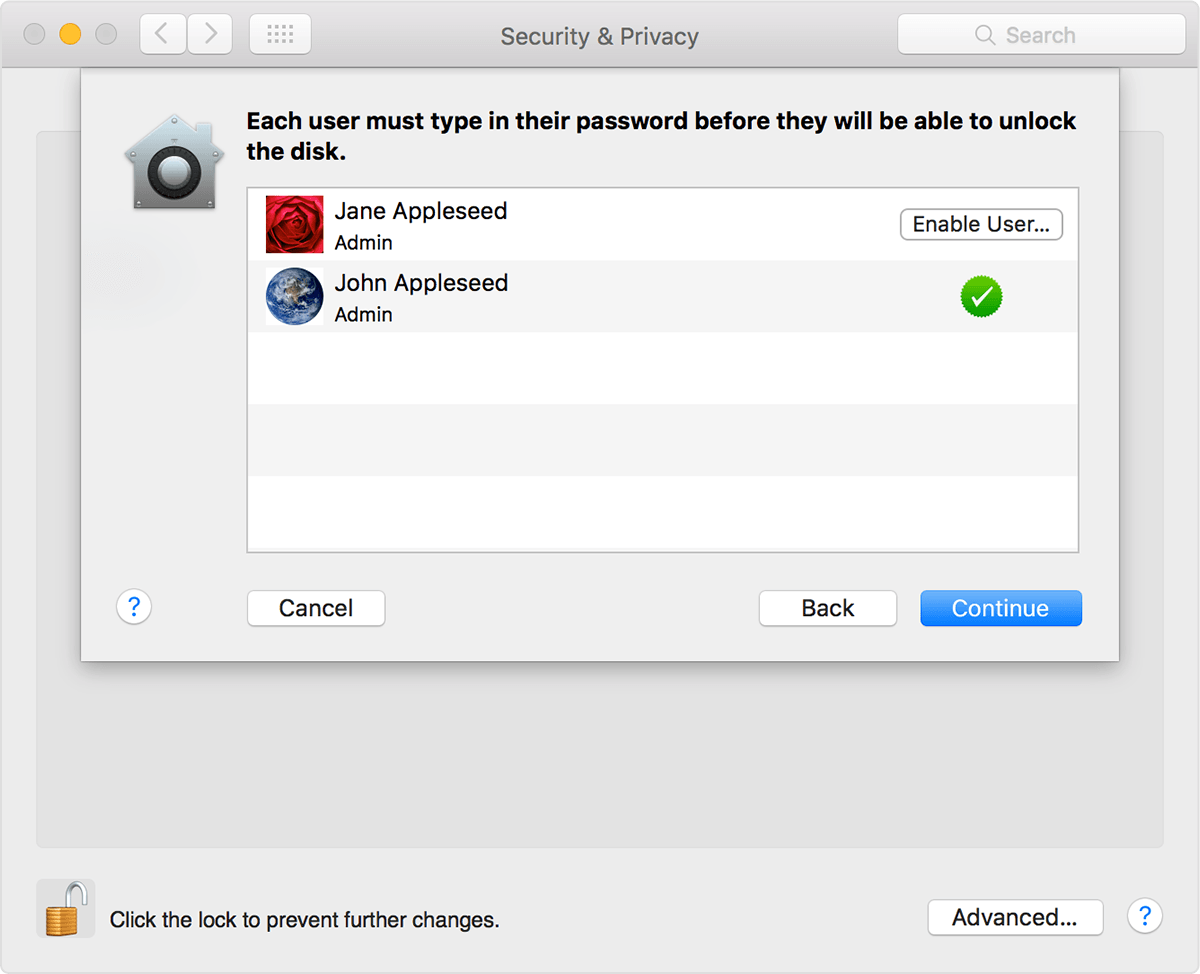
When setting up a FileVault 2 volume, you may be prompted to enable other user accounts to unlock the encrypted volume:
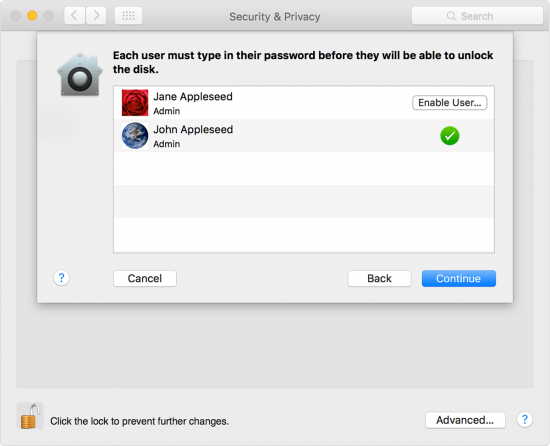
If this is the case, each user must type their password before they will be able to unlock the disk. In order for other users to be able to unlock FileVault 2, one has to click Enable User and enter the user’s password while setting up encryption (or any time after). If new user accounts are added after FileVault 2 encryption is turned on, they are automatically assigned the correct access rights.
Understanding this scheme is very important from the forensic perspective. If there is more than one user on the computer, you’ll have a much greater chance of recovering at least one of these passwords. This is especially true if the computer was used in a household with kids who tend to use much simpler passwords.
In order to unlock an encrypted volume, you will need to use the original plain-text password. Passwords cannot be extracted from a Mac OS X computer; you can only extract password hashes. In order to recover the original plain-text password, you will have to run an attack using a specialized tool such as Elcomsoft Distributed Password Recovery.
With recent update, Elcomsoft Distributed Password Recovery gained the ability to attack plain-text passwords (in addition to user account passwords) protecting disk volumes encrypted with FileVault 2.
Elcomsoft Distributed Password Recovery uses GPU acceleration techniques making the recovery 20 to 50 times faster compared to a CPU alone. You can choose between dictionary attacks with various mutations and GPU-accelerated brute force. Since attacking a password can be lengthy business, Elcomsoft Distributed Password Recovery can utilize multiple computers to simultaneously attack passwords.
Elcomsoft Distributed Password Recovery can recover passwords for popular disk encryption containers. In order to attack a FileVault 2 password with Elcomsoft Distributed Password Recovery, perform the following steps.
Preparing the Attack
- Make an image of the hard drive (physical device) or an image of the encrypted partition and save it into a file. The following formats can be used: Raw disk image (.dd), EnCase image file (.e01), Apple Disk Image (.dmg).
- Run EDPR Disk Encryption Info (EDEI) utility located in Start Menu -> Elcomsoft Password Recovery -> Tools.
- Specify path to the disk image you created on Step 1.
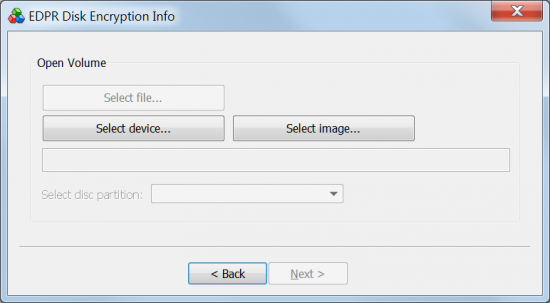

- If more than one encrypted partition is available, specify the volume to attack.
- EDEI will extract the necessary information about the encrypted volume.
- Save the .esprf file created by EDEI.
Running the Attack
- Launch Elcomsoft Distributed Password Recovery.
- Open the .esprf file that was saved by EDEI.
- If several Mac OS accounts appear, choose account to attack.
- Configure the attack (dictionary, mutations, brute force).
- Run the attack.
- Once the password is discovered, you can use it to unlock the Mac that contains the encrypted volume.
Mounting the Volume
After recovering the password to any user account with “Unlock” privileges, you can do the following to mount the encrypted container.
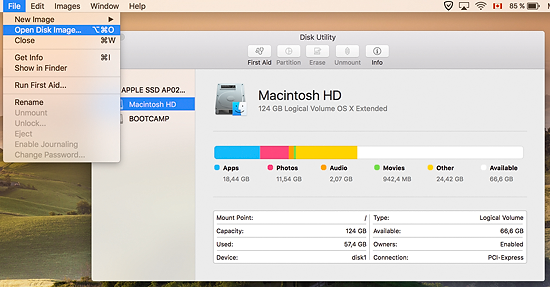
Option 1: [OS X ] In Mac OS X, use “diskutils” to mount the disk volume. Enter the recovered password when prompted. (Applications -> Disk Utility -> File -> Open Disk image -> select image and click Open).
Option 2: [OS X ] You can also use Terminal to mount the encrypted image. Launch Terminal and use the following command line to mount the disk image:
hdiutil mount <image>.dd
You can also mount a .dmg image with the following command line:
hdiutil mount /<image>.dmg
More information on FileVault 2: https://support.apple.com/en-us/HT204837


- Elcomsoft Phone Breaker 11.03: universal binary for Macs, SMS two-factor authentication restored16 July, 2026
- iOS Forensic Toolkit 10.10 adds pairing-free sideloading of the extraction agent24 June, 2026
- Elcomsoft Phone Breaker 11.2: downloads iOS 26 iCloud backups18 June, 2026
- Elcomsoft Phone Breaker 11.1: reliable iCloud backup extraction26 May, 2026
- ElcomSoft Phone Breaker 11: full overhaul of iCloud extraction30 April, 2026