Using iOS 11.2-11.3.1 Electra Jailbreak for iPhone Physical Acquisition
July 10th, 2018 by Oleg AfoninCategory: «General», «Mobile», «Security», «Software»
It’s been fast. iOS 11.3.1 and all earlier versions of the system down to iOS 11.2 have been successfully jailbroken. In addition, the jailbreak is compatible with iOS 11.4 beta 1 through 3. We normally wouldn’t post about each new jailbreak release; however, this time things are slightly different. The new Electra jailbreak uses two different exploits and presents two very different installation routines depending on whether or not you have a developer account with Apple. Considering how much more stable the developer-account exploit is compared to the routine available to the general public, this time it pays to be an Apple developer.
We tested the Electra jailbreak and can confirm that iOS Forensic Toolkit 4.0 is fully compatible. File system imaging and keychain extraction work; no OpenSSH installation required as Electra includes an SSH client listening on port 22.
Why Jailbreak?
For the general consumer, jailbreak is one open security vulnerability calling for trouble. Apple warns users against jailbreaking their devices, and there is much truth in their words.
Forensic experts use jailbreaks for much different reasons compared to enthusiast users. A wide-open security vulnerability is exactly what they want to expose the device’s file system, circumvent iOS sandbox protection and access protected data. Jailbreaking extract the largest set of data from the device. During jailbreaking, many software restrictions imposed by iOS are removed through the use of software exploits.
In addition to sandboxed app data (which includes conversation histories and downloaded mail), experts can also extract and decrypt the keychain, a system-wide storage for online passwords, authentication tokens and encryption keys. Unlike keychain items obtained from a password-protected local backup, physical extraction of a jailbroken device gains access to keychain items secured with the highest protection class ThisDeviceOnly (this is how).
The New Electra Jailbreak
Jailbreaking iOS versions past 11.1.2 (for which a Google-discovered vulnerability was published along with a proof-of-concept tool) was particularly challenging but not impossible. At this time, a team of jailbreakers discovered not one but two different vulnerabilities, releasing two versions of Electra jailbreak. Why the two versions?
The more reliable multipath tcp exploit is only available to users registered as Apple developers. It can only be installed if signed with a valid Apple ID registered in the $99/year Apple Developers program. (No throwaway Apple ID’s this time). As an added bonus, this jailbreak will last longer than the 7-day period available to non-developers. However, as all recent jailbreaks, it remains a semi-tethered jailbreak, meaning you’ll have to re-run the jailbreak tool on the device (without connecting to the computer) after each reboot.
Users without an Apple developer account are served by the less reliable version of the tool exploiting the vfs vulnerability. Reportedly, this version of the tool leads to a lower success rate compared to the developers edition using the mptcp exploit. However, it does allow using throwaway Apple ID’s just for jailbreaking.
Installing Electra Jailbreak
Since iOS 10, all jailbreaks shared a common installation procedure with Cydia Impactor. The procefure is slightly different this time, as a few things must be taken care of before jailbreaking.
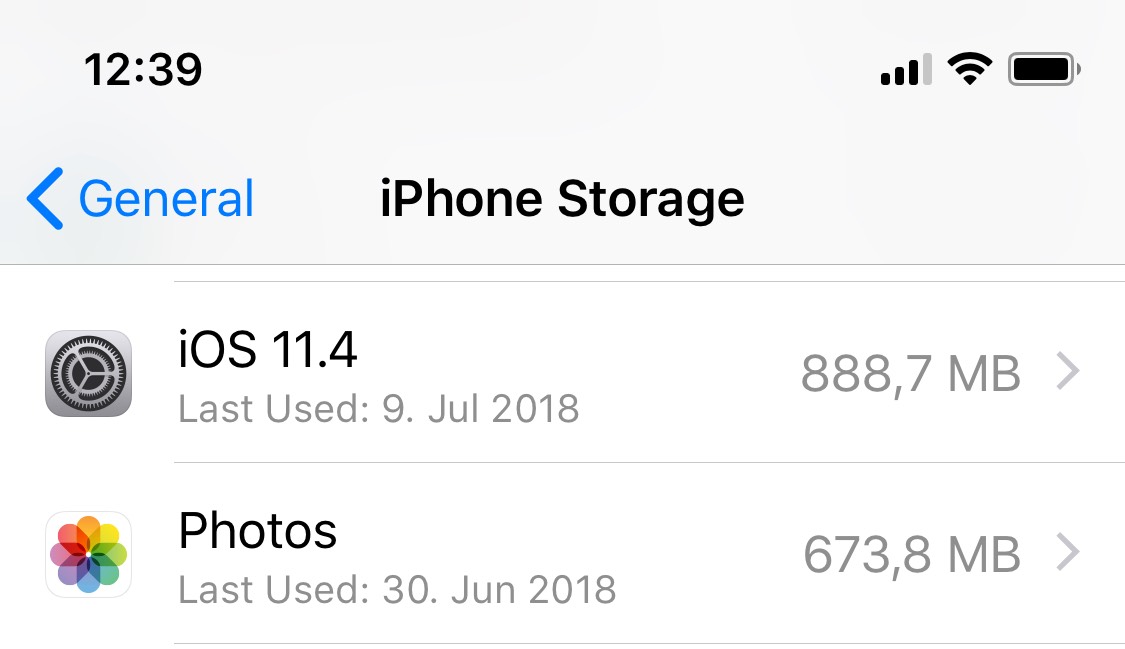
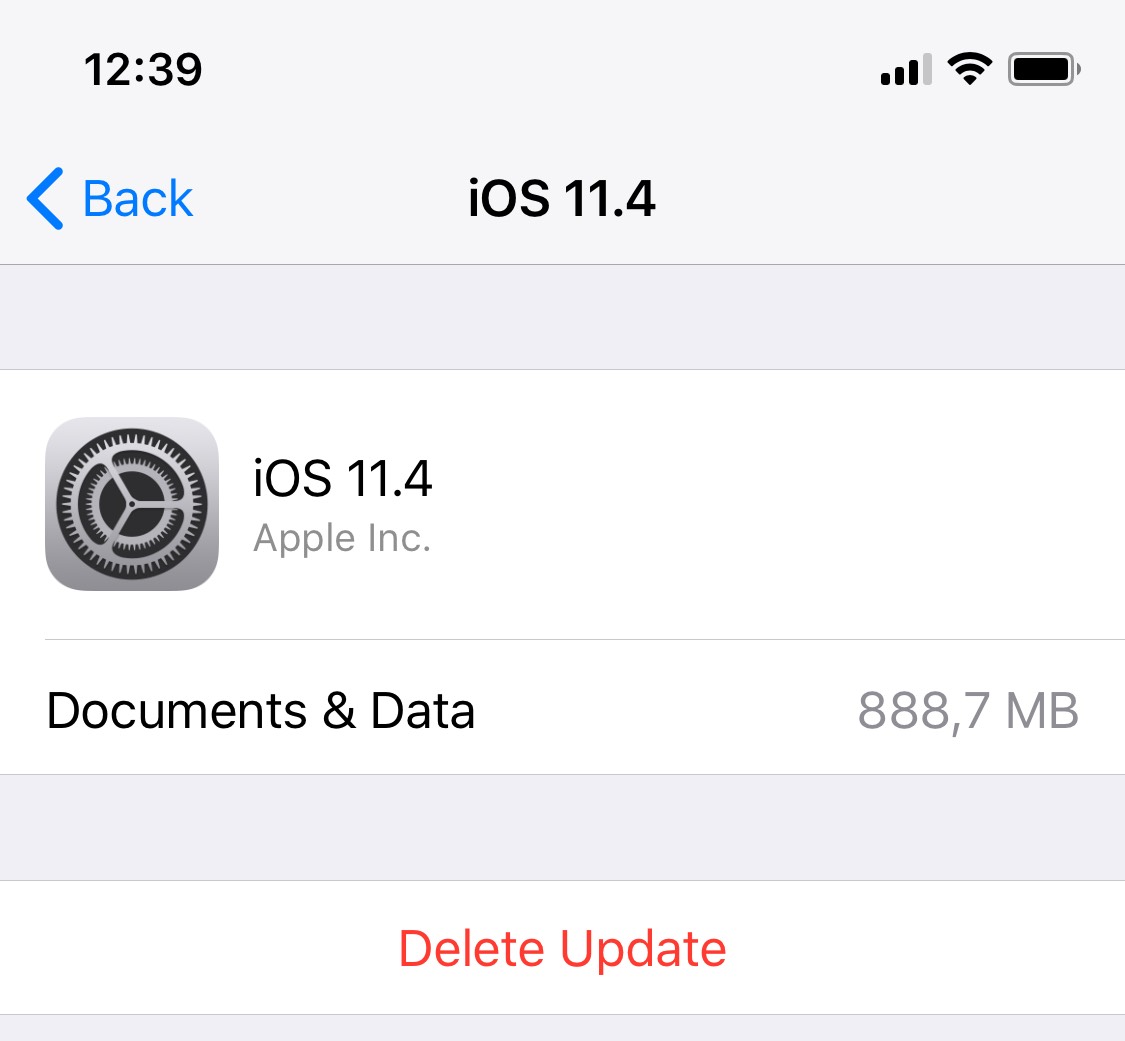
Remove downloaded iOS 11.4 update. This step is required to successfully run the jailbreak. You can remove the update by opening the Settings app, tapping General > iPhone Storage > iOS 11.4, and clicking Delete Update.
Prevent iOS 11.4 update from being downloaded. This requires explanation. The Electra jailbreak is semi-tethered, and requires re-application every time the iPhone is rebooted. The jailbreak may fail if iOS 11.4 update is downloaded, and there is no obvious way to prevent iOS from downloading the update in background even if you delete it from the iPhone. To work around this problem, jailbreak developers recommend installing a TvOS profile onto the iPhone, which prevents iOS from automatically downloading system updates. If you are doing a one-time job and don’t plan re-applying the jailbreak after a reboot, this step is not necessary.
Enable Airplane mode, disable Siri and reboot. Before you run the Electra jailbreak (but after you’ve signed and sideloaded the jailbreak app and trusted the developer signature), you may want to enable Airplane mode and disable Siri. You can disable Siri at Settings > Siri and Search; switch off both of the following toggles: Listen for “Hey Siri” and Press Home button for Siri (or Press Side Button for Siri on newer iPhones. Reboot the device afterwards. Make sure Airplane mode is still enabled after the device boots.
Troubleshooting: removing Find My iPhone and Passcode (and rebooting). Some users reported they’ve been able to successfully jailbreak their iPhone after disabling Find my iPhone and removing the passcode, then reboot the device. While disabling Find My iPhone is relatively safe (except that you’ll have to allow the device connect to the Internet, with obvious consequences), removing the passcode will not allow you to extract some of the most sensitive information from the device after you jailbreak. Do weigh your options here.
If you need to Reset All Settings, do it BEFORE jailbreaking. Since the initial release, iOS 11 has allowed users to reset their iTunes backup password by performing the Reset All Settings routine. This very technique comes extremely handy to investigators performing logical acquisition. As with most jailbreaks, you must not use Reset All Settings after you jailbreak, or else. On Electra, this command will result in the DPKG_LOCKED error; in other words, you will lose the jailbreak and won’t be able to reinstall it without resorting to XCode. If you need to reset the backup password, think ahead and do it before the jailbreak.
Now when we know the requirements, let’s go ahead and jailbreak the device. You will need the following tools:
- Cydia Impactor http://www.cydiaimpactor.com/
- Electra jailbreak: https://coolstar.org/electra/
- Or use direct download links (may not be the latest versions):
Electra jailbreak Developer edition | Non-developer edition
Steps to jailbreak using a NON DEVELOPER ACCOUNT (scroll down for details on DEVELOPER jailbreak):
- Back up data with iTunes or Elcomsoft iOS Forensic Toolkit (if backup password is empty, specify and record a temporary password).
- Read the precautions; remove downloaded updates (iOS 11.4)
- Obtain and install the jailbreak tool using the links above. This includes two files:
- The jailbreak IPA file
- Cydia Impactor app (Windows, Mac, Linux)
- Cydia Impactor (developed by Saurik) is used to sign the IPA file so that the jailbreak tool can be executed on iOS devices. You will need to use valid Apple ID credentials for signing the IPA. We recommend using a newly created Apple ID for signing the certificate.
- Connect the iOS device to the computer, trust the computer on the iOS device and launch Cydia Impactor.
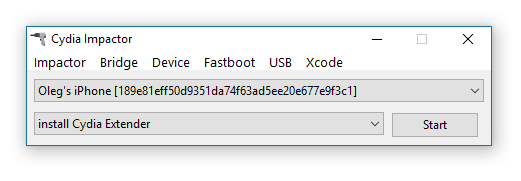
- Drag the jailbreak IPA onto Cydia Impactor app.
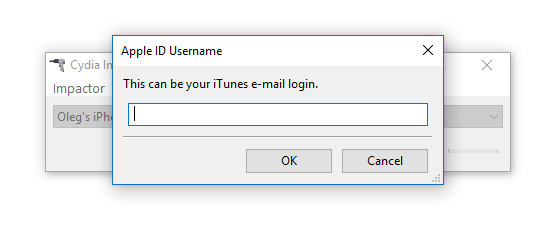
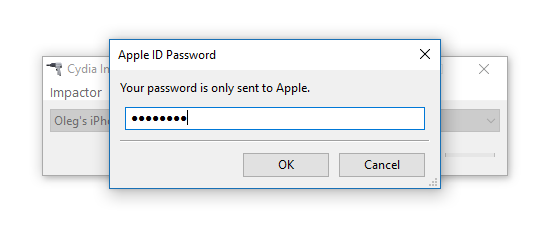
- Provide Apple ID and password when prompted. Click OK to allow Cydia Impactor to sign the IPA and upload it onto the iOS device. (A disposable Apple account is recommended; there is no need to use the same Apple ID as the main ID on the device). If you are using a non-throwaway account and if that account has Two-Factor Authentication, you will need to create an app-specific password
- at https://appleid.apple.com/account/manage
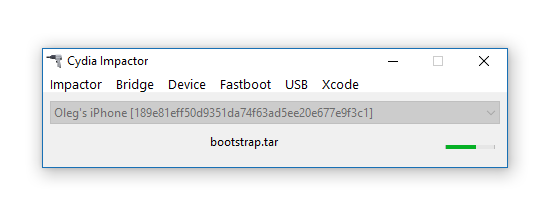
- Cydia Impactor will sideload the IPA file onto the iOS device.
- If you attempt to launch the jailbreak IPA at this time, the attempt fill fail as the digital certificate for that app is not yet trusted.
- You will need to trust the certificate in order to be able to launch the jailbreak. To do that, on the iOS device, open Settings > General > Device Management. You will see a developer profile under the “Apple ID” heading.
- Tap the profile to establish trust for this developer. (An Internet connection is required to verify the app developer’s certificate when establishing trust.)
- On the iOS device, find the jailbreak app and run it. Follow the on-screen instructions.
- After you jailbreak, the device will respring. Note: if you see an error such as the one shown below, please refer to the pre-requisites and troubleshooting section above.
- Electra includes Cydia app repository; however, you should not need Cydia or OpenSSH as Electra already bundles an SSH daemon listening at port 22.
Note: the non-developer jailbreak will expire after 7 days; you’ll have to perform the entire procedure from Step 1. The jailbreak will expire on each reboot; however, if you’re still within the 7-day period, you can simply launch the jailbreak app again (on the device) without using the computer.
Steps to jailbreak using a DEVELOPER ACCOUNT:
- Back up data with iTunes or Elcomsoft iOS Forensic Toolkit (if backup password is empty, specify and record a temporary password).
- Read the precautions; remove downloaded updates (iOS 11.4)
- Obtain and install the jailbreak tool using the links above. This includes two files:
- The jailbreak IPA file
- Cydia Impactor app (Windows, Mac, Linux)
- Cydia Impactor (developed by Saurik) is used to sign the IPA file so that the jailbreak tool can be executed on iOS devices. You will need to use valid Apple ID credentials for signing the IPA. We recommend using a newly created Apple ID for signing the certificate.
- Connect the iOS device to the computer, trust the computer on the iOS device and launch Cydia Impactor.
- Drag the jailbreak IPA onto Cydia Impactor app.
- Provide Apple ID and password when prompted. Click OK to allow Cydia Impactor to sign the IPA and upload it onto the iOS device. (A disposable Apple account is recommended; there is no need to use the same Apple ID as the main ID on the device). IMPORTANT: since you are not using a throwaway account, you probably have Two-Factor Authentication enabled. If this is the case, you will have to open the Apple ID page in a Web browser and generate an app-specific password at https://appleid.apple.com/account/manage

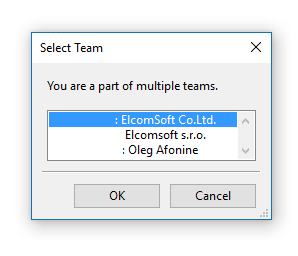
- Now the first difference between a regular and developer account: you’ll have to choose the profile you want to sign the jailbreak IPA with. Select a developer account. (You will see this dialog every time if you’re using an account that participates in the developer program).
- Cydia Impactor will sideload the IPA file onto the iOS device.
- On the iOS device, find the jailbreak app and run it. Follow the on-screen instructions.

- After you jailbreak, the device will respring. Note: if you see an error such as the one shown below, please refer to the pre-requisites and troubleshooting section above.

- Electra includes Cydia app repository; however, you should not need Cydia or OpenSSH as Electra already bundles an SSH daemon listening at port 22.
What Next?
Installing a jailbreak is a required pre-requisite for physical extraction. The process of physical extraction is described in Breaking into iOS 11. An alternative to physical extraction is logical acquisition, which can be performed even on a locked device if a lockdown file (iTunes pairing record) is available. However, using existing pairing records becomes more complicated as iOS 11.3 limits the lifespan of lockdown records.
Which versions of iOS do and which don’t have a working jailbreak? At this point, all versions of iOS 10 can be jailbroken on all 32-bit and 64-bit devices. Speaking of iOS 11, we have jailabreaks for iOS 11.0 through 11.1.2, iOS 11.2 through 11.3.1, and iOS 11.4 beta 1 through beta 3. There is no jailbreak for iOS 11.4 or iOS 11.4.1.

- iOS Forensic Toolkit 10.10 adds pairing-free sideloading of the extraction agent24 June, 2026
- Elcomsoft Phone Breaker 11.2: downloads iOS 26 iCloud backups18 June, 2026
- Elcomsoft Phone Breaker 11.1: reliable iCloud backup extraction26 May, 2026
- ElcomSoft Phone Breaker 11: full overhaul of iCloud extraction30 April, 2026
- iOS Forensic Toolkit 10.02 adds agent-based extraction for iOS 2629 April, 2026