Elcomsoft and The Case of the Apple iPad
November 12th, 2020 by Shafik PunjaCategory: «Mobile», «Tips & Tricks»
For almost a decade, if not longer, I have collaborated with Vladimir Katalov on various digital forensics research topics. He has always been a great source of guidance, especially on iOS related challenges. When he offered me a standing invitation to post on the Elcomsoft Blog, I felt very humbled and honored to be given the opportunity to post on the ElcomSoft Blog, and I would like to thank the ElcomSoft team. This article has also been prepared together, with Vladimir Katalov.
Background
I had an opportunity to use Elcomsoft iOS Extraction Toolkit (EIFT) 6.52 to perform jailbreak-free extraction of an Apple iPad 5th Generation, running iOS 11.1, with known passcode. This method requires the use of an Apple developer account, installing an acquisition agent on the device, and then using the acquisition agent to obtain a full file system and decrypted keychain. If you don’t know the passcode to the device, then no method will work for a full file system extraction.
The iPadOS 11.1 on this device does NOT make it susceptible to checkm8/checkra1n exploitation techniques. So, why not upgrade the device to at least iOS 12.3 to leverage checkm8/checkra1n methods? I had researched the device serial number on everymac.com and knew that it could accept iPadOS 12.x up to 14.x. What I did not realize, until Vladimir corrected my understanding, is upgrading this Apple iPad from 11.1, will force iPadOS 14.1 to be installed.
In my dialogue with Vladimir, he reminded me that: “The article at everymac.com is only partially correct – it only describes what versions of iOS can run on this model; however, the *only* one you can install now (after reset or as upgrade) is 14.1. For years, Apple implements specific “protection” by allowing only last version (sometimes also the previous one) to be installed; when you install or upgrade, it connects to Apple servers and verifies the signature. Right now, only 14.1 is signed. So, you will not be able to use checkra1n/checkm8 extraction for this model, no way at all.”
The ONLY option left in this case was to perform a jailbreak-free extraction using Elcomsoft iOS Extraction Toolkit (EIFT) 6.52 [1].
Vladimir also stressed the following about the forensic soundness of various full file system extraction methods: “Generally speaking, checkm8 extraction is almost forensically sound (it *temporary* [sic] modifies a couple of system files); the second place goes (I would say, 99%) goes to our agent acquisition, and checkra1n is the worst, as it makes tons of modifications to the file system. In any case, agent acquisition is your only option (until may be someone will implement checkm8 acquisition for systems less than 12.3).”
The purpose of the article will be to describe a digital forensic practitioner’s experience with using EIFT 6.52 on a Mac running macOS Catalina 10.15.7.
The processes covered in this article will cause the device to undergo changes, such as sideloading an app for extraction purposes, and being connected to the Internet. For this specific situation there is no known or identified risk of a remote device wipe being initiated should the device need to be connected to the Internet. While this is not the most ideal forensically sound method by which to obtain data from a device, in this case this is the only option available for a full file system extraction. The digital forensics practitioner should keep a detailed set of notes documenting the processes followed.
Preparation
After downloading and unpacking the latest version of Elcomsoft iOS Extraction Toolkit (EIFT) archive, the digital forensics practitioner should be aware of how to properly install and run EIFT specifically on a Mac. Read this article first, if you are using a Mac, before the mounting the EIFT DMG file. The instructions are outlined in the article ‘Installing and using iOS Forensic Toolkit on macOS 10.15 Catalina’ (published Oct 2, 2019 by Oleg Afonin).
In my previous experience with using EIFT on a Mac, the instructions as outlined in the above referenced article have worked. A summary of these instructions, for Mac only, is provided below.
- Remove the quarantine flag, ‘com.apple.quarrantine’, from the EIFT DMG file, using the ‘-d’ flag option.
xattr -r -d com.apple.quarantine <path_to_dmg>
- If the EIFT DMG file is on the desktop the command is typed as shown below.
xattr -r -d com.apple.quarantine Desktop/iOS-Toolkit-6.52-Mac.dmg
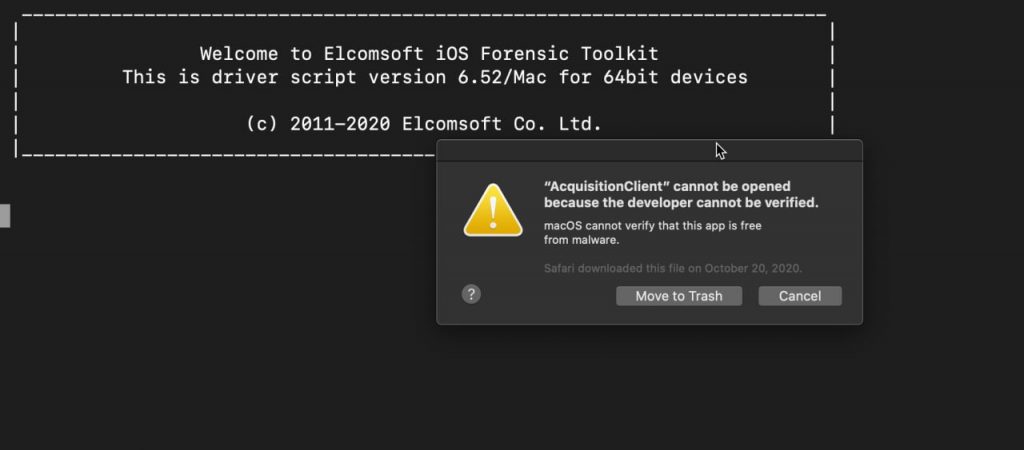
If you forget to follow the steps for removing the quarantine flag from the EIFT DMG file, you will end up getting Gatekeeper alerts like the one shown in the screenshot. And unfortunately, you won’t only get one, but a number of successive alerts each time a component of the EIFT is being executed.
Removing the quarantine flags from the EIFT DMG did not work in my case, even after several attempts. Although these instructions have worked previously.
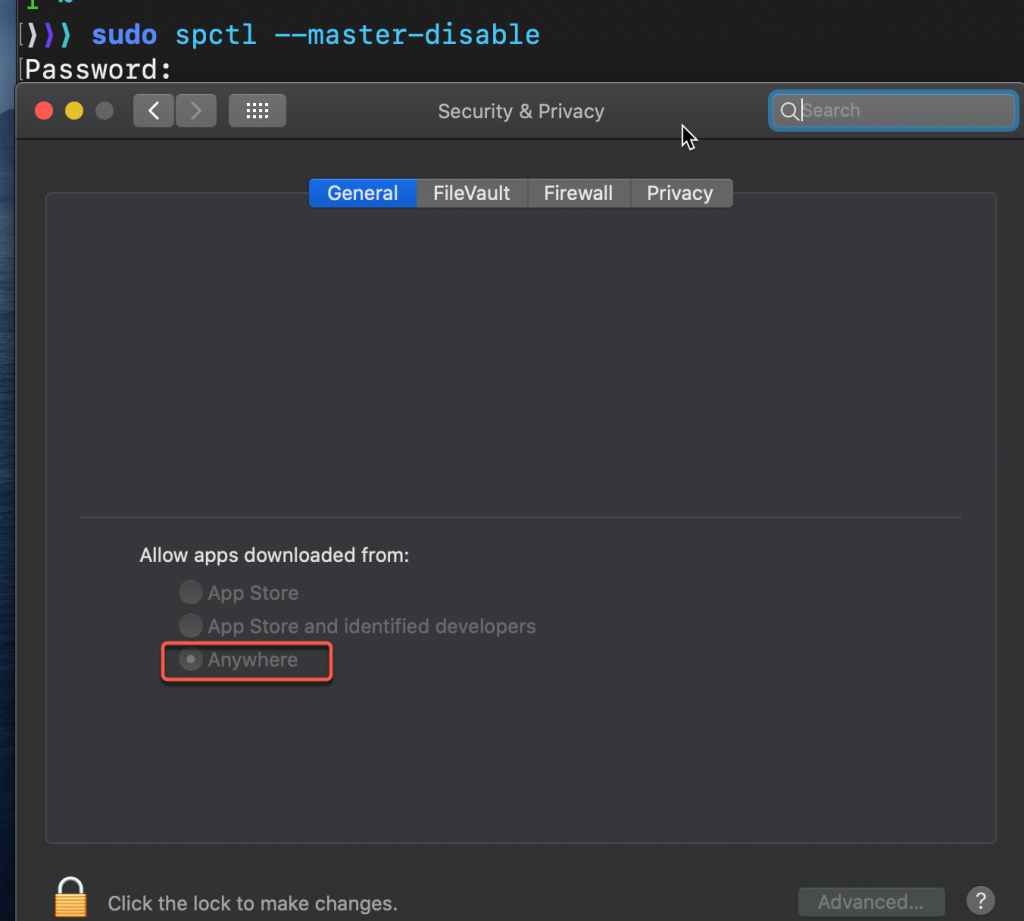
A workaround is to disable Gatekeeper temporarily using the command shown below.
sudo spctl –master-disable
The following screenshot shows the System Preferences -> Security & Privacy > General screen where under ‘Allow apps downloaded from:’ now displays ‘Anywhere’ as the selected option.
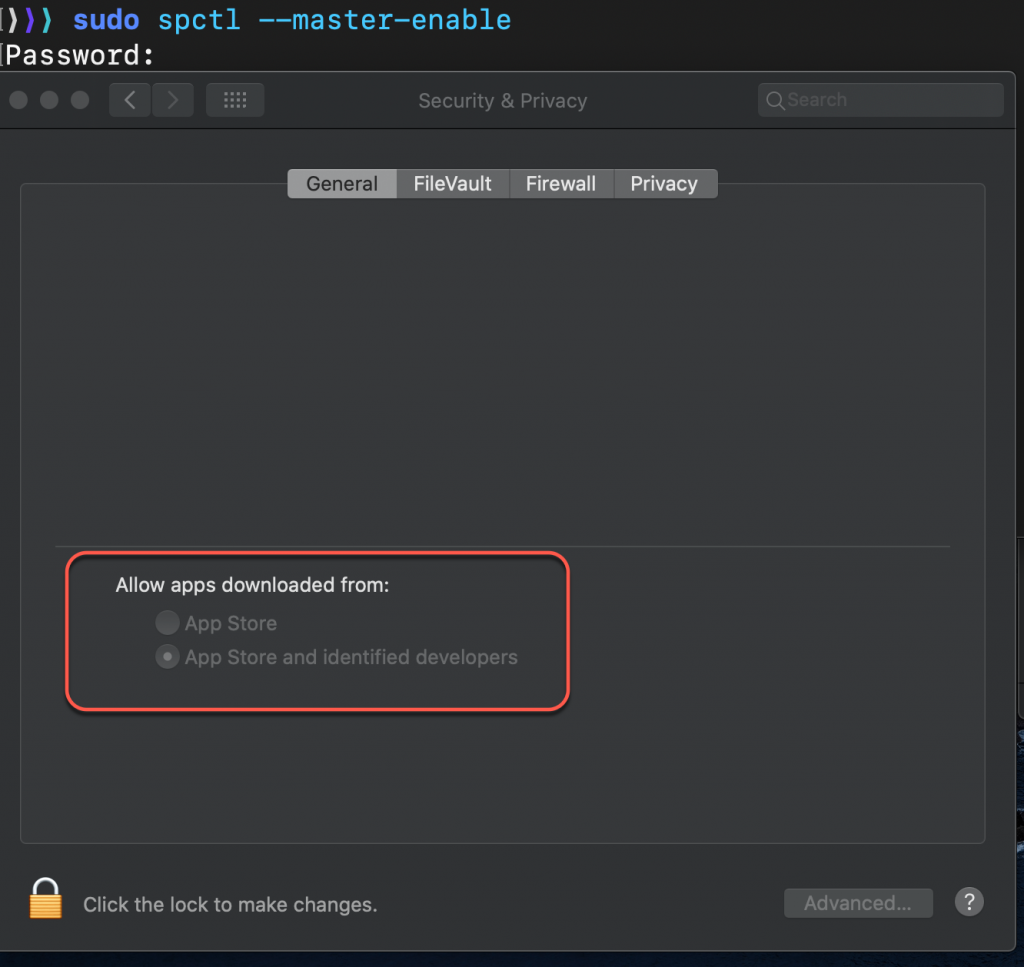
Please remember to reenable Gatekeeper when you are finished using EIFT, with the command shown below.
sudo spctl –master-enable
The following screenshot shows the System Preferences -> Security & Privacy > General screen where under ‘Allow apps downloaded from:’ the ‘Anywhere’ option is no longer present. And my Mac device has reverted back to its previous setting ‘App store and identified developers’.
If you are using the Windows version of EIFT, then you don’t have to worry about the information presented above. Whether on MacOS or Windows, ensure you temporarily disable your antivirus, as the components of the EIFT may very likely end up being quarantined by your AV/anti-malware solution. Just don’t forget to reenable your AV/anti-malware solution after you are finished!
Apple Developer Account
Leveraging the use of an Apple Developer Account has been explained in a previously released article titled ‘Extracting iPhone File System and Keychain Without an Apple Developer Account’ (published September 3, 2020 by Oleg Afonin).
In my discussions with Vladimir he indicated that:
- Agent extraction is simple enough, but it is highly recommended to have developer account at Apple.
- If you don’t have an developer account at Apple, there are two options:
- Use “normal” Apple ID account (your personal or temporary); it is only needed for agent installation. You will have to connect the device temporarily to the Internet to approve the certificate; it might be a problem if the “Find My” option is enabled, and you may receive the remote lock/wipe command (until you set up firewall properly, as described in Setting Up Restricted Internet Connection for iPhone Extraction article).
- Temporary connection of your Apple ID to somebody else’s developer account.
- Ensure you have 2FA on the Apple ID you are using, and have access to a trusted device connected to this Apple ID (any one: iPhone, iPad or Mac)
I used a temporary custom created Apple ID (with 2FA enabled), that was then invited to join the development team of some other company.
Running EIFT
Mount (open) the iOS Toolkit DMG file. Pay close attention to the directions provided in this article ‘Installing and using iOS Forensic Toolkit on macOS 10.15 Catalina’ (published Oct 2, 2019).
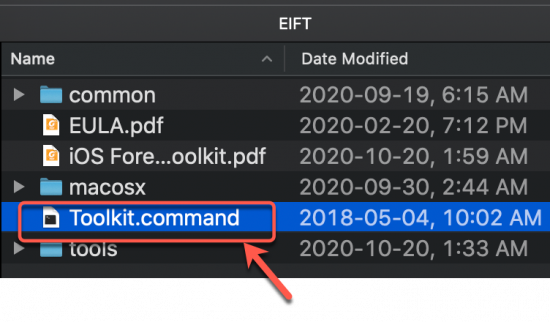
IMPORTANT: Do NOT launch EIFT directly from the mounted image! You MUST create a new directory on your Mac (e.g. on your Desktop) and copy the entire content of the mounted disk to that new folder. You can unmount and delete the DMG afterwards.
Make sure your licensed EIFT USB dongle is inserted into the USB port of your laptop. After copying the contents of the DMG file to a new folder, run the “Toolkit.command” file that is in the folder, by double clicking on it.
After running the “Toolkit.command” a terminal window will open with a ‘Welcome to Elcomsoft iOS Forensic Toolkit’ banner message. The screenshot below shows that no device is connected. After connecting the device, it must be paired with the Mac, by accepting the trust relationship prompt that is presented on the device by pressing ‘Trust’.
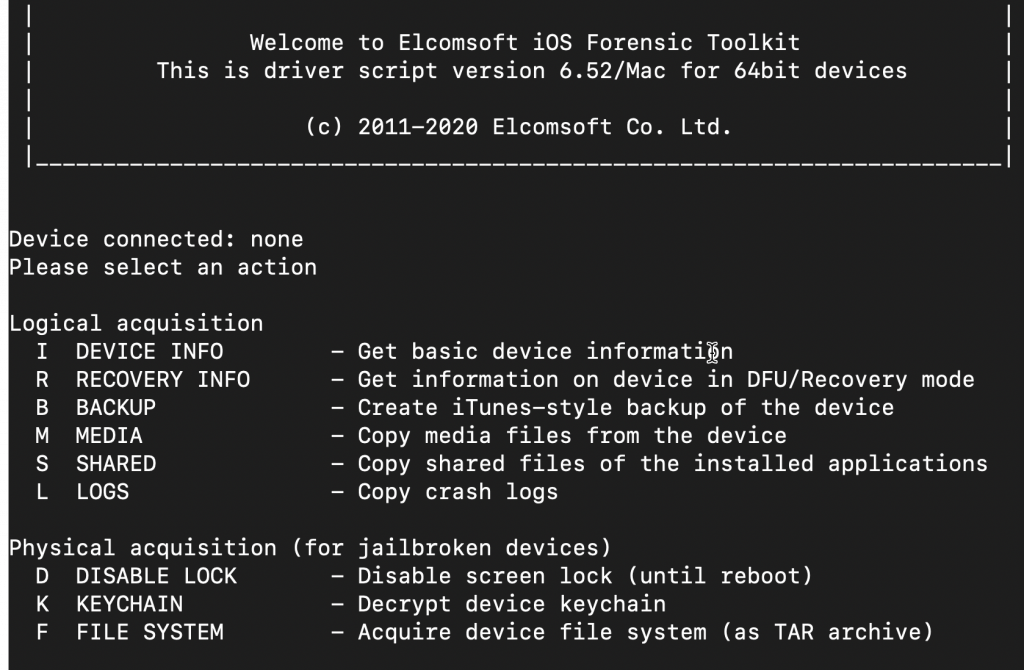
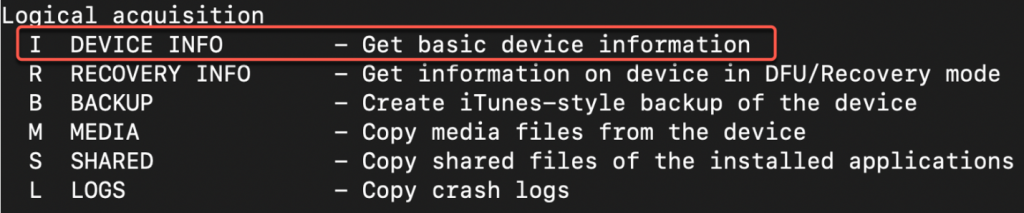
Once the device is connected, EIFT will detect it. Basic device information can be collected using the ‘I’ command.
Once the ‘I’ command is executed, EIFT will obtain device information and generate 3 files: ideviceinfo.plist, applications.txt and applications.plist, shown the screenshot below. If you have identified the error in the screenshot, no need to bother Vladimir as he is already been made aware of it.

Install Acquisition Agent
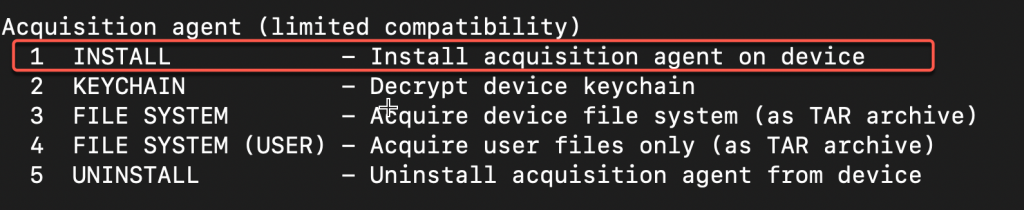
From the main menu under ‘Acquisition agent’ select ‘1 INSTALL’.
This initiates the installation process for the acquisition agent application, by sideloading it over USB connection on to the device. There are two options for signing the acquisition agent. Option 1 uses the “developer” signing and Option 2 uses the custom Apple ID that was created.
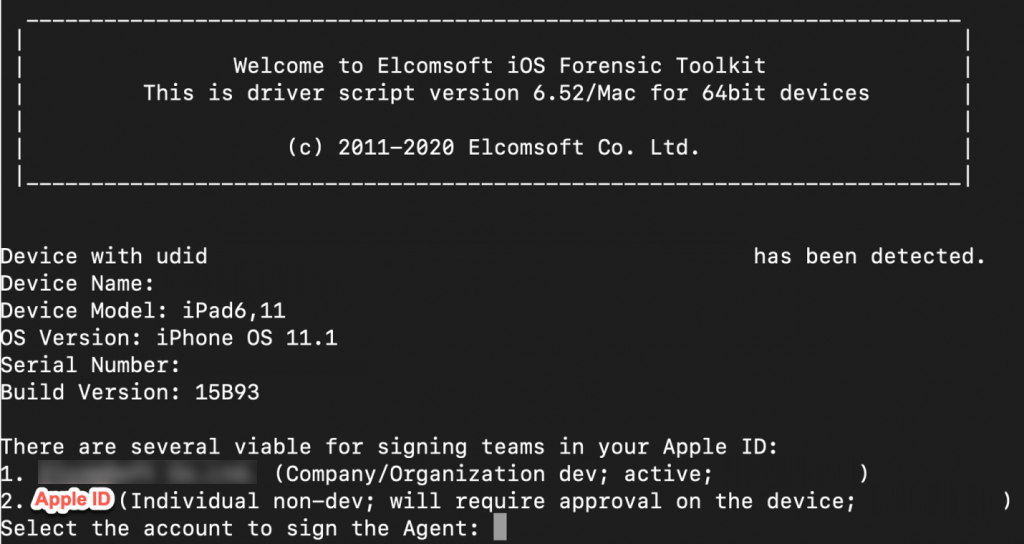
Selecting either option 1 or 2 will begin the acquisition agent installation process. I first tried option 1.
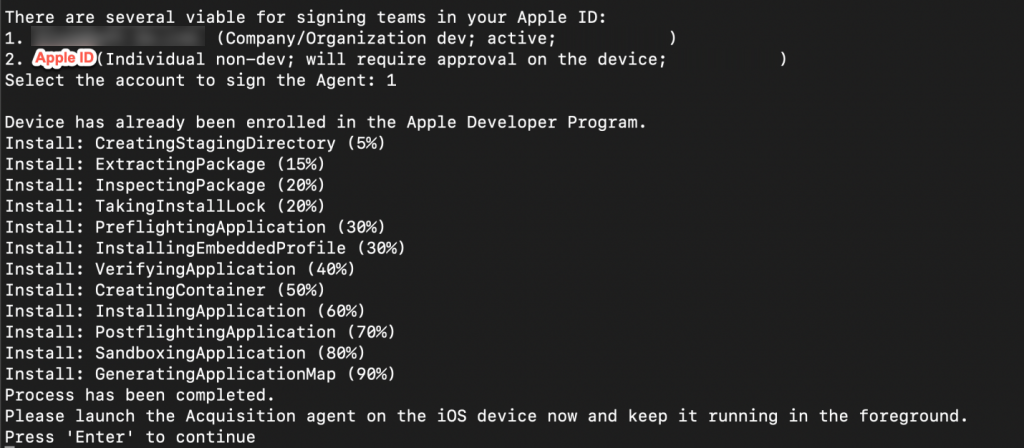
On the device you should now see an application icon that is named ‘Acquisition’.

Following the directions provided after installing it, launch the Acquisition agent. In the Acquisition agent app screen there are two messages, one at the top and the other at the bottom: ‘Waiting for AcquisitionClient connection’ and ‘Please keep application in foreground for correct work’.

File System Extraction
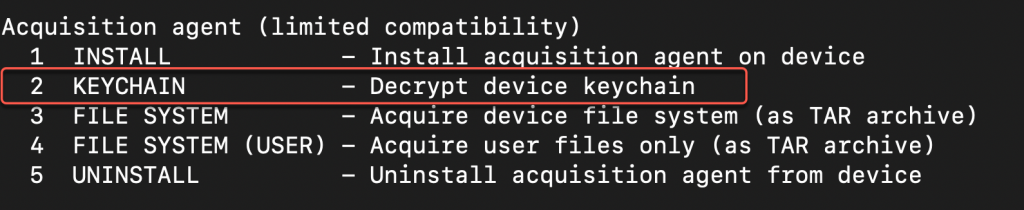
Ensure the device is unlocked and the Acquisition agent on the device is running in the foreground. From the EIFT main menu under ‘Acquisition agent’ select ‘3 FILE SYSTEM’ to obtain the full file system. This initiates the exploitation process and subsequent full file system extraction through the Acquisition agent.
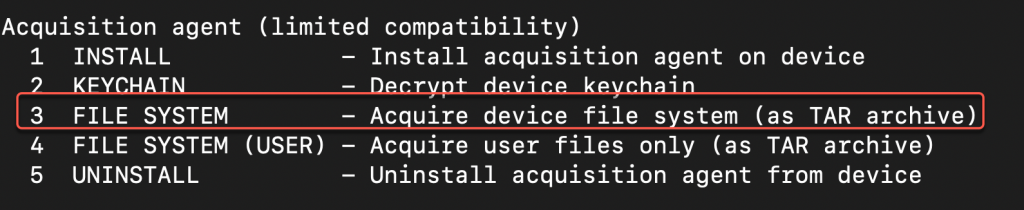
What should be observed, on the device in the Acquisition agent interface, is listing of the files being extracted. Instead what I observed was the device rebooting, regardless of trying ‘2 KEYCHAIN’, 3 FILE SYSTEM’ or ‘4 FILE SYSTEM (USER)’. So, like any dedicated practitioner, began troubleshooting: rebooted the Mac, the device, changed cables and USB ports. During this process Internet access was NOT enabled on the device.
The only other choice left was try option 2, custom Apple ID. First, I uninstalled the agent using the command ‘5 UNINSTALL’ so as to remove the agent that was installed with option 1. I then repeated the install process by selecting 2 to sign the agent and install it.

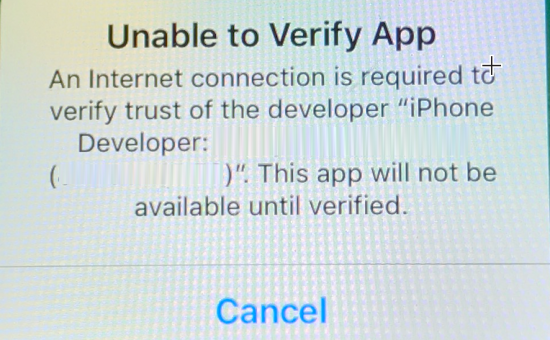
The agent was confirmed as being installed on the device, but starting it caused the device to respond with ‘Unable to Verify App’, and to verify the trust of the developer required an Internet connection. At this juncture, there is no other recourse but to enable Internet access to the device.
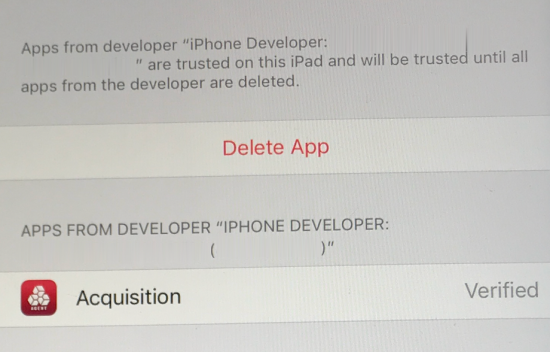
Once Internet access to the device was successfully established, a second device challenge was presented with an ‘Untrusted Developer’ warning. Apple iOS security mechanisms do not allow unverified apps (that is, apps not accessed from the Apple App Store) to be run on Apple devices without the device user manually verifying the “untrusted application” application.
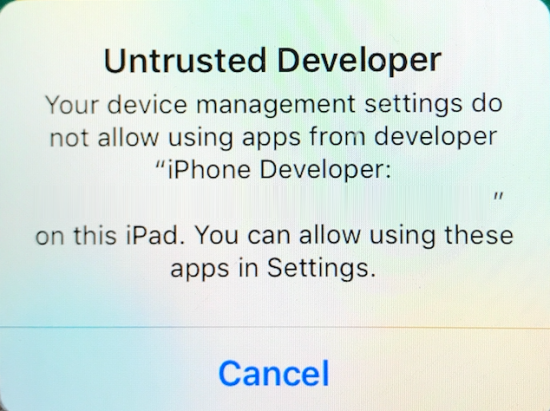
To allow the Acquisition agent app to run, on the device, under General -> Device Management -> Developer App, the trust must be manually accepted by the device user. In the screenshot below the Acquisition agent is now trusted.
In the EIFT menu in the ‘Acquisition agent’ select ‘3 FILE SYSTEM’, to begin extracting the full file system. Using option 2, custom Apple ID method works with obtaining a file system extraction. Note that the data is extracted to the user’s home directory. The resulting full file system extraction is output to a TAR archive that is named using the UDID value of the device.

Following a successful full file system extraction, the decrypted keychain was also obtained through the EIFT menu in the ‘Acquisition agent’ select ‘2 KEYCHAIN’. This data is also saved to the user’s home directory as an XML file that is prefixed with the filename ‘keychain’.
Satisfied that all the information being sought has been obtained, the following steps are followed prior to departure from the device and EIFT:
- Uninstall the Acquisition agent from the device by choosing ‘5 UNINSTALL’ from within the EIFT menu.
- Disconnect the device from the Internet.
- Verify on the device that the Acquisition agent app is no longer present.
- On the Mac used for extraction, don’t forget to reenable Gatekeeper as noted earlier in this article, and of course also reenable your AV/anti-malware application.
The resulting extracted full file system TAR file can be ingested into almost any if not all free open source and commercial digital forensic analysis tools that parse Apple iOS data. There is, of course, the matter of the option 1 signing Apple ID failing. At this time neither myself nor Vladimir can explain why it failed.
Thank you for taking the time to read this and take care.
Sources/References
- Elcomsoft iOS Forensic Toolkit 6.52: plugging the last gap
- Installing and using iOS Forensic Toolkit on macOS 10.15 Catalina
- Extracting iPhone File System and Keychain Without an Apple Developer Account
Acknowledgements
Thank you to my dear friend and colleague Doug Kraan (Digital Forensics Analyst, Digital Forensics Team, Calgary Police Service), for reviewing this article.
REFERENCES:

Elcomsoft iOS Forensic Toolkit
Extract critical evidence from Apple iOS devices in real time. Gain access to phone secrets including passwords and encryption keys, and decrypt the file system image with or without the original passcode. Physical and logical acquisition options for all 64-bit devices running all versions of iOS.
Elcomsoft iOS Forensic Toolkit official web page & downloads »


- iOS Forensic Toolkit 10.10 adds pairing-free sideloading of the extraction agent24 June, 2026
- Elcomsoft Phone Breaker 11.2: downloads iOS 26 iCloud backups18 June, 2026
- Elcomsoft Phone Breaker 11.1: reliable iCloud backup extraction26 May, 2026
- ElcomSoft Phone Breaker 11: full overhaul of iCloud extraction30 April, 2026
- iOS Forensic Toolkit 10.02 adds agent-based extraction for iOS 2629 April, 2026