Sideloading the extraction agent: a Stolen Device Protection workaround
June 24th, 2026 by Vladimir KatalovCategory: «Elcomsoft News», «Mobile», «Tips & Tricks»
A new update to iOS Forensic Toolkit is out. The headline feature is an alternative installation method for the extraction agent – that is, deploying it onto an iPhone while bypassing the mandatory pairing requirement. The agent can now be delivered across the network, which removes a number of limitations that came with the usual cable-based installation. One requirement up front: the device must already be unlocked – in other words, the passcode must be known. This method does not work with a fully locked iPhone.
Why a new installation method was needed
The reason is a feature called Stolen Device Protection (SDP), which we discussed in the previous article. It is designed for the situation where a phone ends up in someone else’s hands and that person also knows the passcode. In this mode, certain actions require biometric authentication – the owner’s Face ID or Touch ID — with no option to confirm the operation by entering the passcode. The checks tighten when the device is away from familiar locations such as home or work, and in settings they can be enforced at all times, regardless of location.
For an examiner this is a serious obstacle. When an iPhone is connected to an unfamiliar computer (a forensic workstation is always “unfamiliar”) SDP demands the owner’s biometrics, and there is no way to satisfy that check by entering the passcode. In practice, presenting the owner’s Face ID or Touch ID is far from always possible, both technically and legally.
Previously this protection could only be enabled optionally, and it was rarely encountered. Starting with iOS 26.4, that has changed: Apple turns Stolen Device Protection on automatically. As a result, examiners increasingly run into devices that simply will not allow a USB connection to a new computer.
The alternative agent delivery methods solve this. Because delivery happens across the network rather than through a cable connection to a new computer, the SDP restriction is not triggered provided the phone is already unlocked or the passcode is known.
How to do it
Below is the sequence of steps for installing the agent bypassing Stolen Device Protection.
Where this works
This method works on all three desktop platforms – macOS, Windows, and Linux. It’s smoothest and safest on a Mac, though: there you don’t need any adapters at all.
What differs between platforms is which connection types you can actually use:
| Platform | Wi-Fi | Ethernet cable (adapters) | USB cable (direct) |
|---|---|---|---|
| macOS | ✓ | ✓ | ✓ |
| Linux | ✓ | ✓ | — |
| Windows | ✓ | ✓ | — |
What you’ll need:
- A paid Apple developer account.
- A way to put the phone and computer on an isolated link. Which options you have depends on your platform (see the table above); you only need one option:
- Direct cable (macOS only). A C-to-C or C-to-Lightning cable; on the Mac side use USB-C, not USB-A (every Mac has been USB-C for years anyway). No adapters and no pairing needed; a network link comes up on its own.
- Two Ethernet adapters (all platforms). For the phone: Lightning/USB-C→Ethernet; for the computer: USB-C→Ethernet (stick to USB-C on the computer side).
- An isolated Wi-Fi access point (all platforms). A dedicated AP cut off from the internet.
Steps:
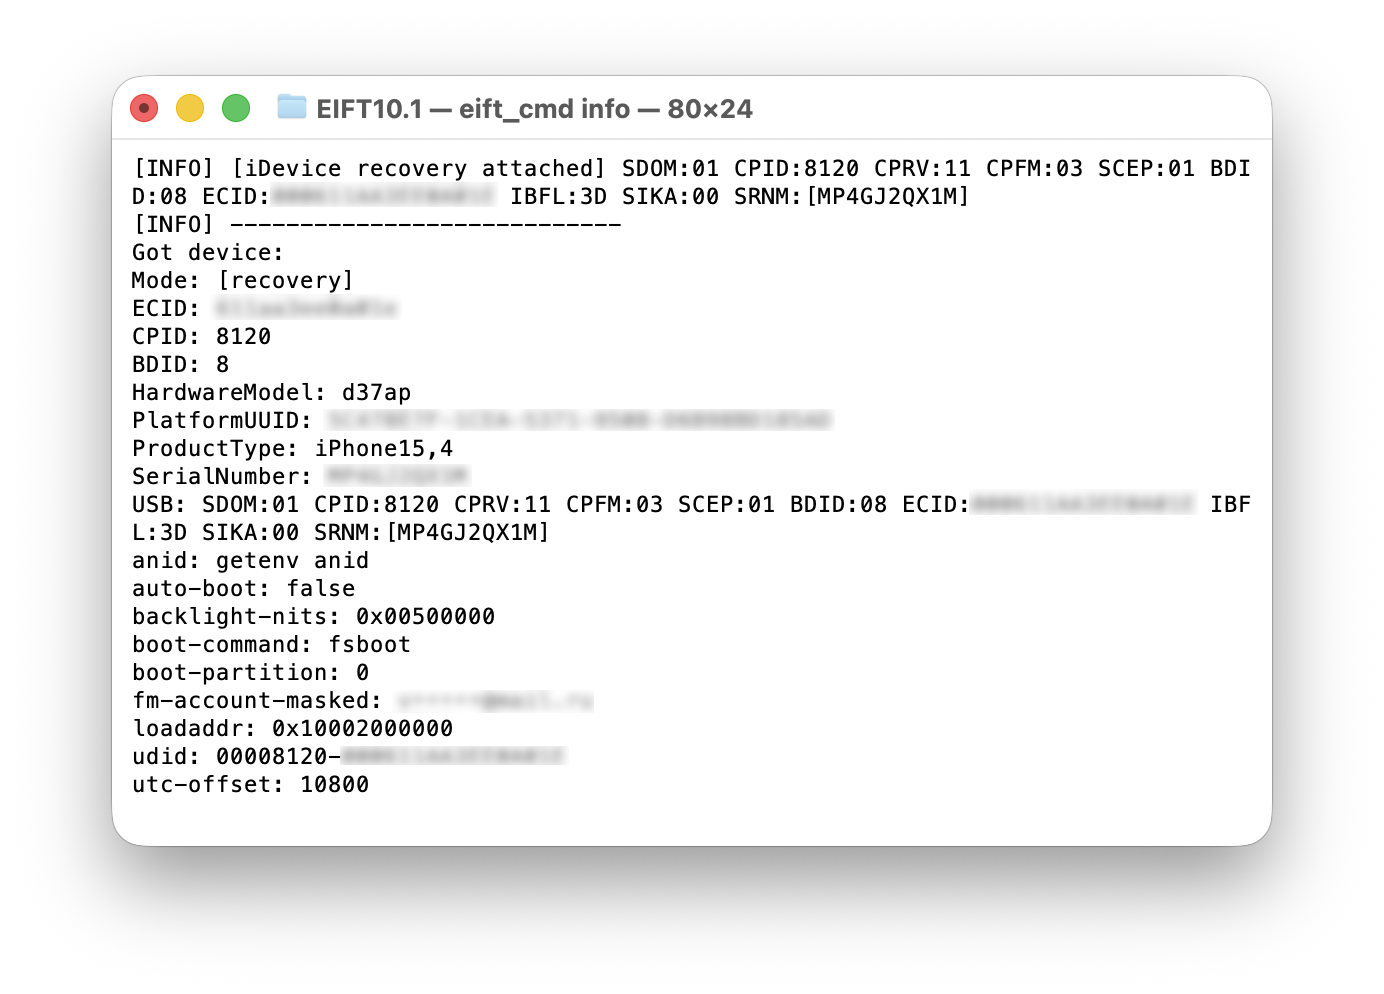
1. Obtain and save the UDID (device required)
You can plug an iPhone into the computer, but you can’t pair it (set up the trust relationship) without biometric authentication, so put the device into Recovery mode and obtain the UDID with the info command. Save the value; the device is not needed for the next couple of steps.
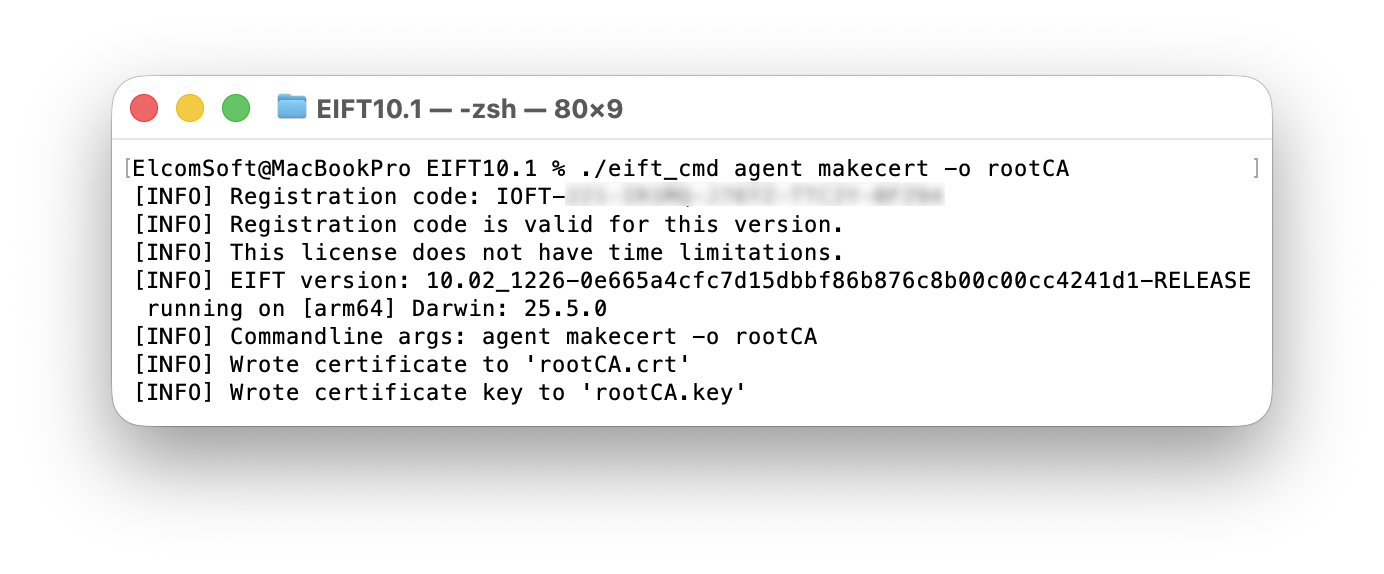
2. Generate a certificate for the “site” (no device, done once)
./eift_cmd agent makecert -o NAME
NAME is the certificate filename without an extension. For example:
./eift_cmd agent makecert -o rootCA
This creates the files rootCA.crt and rootCA.key in the toolkit folder. This certificate signs the local “server” the agent is installed from.
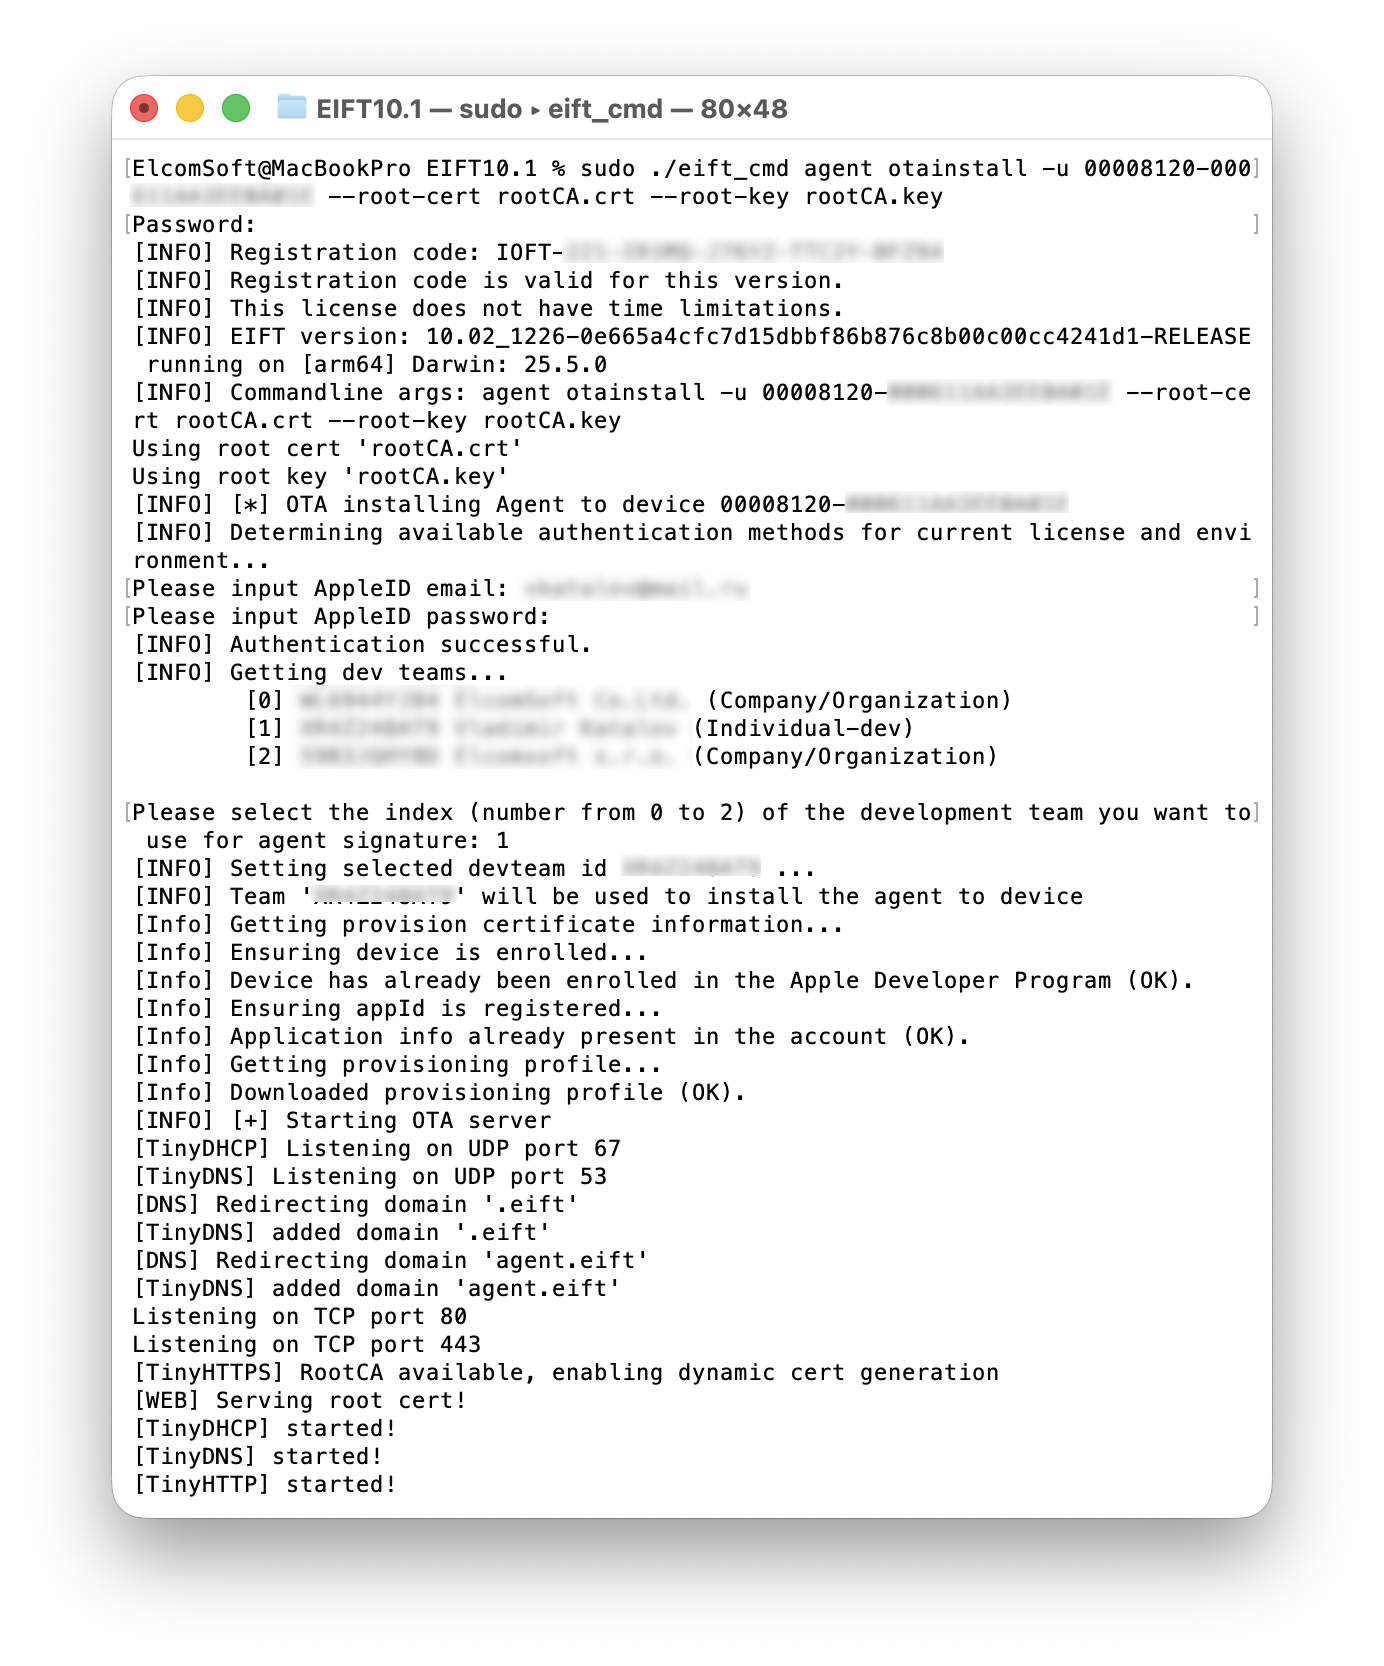
3. Sign the agent against the UDID and serve it (no device)
Run this command with root privileges:
sudo ./eift_cmd agent otainstall -u UDID --root-cert CERTIFICATE --root-key KEY
For example:
sudo ./eift_cmd agent otainstall -u 00008120-000611AA3EE0A01E --root-cert rootCA.crt --root-key rootCA.key
This step involves the standard authentication: Apple ID, password, and two-factor authentication (2FA). The computer has to be online for this, or the agent won’t sign. Sounds obvious, but it’s a common slip-up.
On Linux: when the OTA server starts you may see a message like:
If you are using systemd-resolved, edit the file
/etc/systemd/resolved.confand setDNSStubListener=no. Afterwards runsudo systemctl restart systemd-resolved.
Just do exactly that – it’s quick. (The stub resolver otherwise sits in the way of resolving agent.eift.)
Important: eift_cmd does not return control here – it keeps the local server running and must not be interrupted until the agent is installed on the device. The on-device steps below (4–6) are performed while this command is still running, so leave the terminal alone and continue on the iPhone.
4. Connect the device
Pick the connection that fits your platform (see the table at the top). Whichever you go with, if it’s a cable link the phone won’t reach the internet through it — but we’d still suggest pulling the computer off the internet too, just for peace of mind. Costs you nothing and rules out surprises.
- Direct cable (macOS only) – a C-to-C or C-to-Lightning cable straight between the phone and the Mac (USB-C on the Mac side). A network link forms even though there’s no pairing. Nothing to configure:
agent.eiftis picked up automatically, no DNS to set. - Ethernet adapters (all platforms, but macOS can use direct cable connection instead) – a twisted-pair link between the phone and the computer. This option is reliable and rules out configuration mistakes, and Wi-Fi does not need to be enabled.
agent.eiftresolves on its own, so there’s no manual network config on the iPhone. Limitation: speed is capped by the phone’s port (Lightning uses USB 2.0, with a ceiling of about 40 MB/s).- On Linux: the computer’s adapter won’t pull an IP automatically. In its IPv4 settings, change IPv4 Method from the default Automatic (DHCP) to Link-Local Only.
- Over Wi-Fi (all platforms) – on a shared network that must be isolated from the internet. Connect both the computer and the phone to that access point. Best to use a dedicated AP that’s wired to nothing else, so there’s no chance traffic slips online through it. This delivers maximum throughput (up to ~200 MB/s has been observed on some devices, including older models), but calls for greater attention to security. Here you do have to set the phone’s DNS to the local-network IP of the computer running EIFT (the one hosting the server), otherwise it won’t know what
agent.eiftis – and the certificate can only be installed properly from that address.
5. Install the root certificate on the iPhone
First, open the following address in Safari – over http, not https:
http://agent.eift
The plain-http address matters: over https Safari would complain about the missing certificate, since it is not installed yet.
The certificate arrives as a configuration profile rather than a visible .crt download (the file extension is hidden), and it goes straight into the system instead of landing in Downloads. Approve and install it: Settings will show a Profile Downloaded item → install it (or go to Settings → General → VPN & Device Management → select the profile → Install).
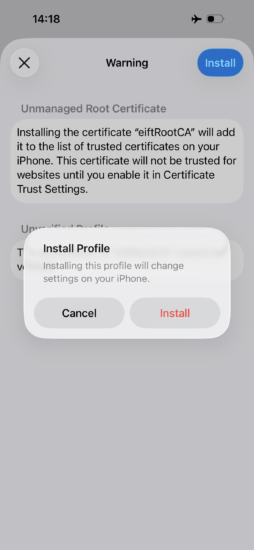
Heads-up: on managed (MDM-supervised) phones the profile may refuse to install. On such devices installing apps can be locked down entirely, by any route, and only the MDM supervisor can alter that setting.
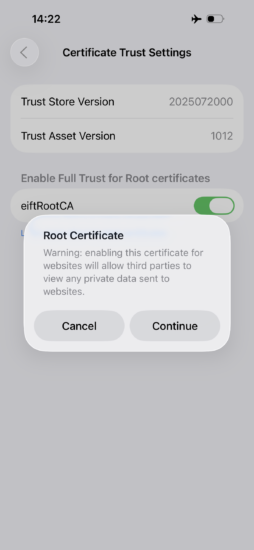
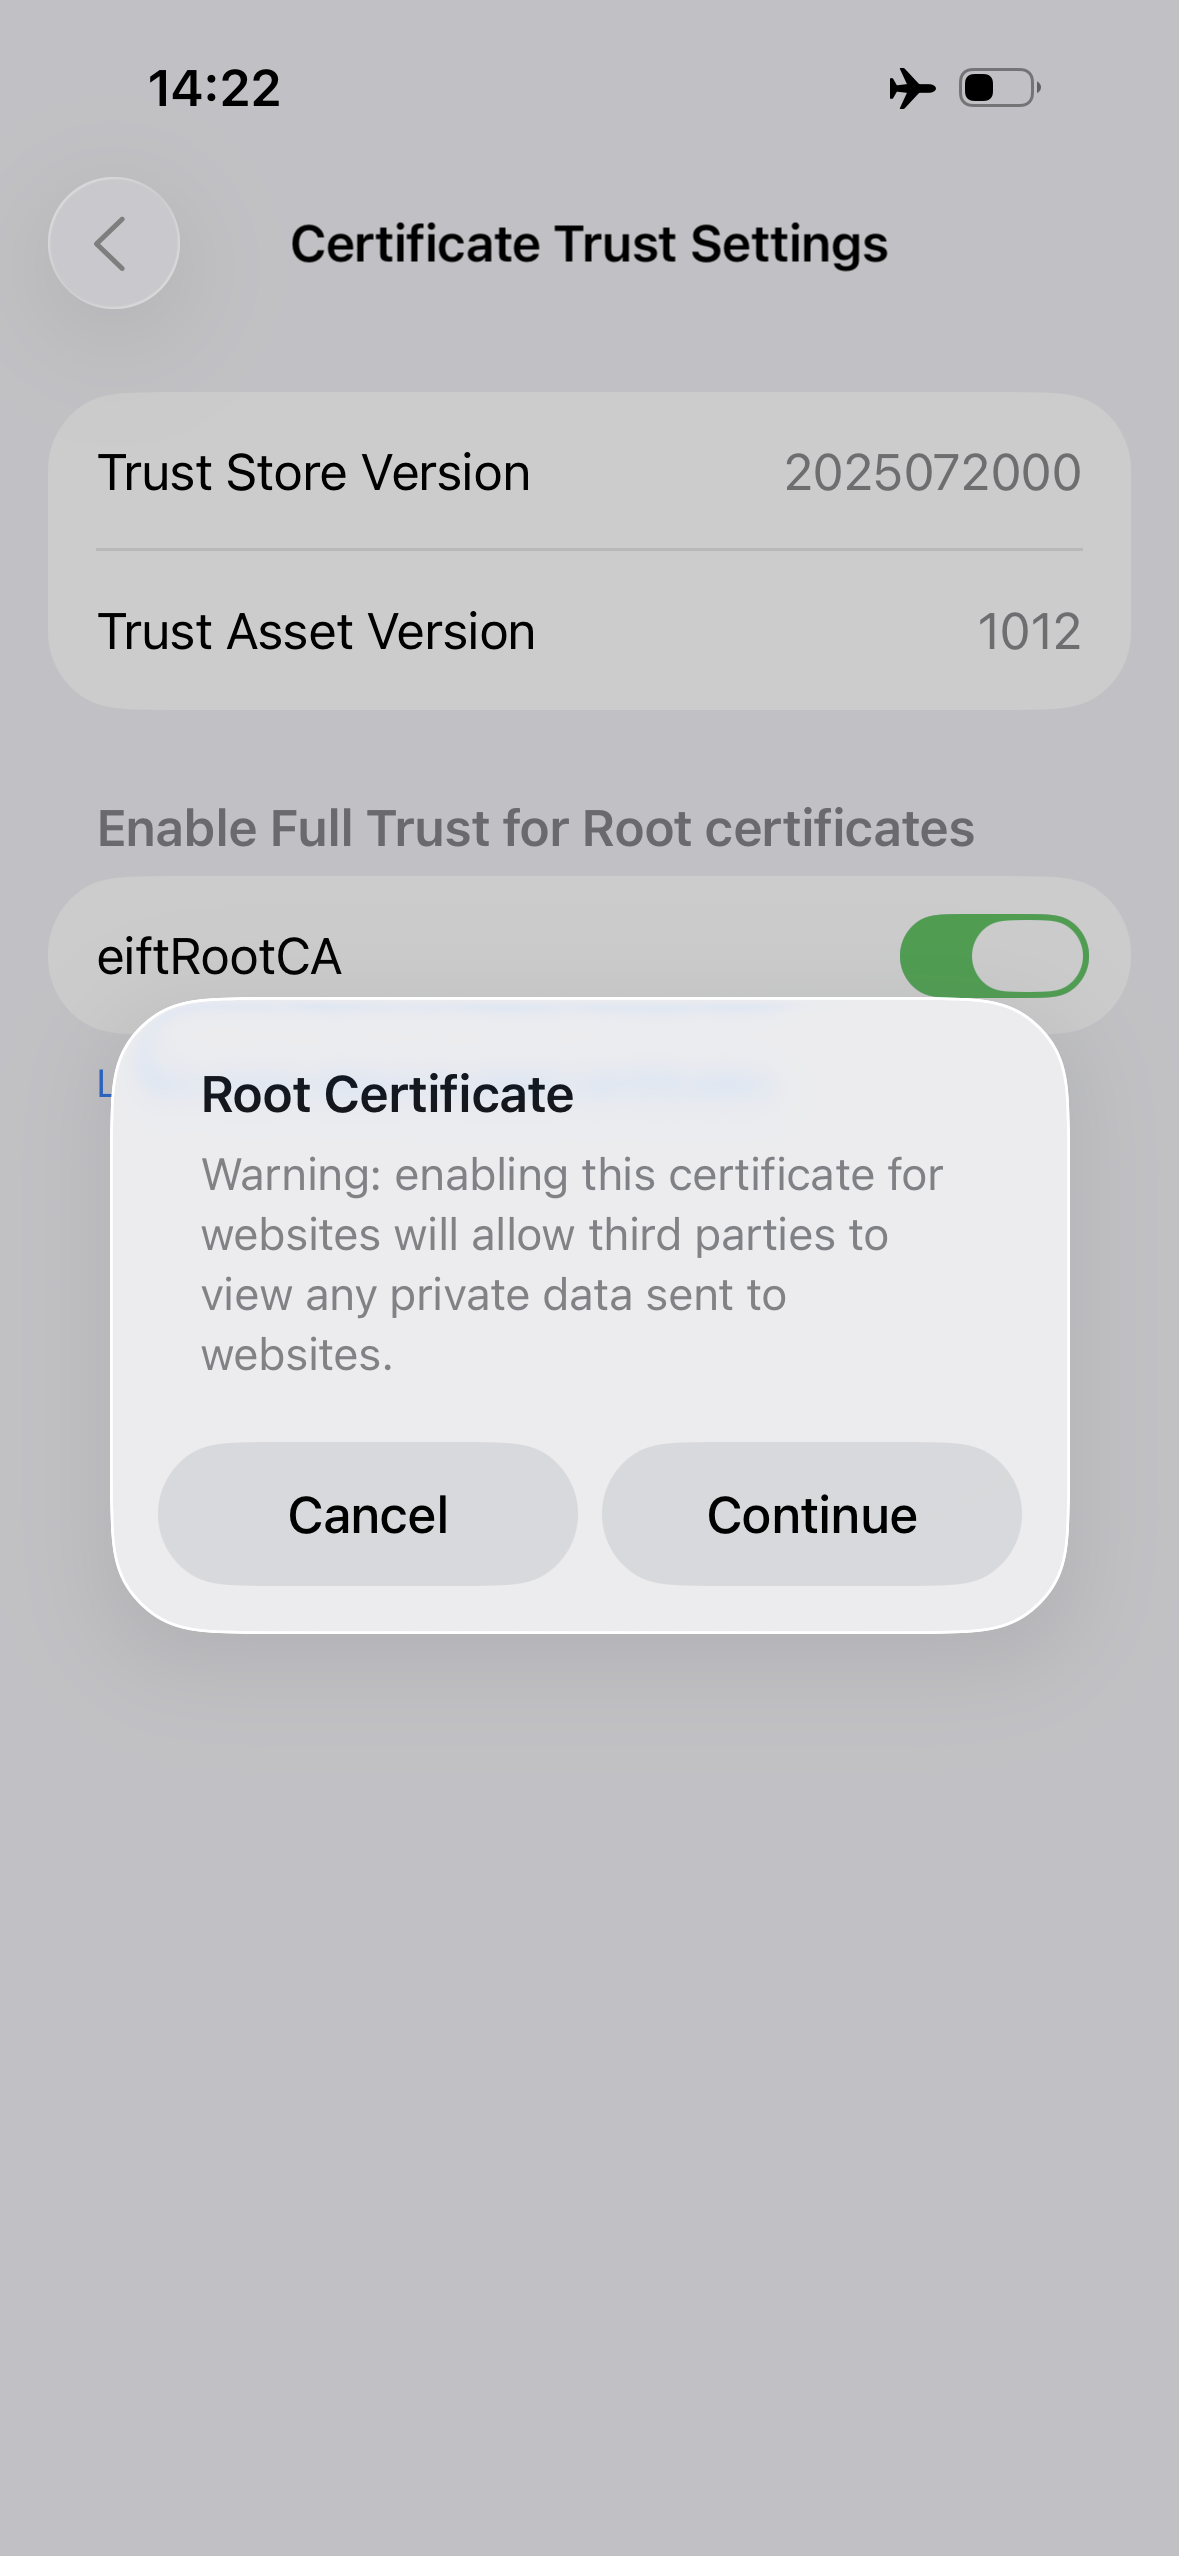
Then enable full trust: Settings → General → About → Certificate Trust Settings → under Enable Full Trust for Root Certificates, turn on the toggle next to rootCA. Without this, Safari will keep treating the “site” as untrusted.
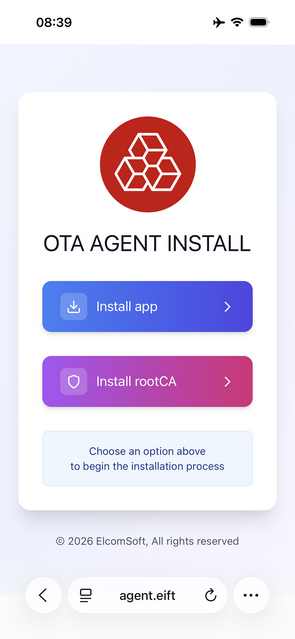
6. Install and launch the agent
Open the same address, now over https:
https://agent.eift
Using https here is deliberate: it doubles as a check that the root certificate installed correctly. If Safari throws a certificate warning, trust was not set up properly in step 5, and you should sort that out before continuing.
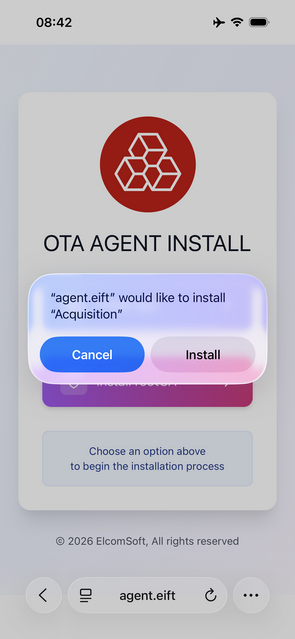
Tap Install agent → confirm the installation → launch it. On the first launch, iOS 16+ will require Developer Mode to be enabled: Settings → Privacy & Security → Developer Mode → turn it on → restart the device → after the restart, confirm by entering the passcode.
You can instead reopen the http address (with a refresh) and the agent will still install – but https is safer for the reason above. If the certificate did not install and you reopen over http, agent installation can fail in ways that are hard to spot: for example, a placeholder (“dummy”) icon appears on the Home Screen but just sits there, with no download ever starting.
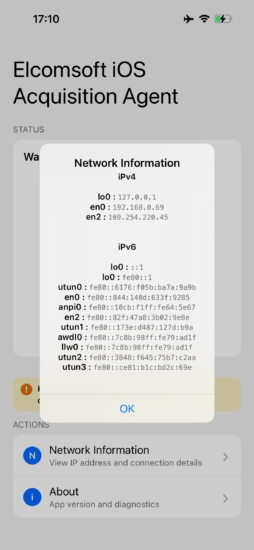
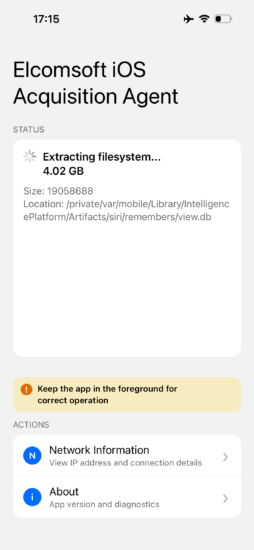
7. First launch and check
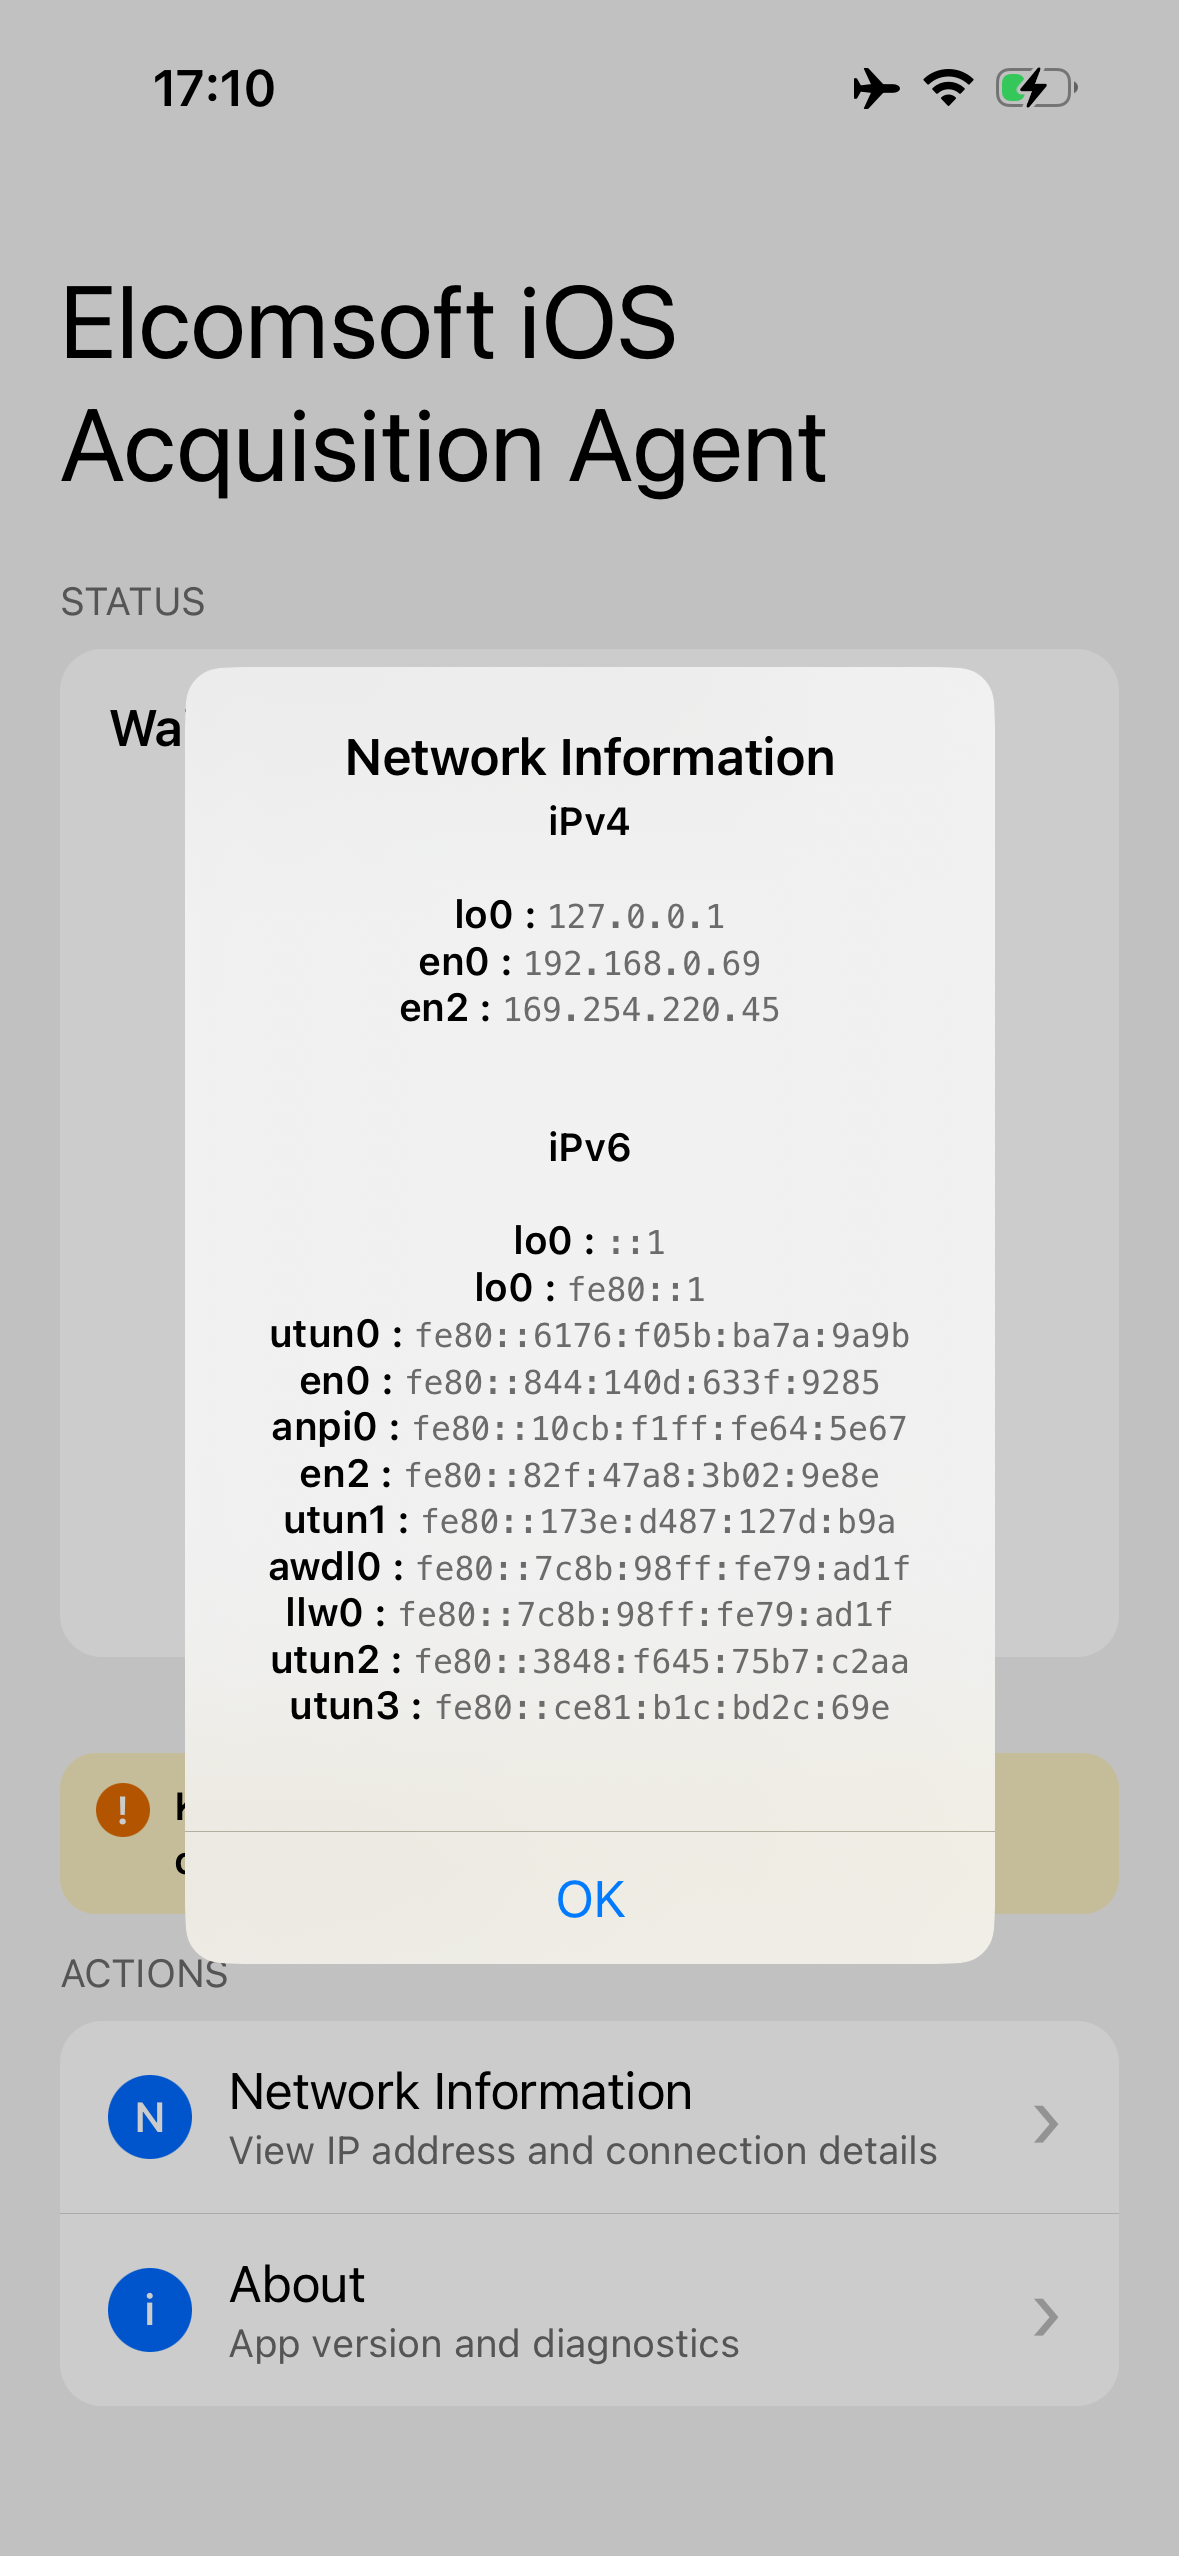
If the account was created after 2021, perform the first launch through the firewall (again, a hardware one is the safer bet) to stop remote lock, wipe, and iCloud sync on the evidentiary device. Then, in the agent, tap Get network info: this returns the phone’s IP address (needed for the following steps) and the permissions required to work with the network.
Hint: Use a hardware firewall, e.g. on a Raspberry Pi. A software firewall also works, but we don’t recommend it: it’s a hassle to set up, and it’s easy to slip up and accidentally let the device reach the internet; with a hardware box that just doesn’t happen.
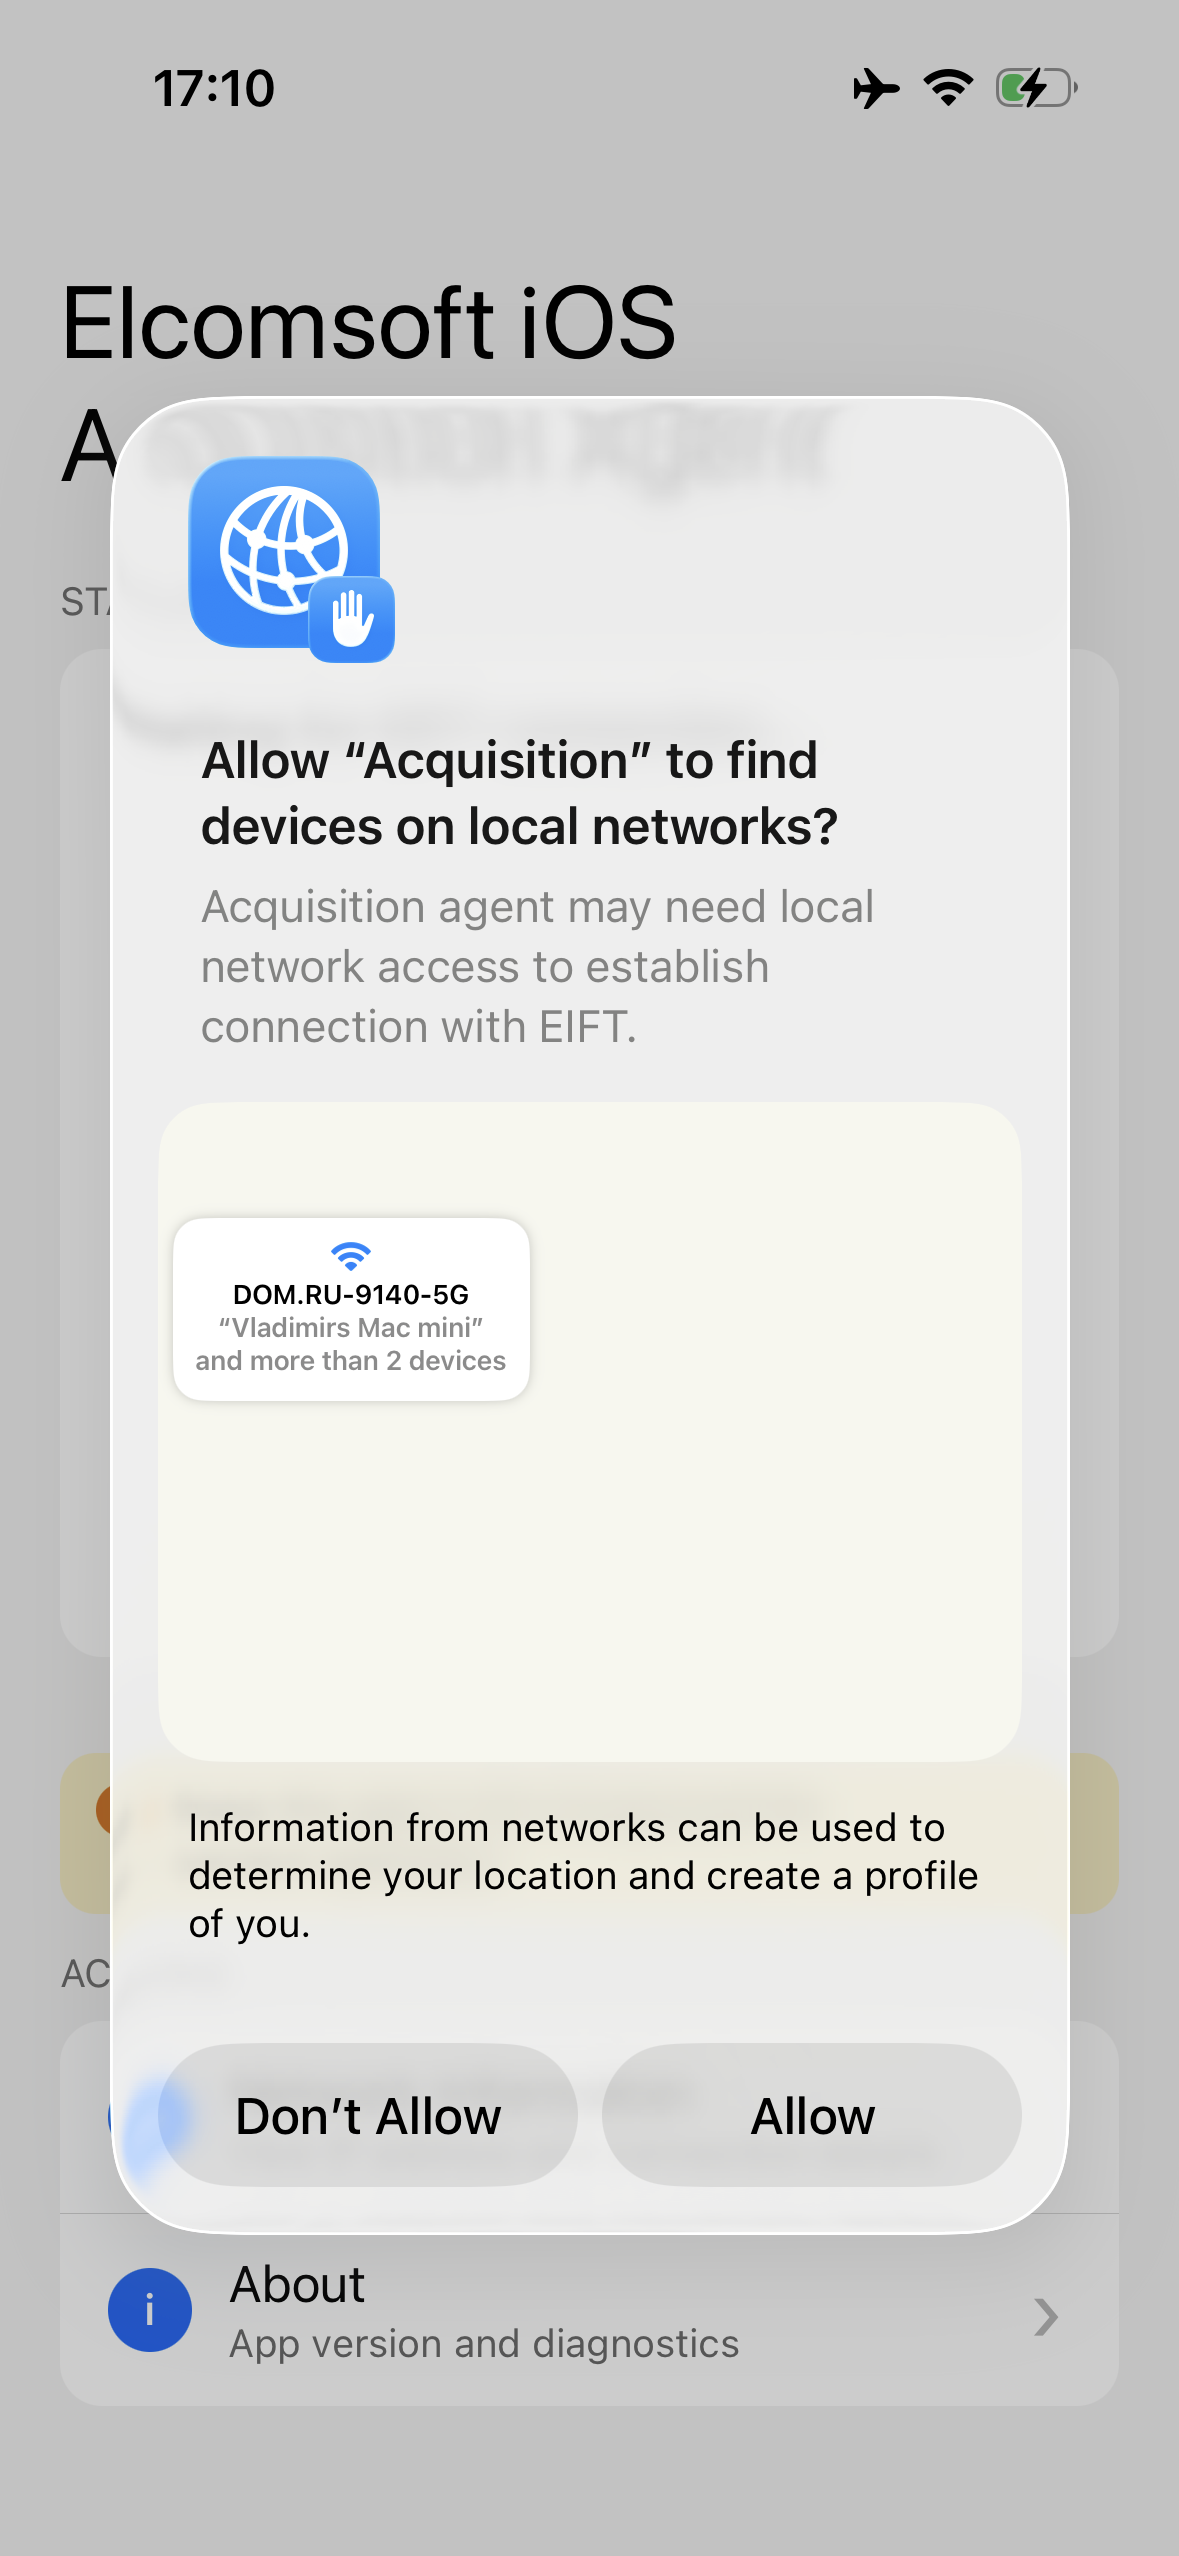
The agent may ask for permission twice. First it requests access to the local network.

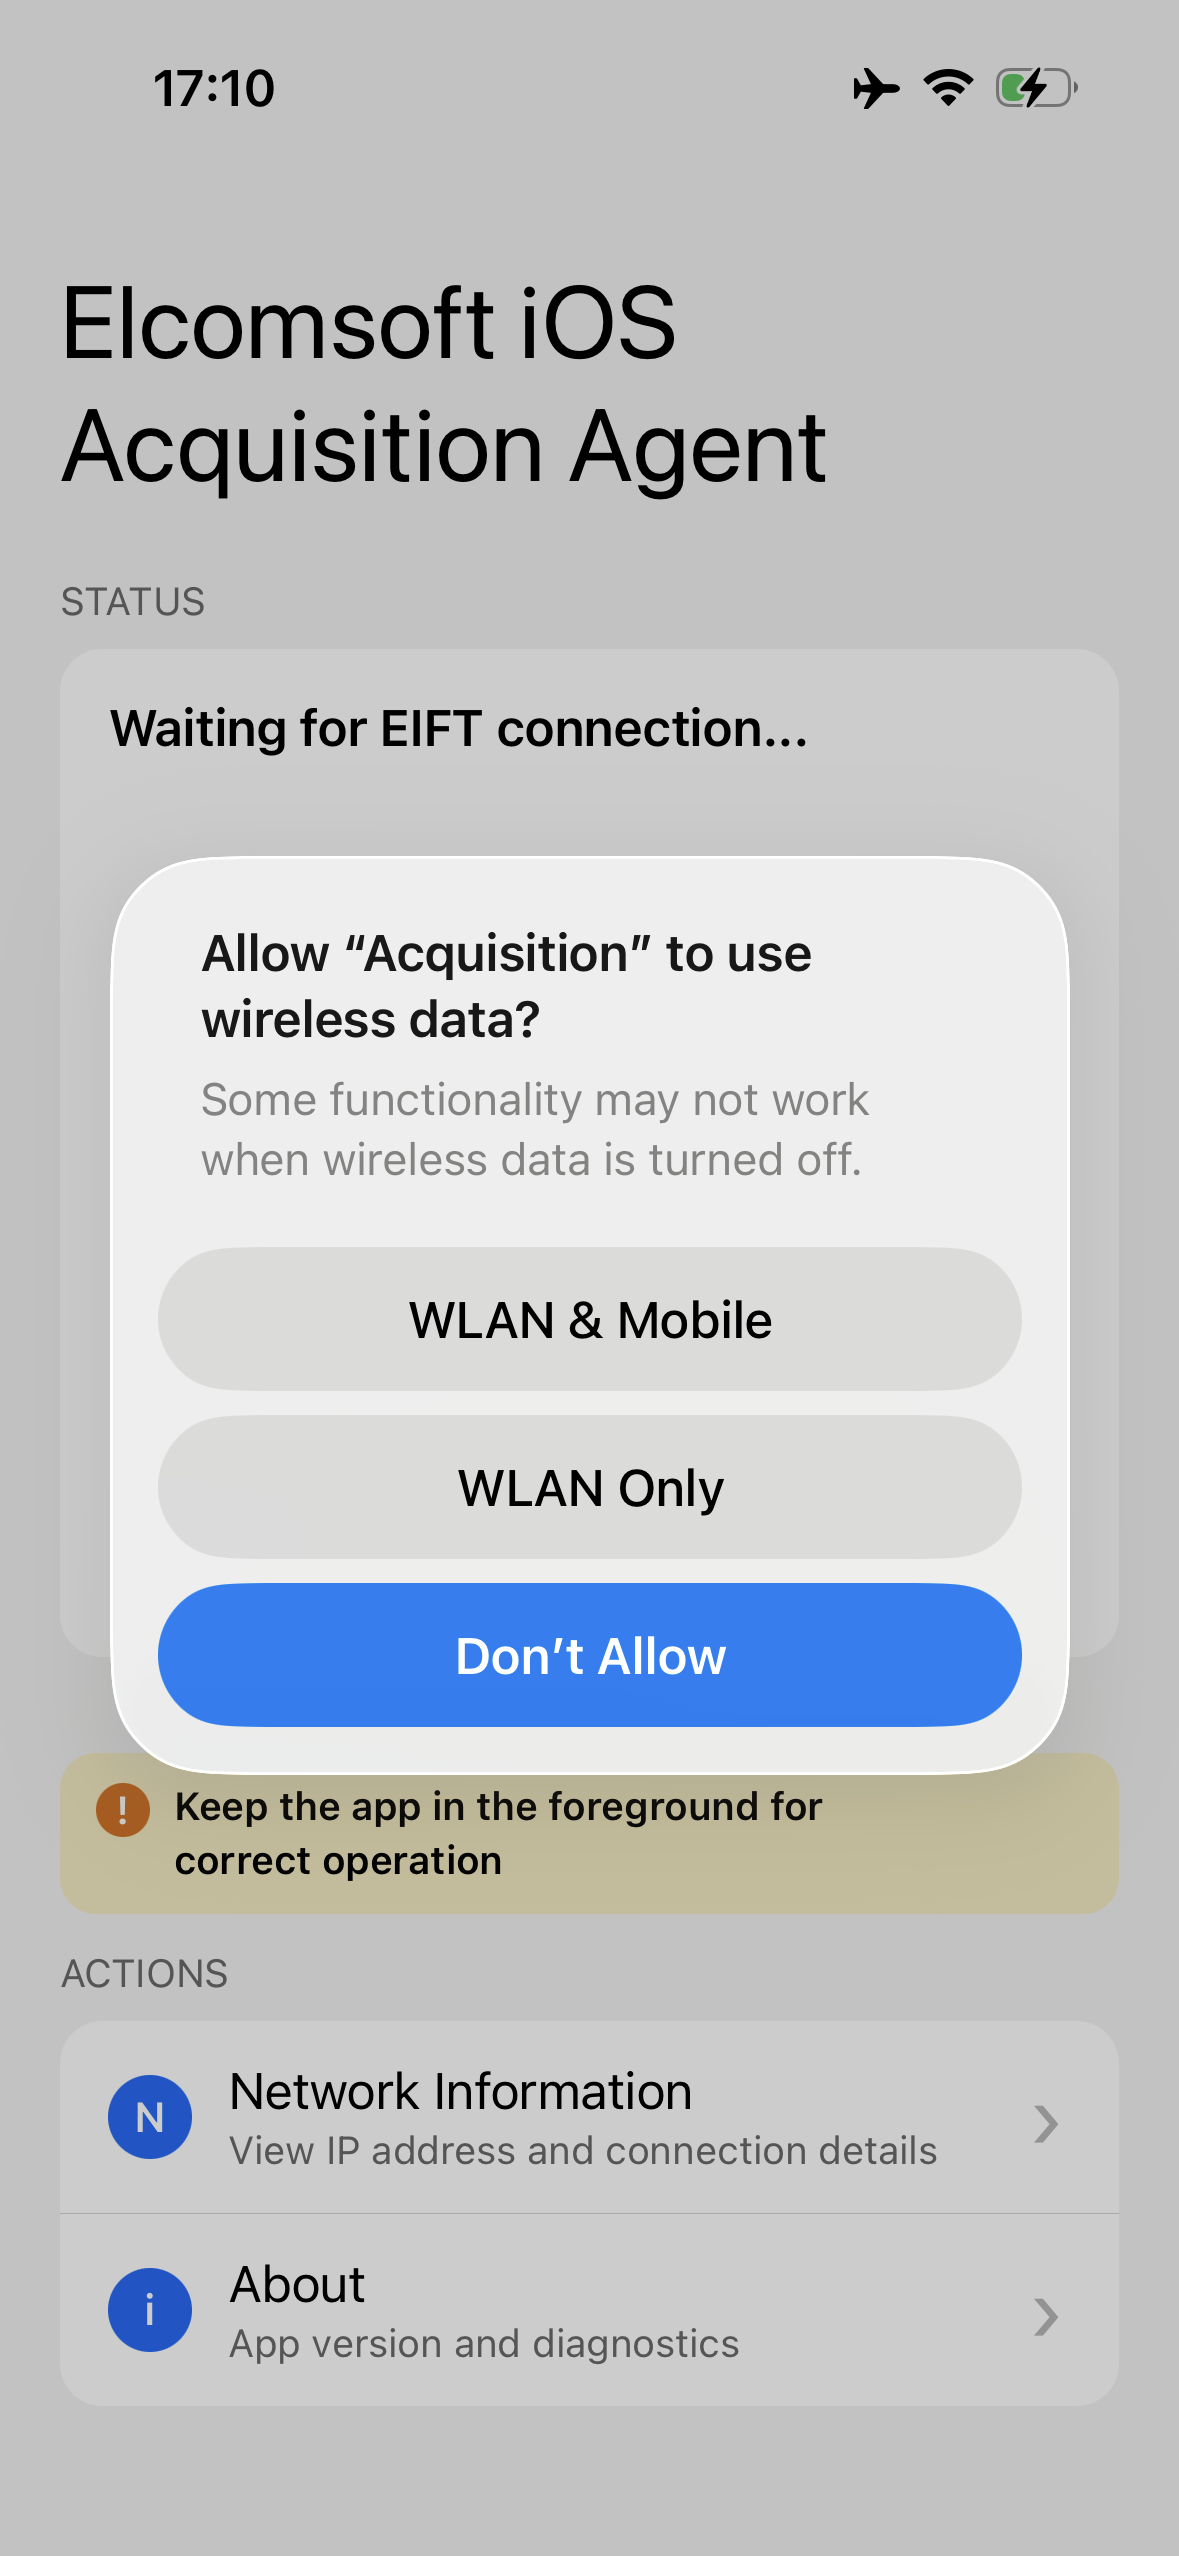
Then, on some phones, a second prompt pops up – “Allow to use wireless data?”; choose WLAN & Mobile. This second prompt only shows up on iPhones for the Asian market; on other devices you won’t see it.

8. Extraction
Done with the standard keychain / tar commands, passing the phone’s IP address in the -i parameter:
./eift_cmd agent keychain -i IP-ADDRESS -o /PATH
./eift_cmd agent tar -i IP-ADDRESS -o /PATH
For example:
./eift_cmd agent tar -i 192.168.1.22 -o /Users/ElcomSoft/Desktop/EXTRACTION
REFERENCES:

Elcomsoft iOS Forensic Toolkit
Extract critical evidence from Apple iOS devices in real time. Gain access to phone secrets including passwords and encryption keys, and decrypt the file system image with or without the original passcode. Physical and logical acquisition options for all 64-bit devices running all versions of iOS.
Elcomsoft iOS Forensic Toolkit official web page & downloads »

- iOS Forensic Toolkit 10.10 adds pairing-free sideloading of the extraction agent24 June, 2026
- Elcomsoft Phone Breaker 11.2: downloads iOS 26 iCloud backups18 June, 2026
- Elcomsoft Phone Breaker 11.1: reliable iCloud backup extraction26 May, 2026
- ElcomSoft Phone Breaker 11: full overhaul of iCloud extraction30 April, 2026
- iOS Forensic Toolkit 10.02 adds agent-based extraction for iOS 2629 April, 2026